There are a few of different ways to log in to Mura CMS as a content manager or administrator. The method you choose will depend primarily on what you're trying to do, as you'll see in the next steps.
Log In From Back-End Administration View
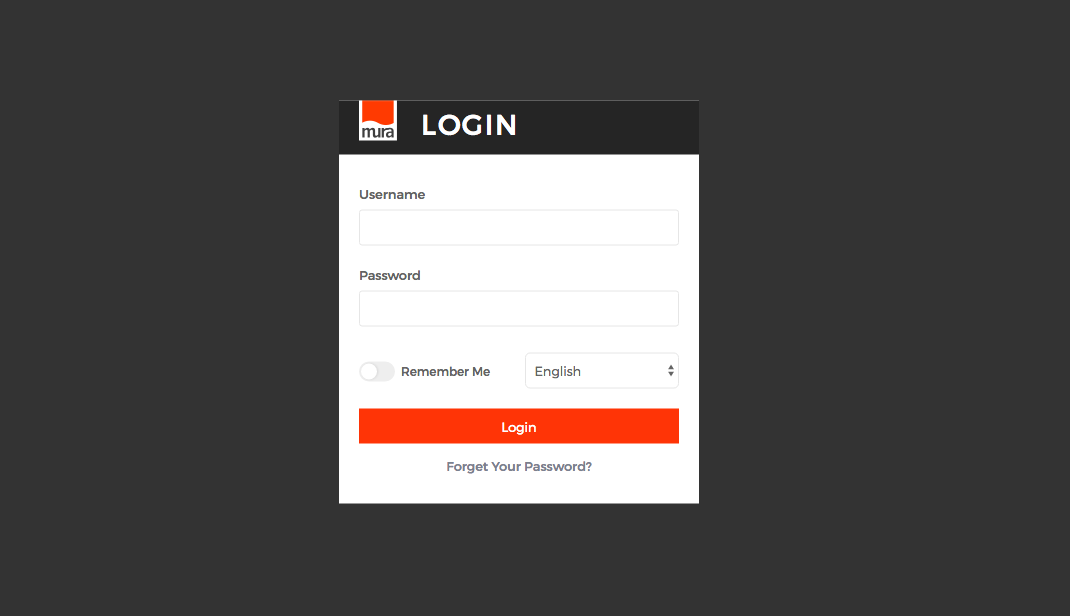
Go to your primary domain/URL and add "/admin/" to it. For example, http://www.yourdomain.com/admin/
If you're not already logged in, you should be prompted with a "Login" screen
Enter your Username and Password, then click the Login button
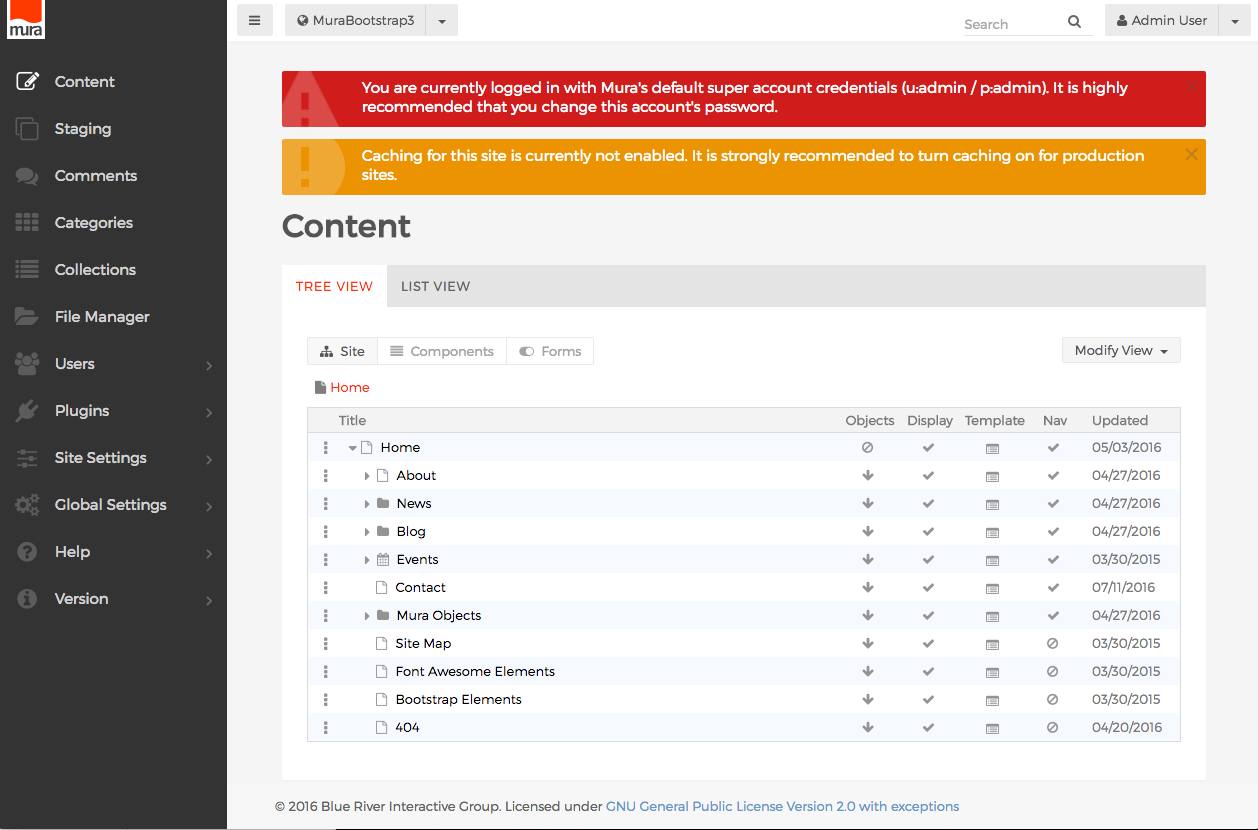
Once logged in, you should be taken to the Content view
Log In From The Front-End Public View
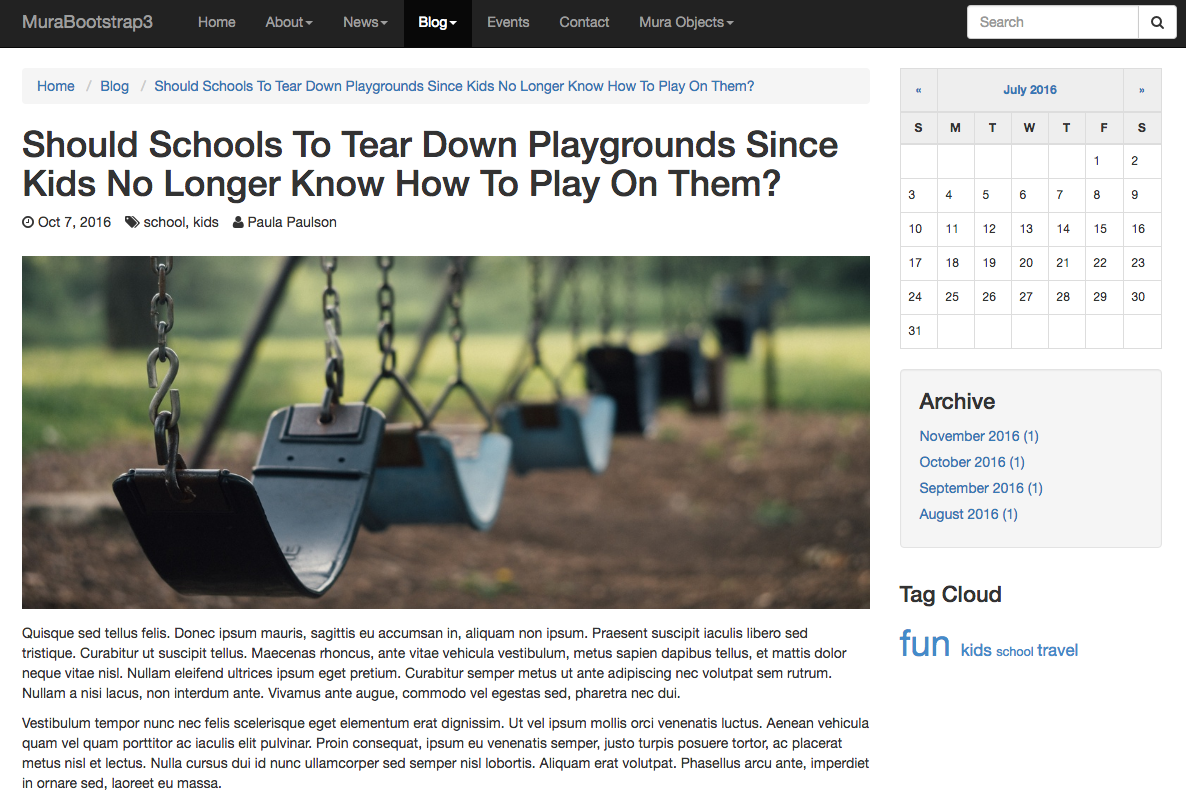
Go to your primary domain/URL, and navigate to the page you wish to edit
Now, press the Escape key and the lower case letter L (e.g., <ESC>+l)
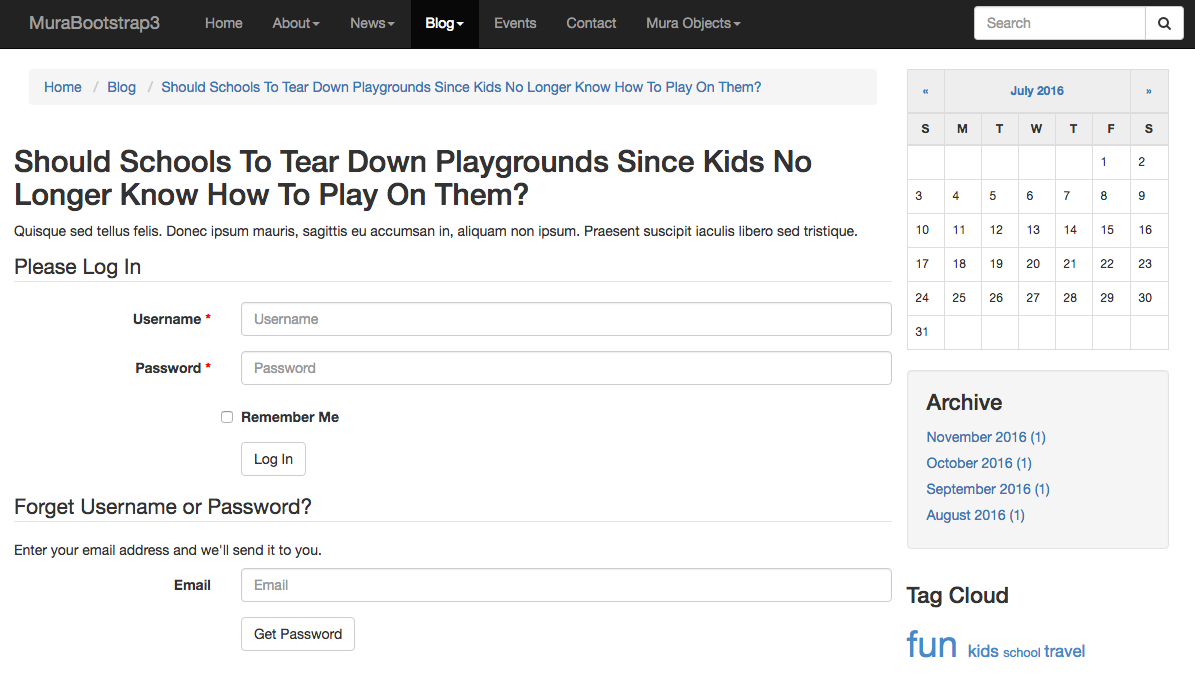
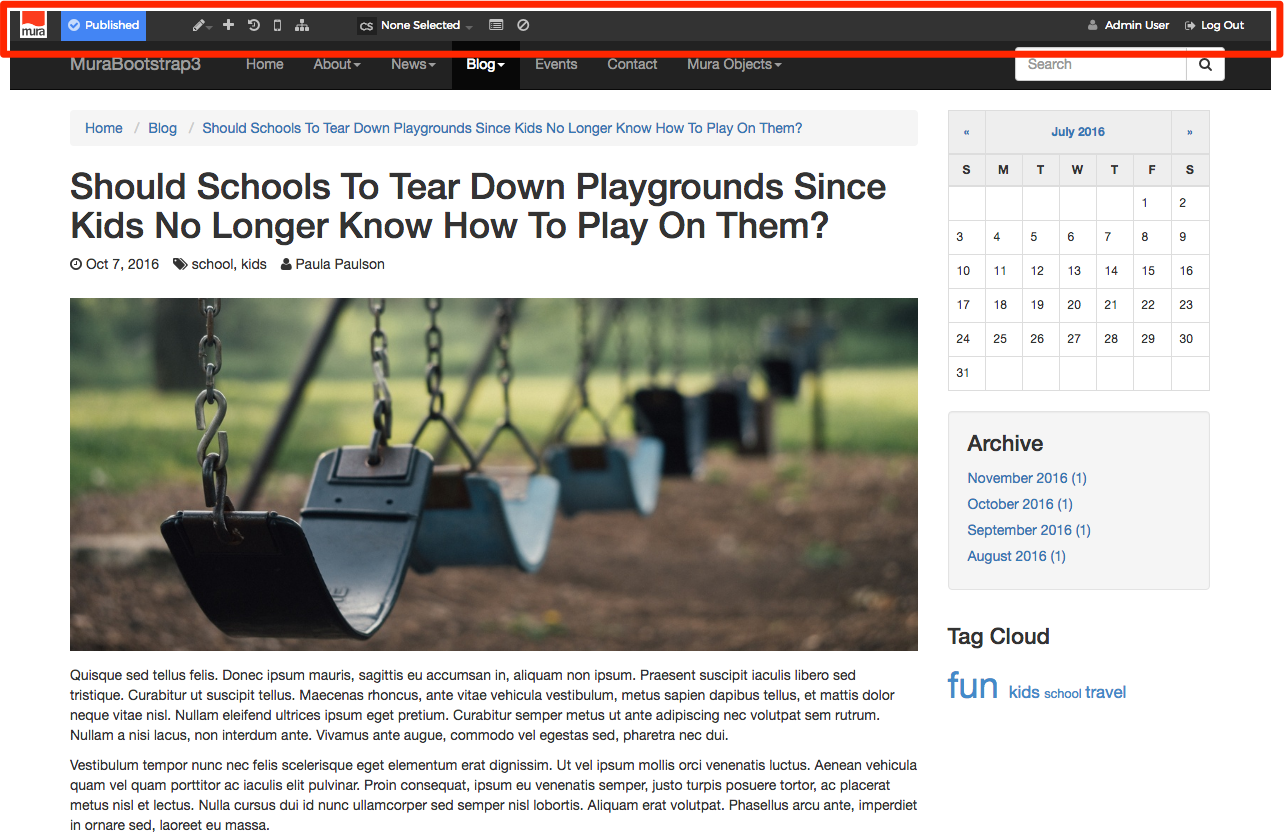
You should be prompted with a "Please Log In" screen.
Once logged in, you should now see the Front-End Toolbar appear at the top of the browser viewport, as highlighted below.
Logging Out
There are a few different ways to log out of Mura CMS. The method you choose, will depend on where you're at while logged in to Mura.
Log Out From Back-End Administration View
Look to the top right part of your browser window, and on the the right of your name, click the down arrow, then select "Log Out"
You should be logged out successfully and presented with a "Login" screen.
Log Out From Front-End Public View
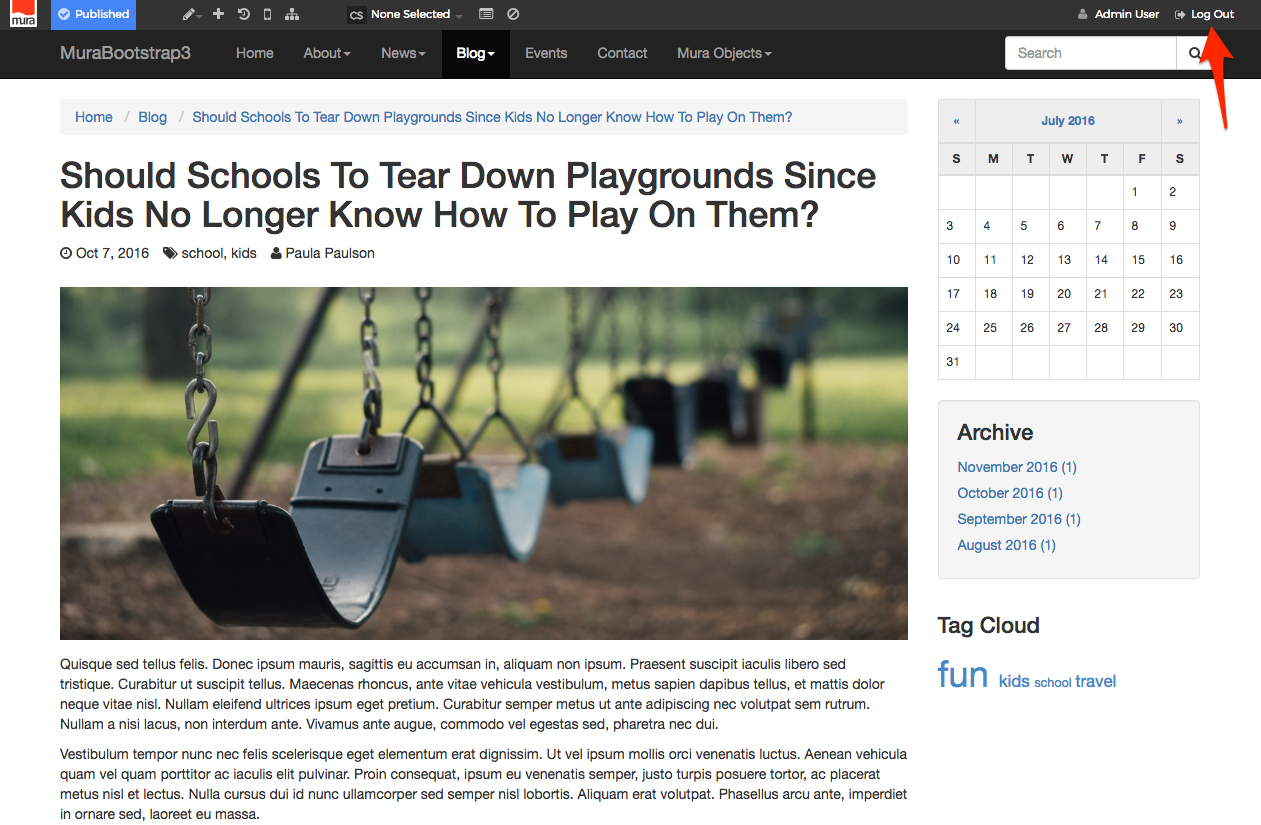
On the Front-End Toolbar, look to the far right and locate the "Log Out" link.
If you see the Mura logo at the top of your browser, but cannot see the Front-End Toolbar, simply click the Mura logo to toggle the visibility of the toolbar.
Click the "Log Out" link, and you should be logged out successfully.
Front-End Editing
With Mura CMS, most content managers tend to make content edits using the front-end editing options listed below.
Inline Edit
Inline editing is useful for content managers who wish to see how their content will appear in context to the rest of the page. As you'll see in another section, you can also add various display objects to different display regions using inline editing. For basic inline editing, follow the steps below.
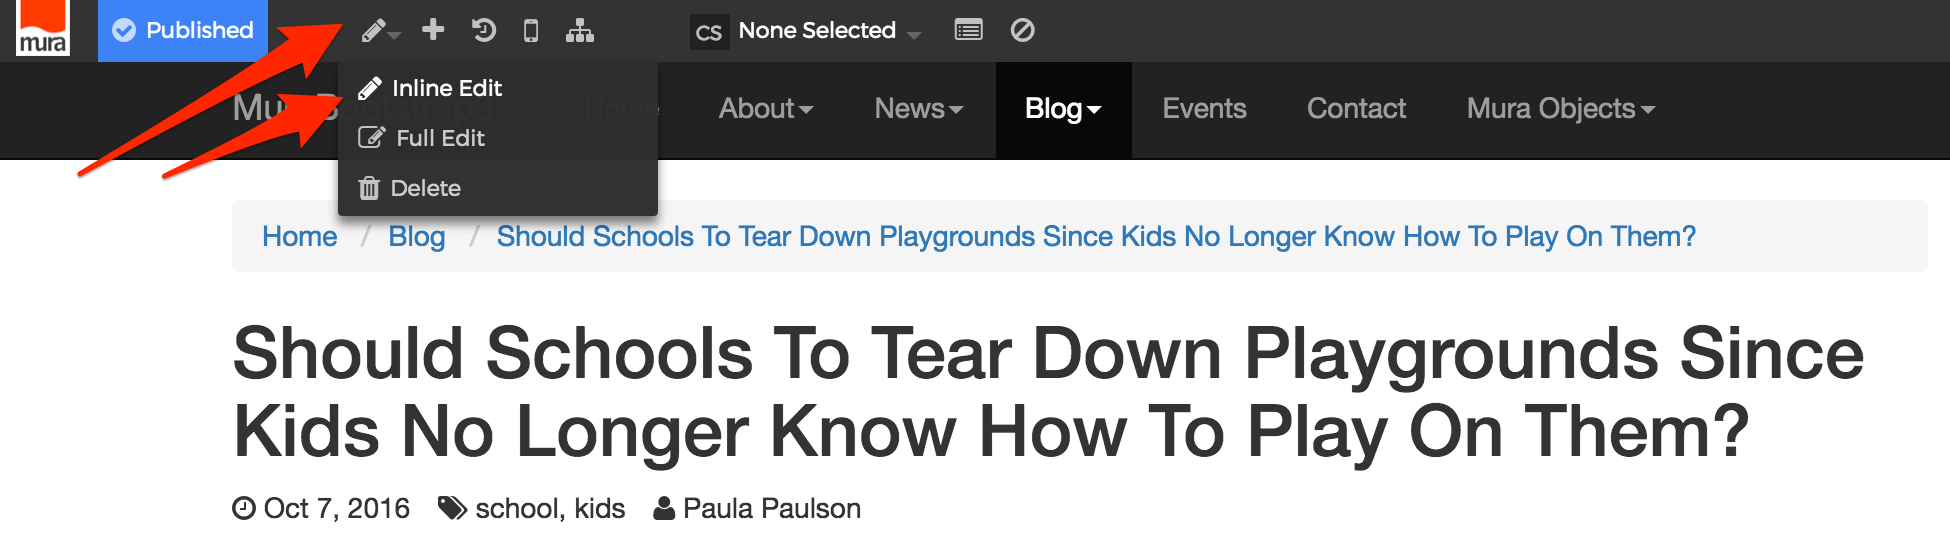
From the Front-End Toolbar, hover over the pencil icon, and select "inline edit"
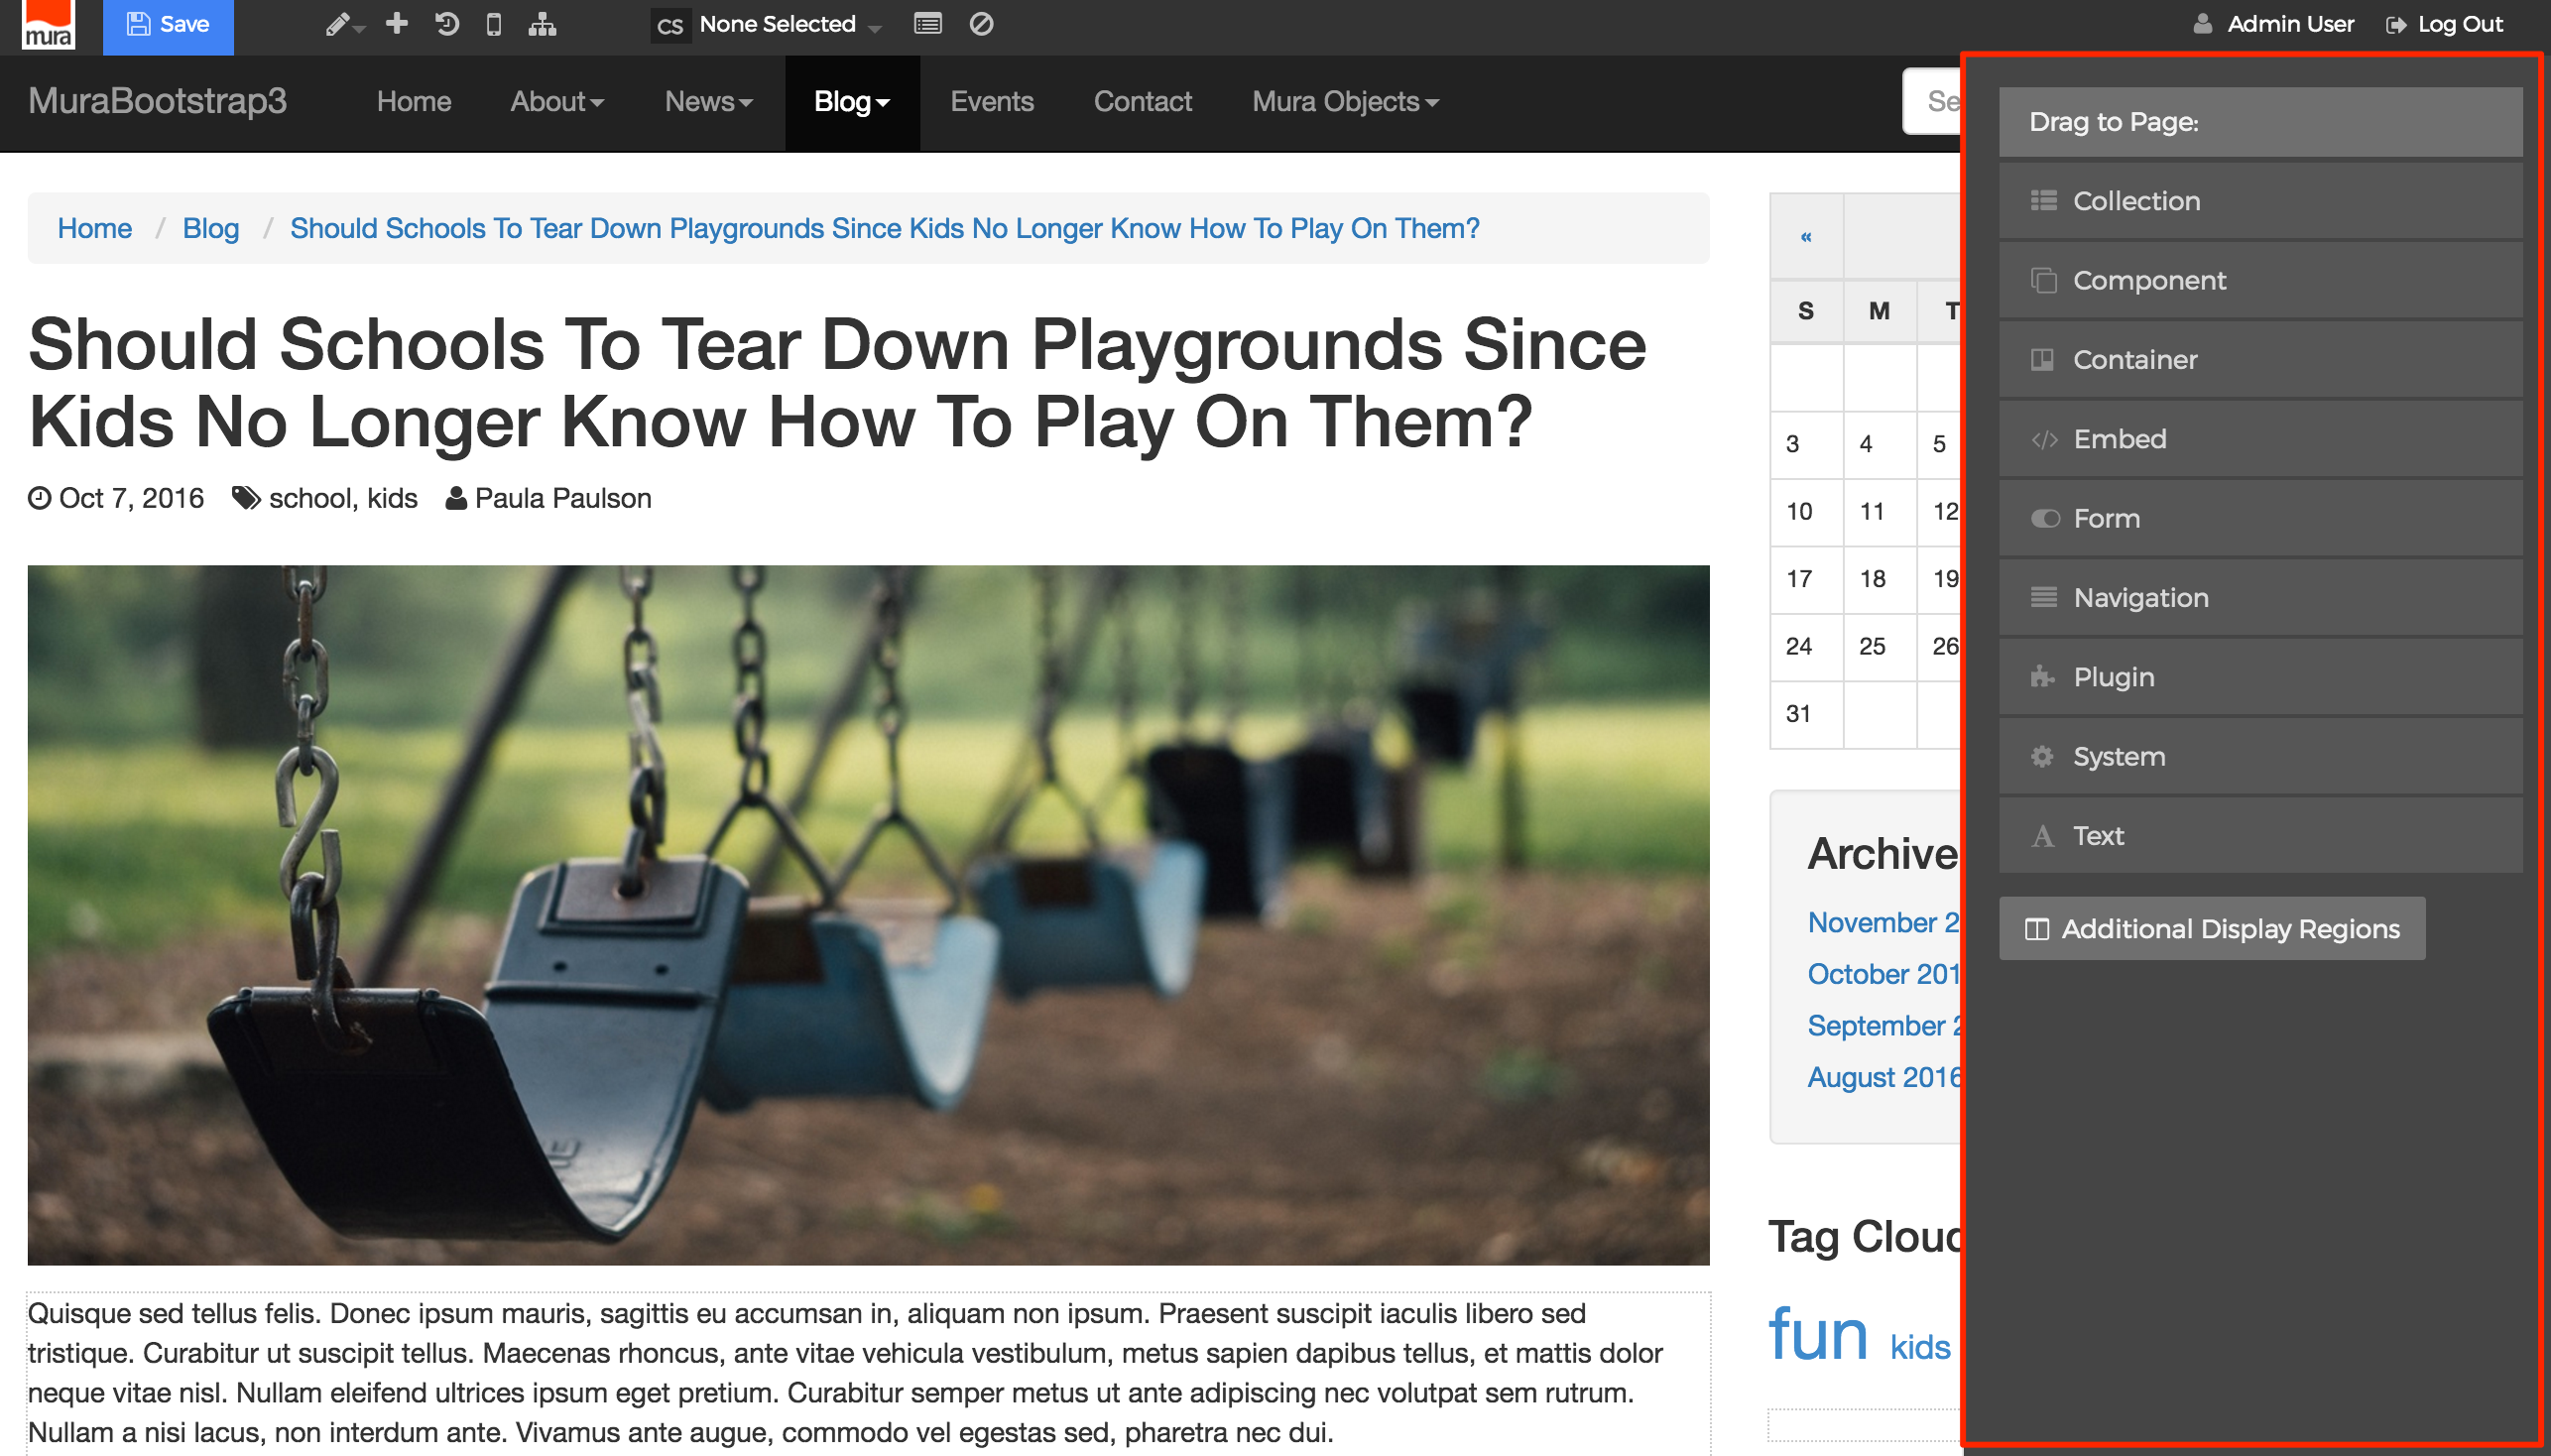
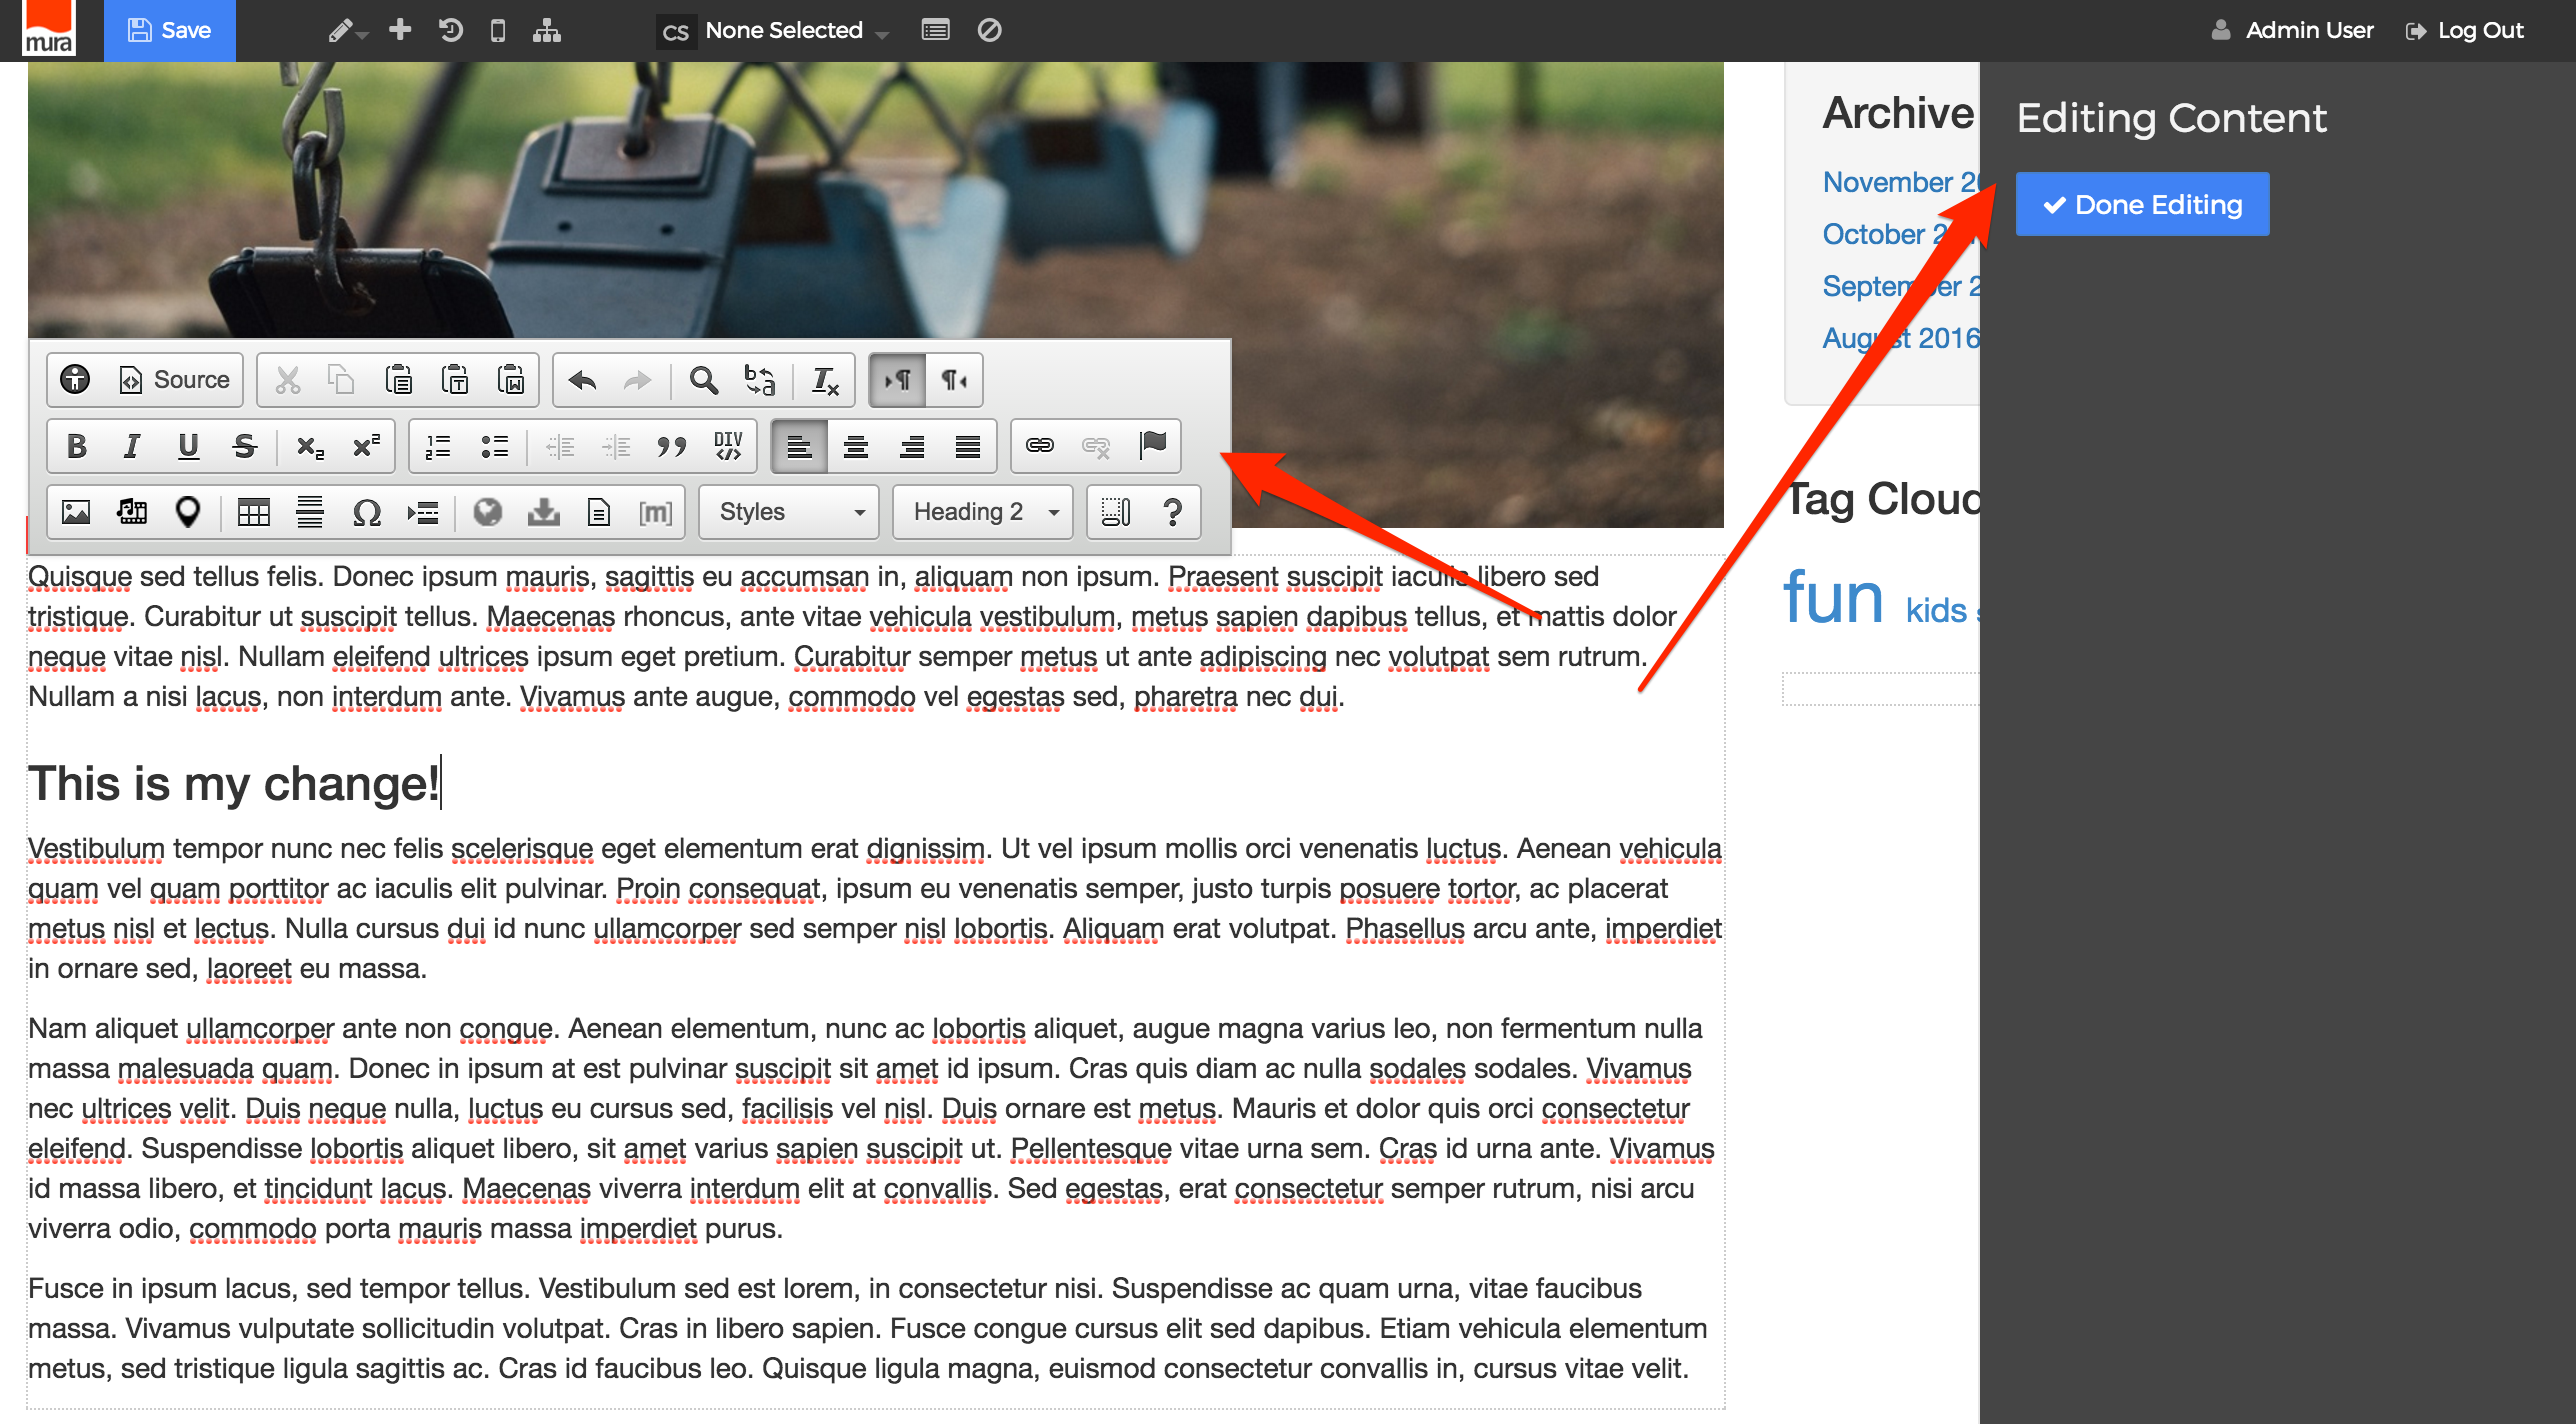
While in "inline edit" mode, a utility panel will open on the right hand side of your browser window. The utility panel contains several types of display objects that can be added to the various display regions throughout the page simply by dragging them into place and configuring them for how you'd like them to display.
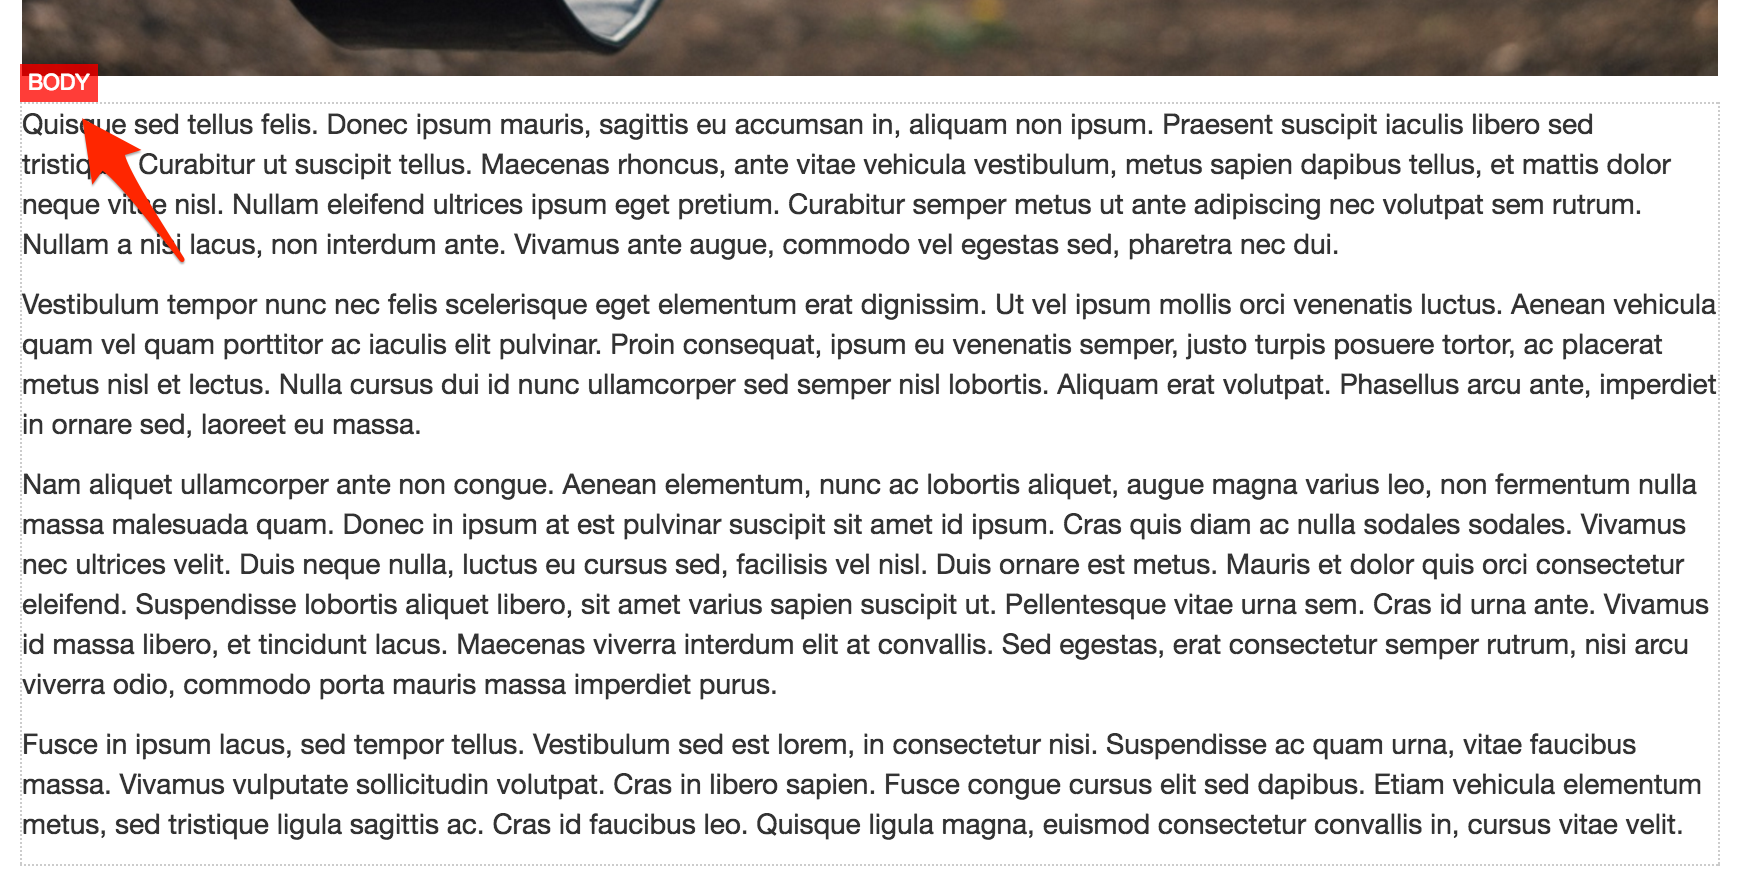
As you move your mouse around the browser window, the "Body" and other editable display regions will highlight. For example, if you hover over the "Body" region, a label will appear around it.
If you double-click inside the "Body" region, the utility panel will change to "Editing Content" and a content formatting toolbar will appear above the content region. So, you can make a change and apply any desired formatting.
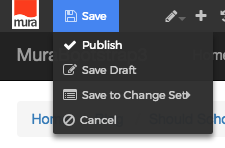
When finished making your content change(s), move your mouse to the Front-End Toolbar, hover over "Save" and select your desired publishing option (e.g., "Publish"). Please note that "Publish" will only appear for groups that have been given "Editor" privileges.
Congratulations! You've just edited content using "inline edit" mode.
Full Edit
When you need to edit something more than basic content and display objects, you will need to use "full edit" mode. In full edit mode, you have complete control over a vast number of attributes and options that will be discussed in future sections. However, let's at least get familiar with how to make a simple content edit in "full edit" mode.
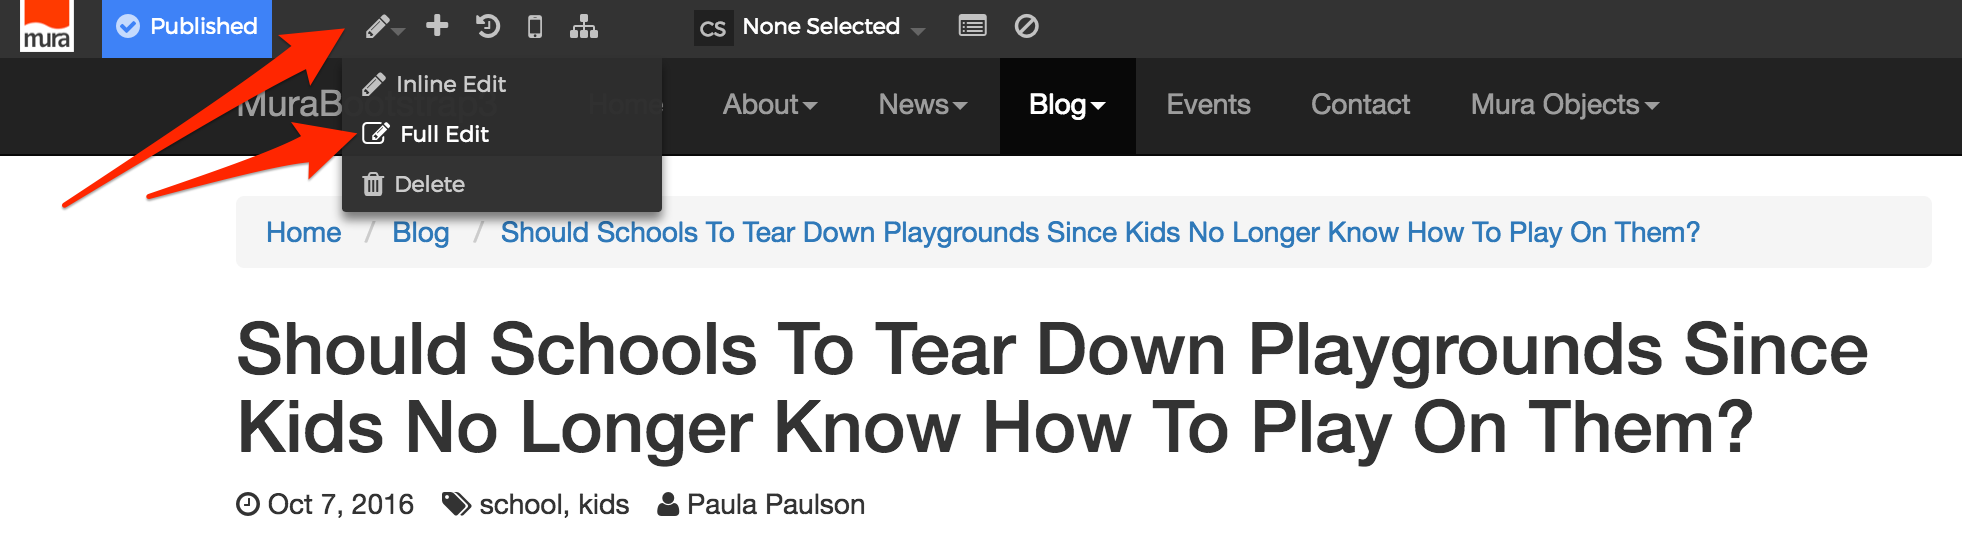
From the Front-End Toolbar, hover over the pencil icon, and select "full edit"
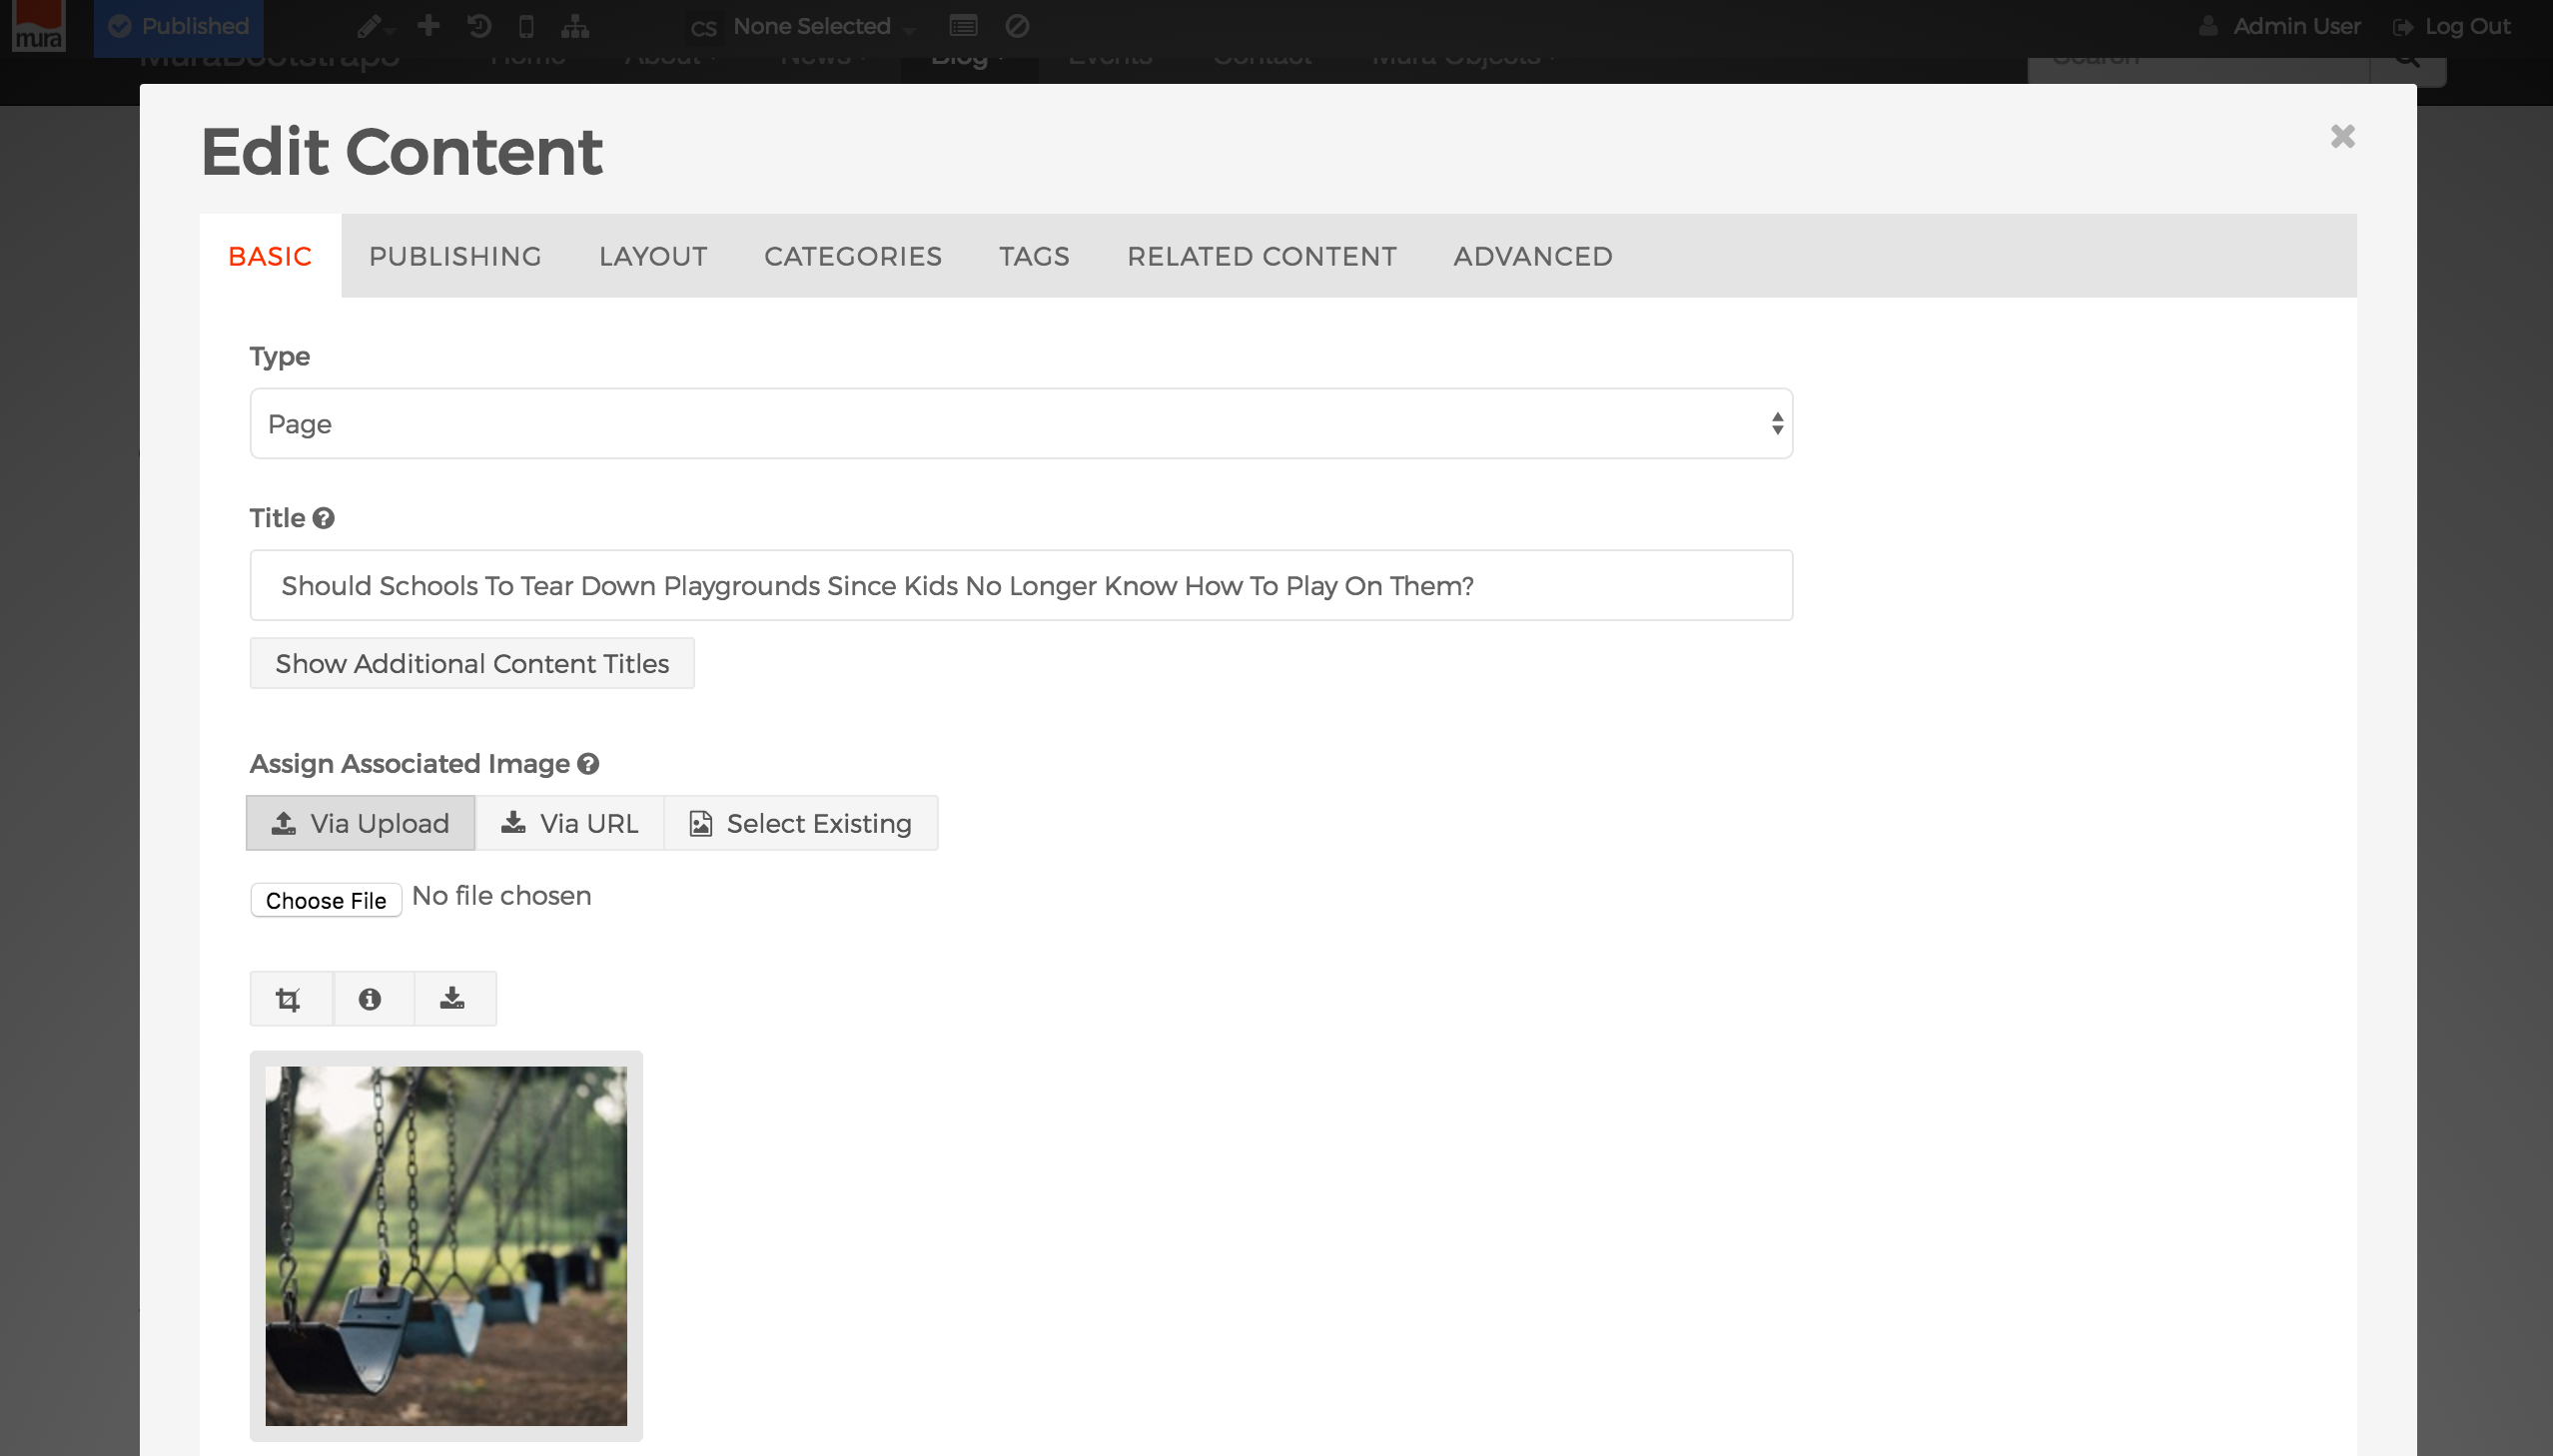
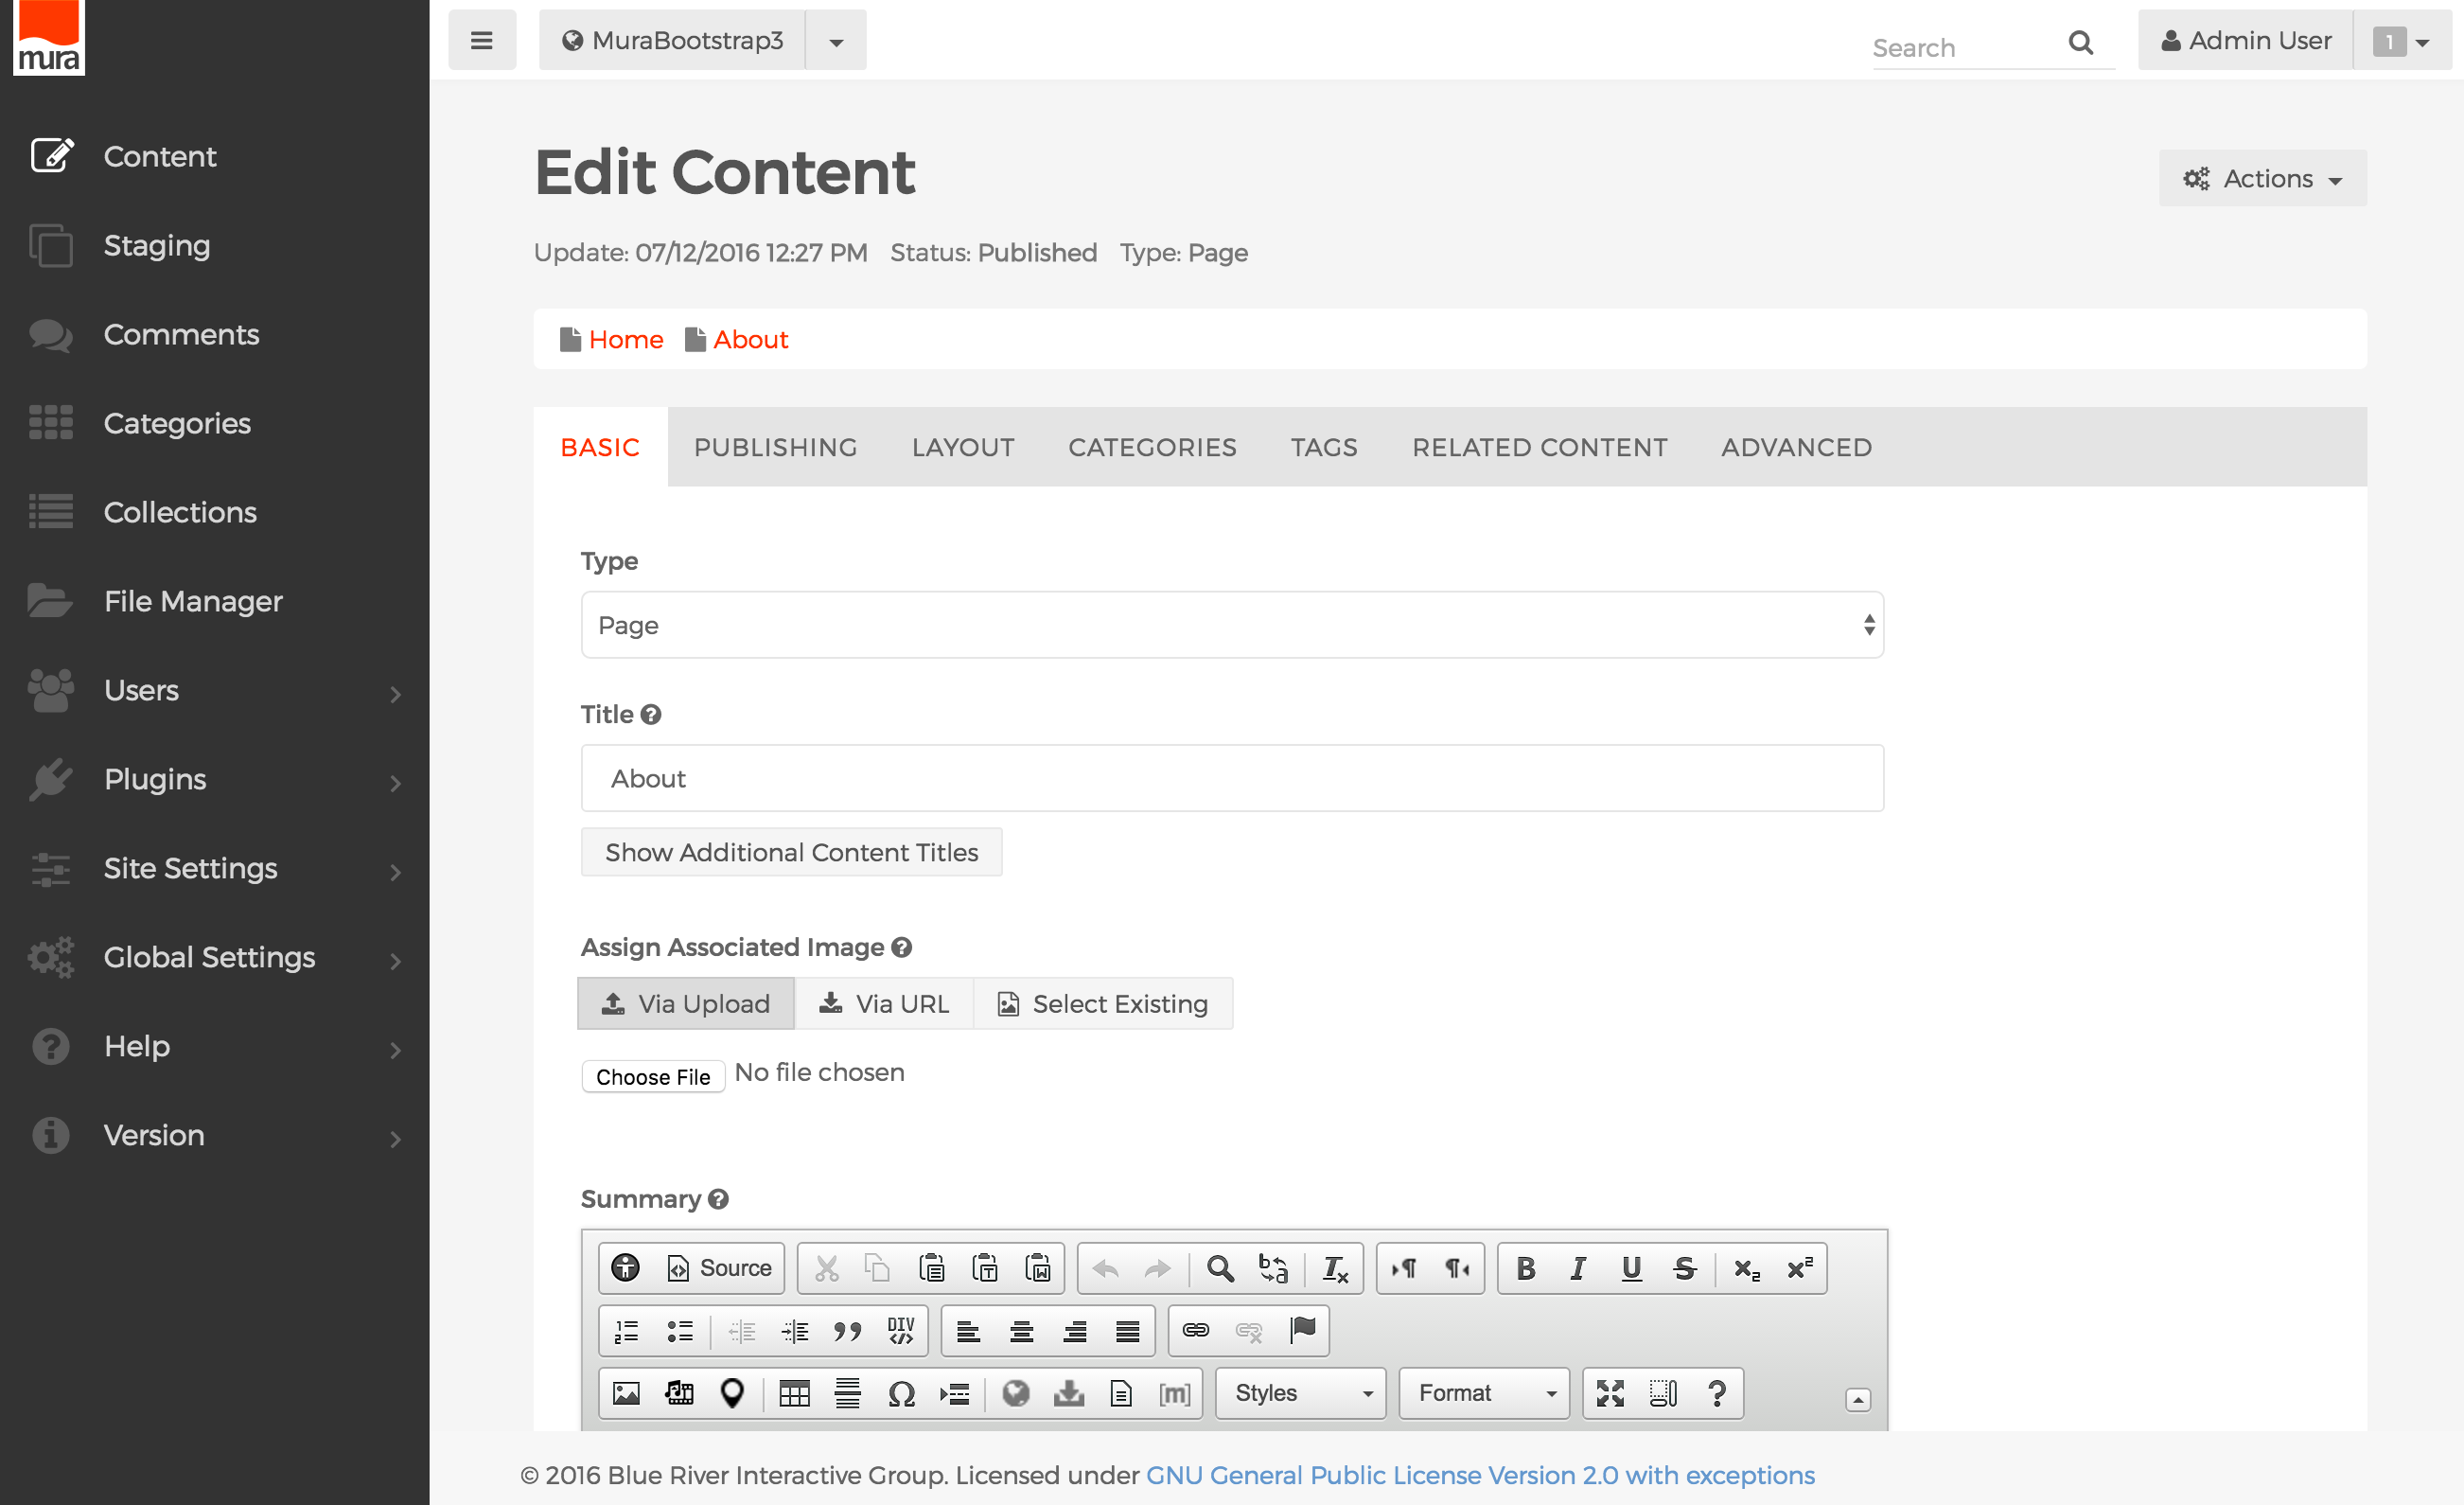
The "Edit Content" modal window will appear.
You'll see that it contains a number of tabs which are display across the top of the window that will be discussed later. However, if you scroll down, you should be able to located the "Content" region and a familiar formatting toolbar.
From this window, you can simply click inside of it, make your change(s), and apply your desired formatting. When you're done, you can select your desired publishing option (e.g., "Publish"). Please note that "Publish" will only appear for groups that have been given "Editor" privileges.
Congratulations! You've just edited content using "full edit" mode.
Basic Publishing
Content managers have a number of publishing options with Mura CMS. We've listed an overview of some of the various options below. However, we'll have a more in-depth look at publishing options and workflows in the Groups, Users, and Access Control section.
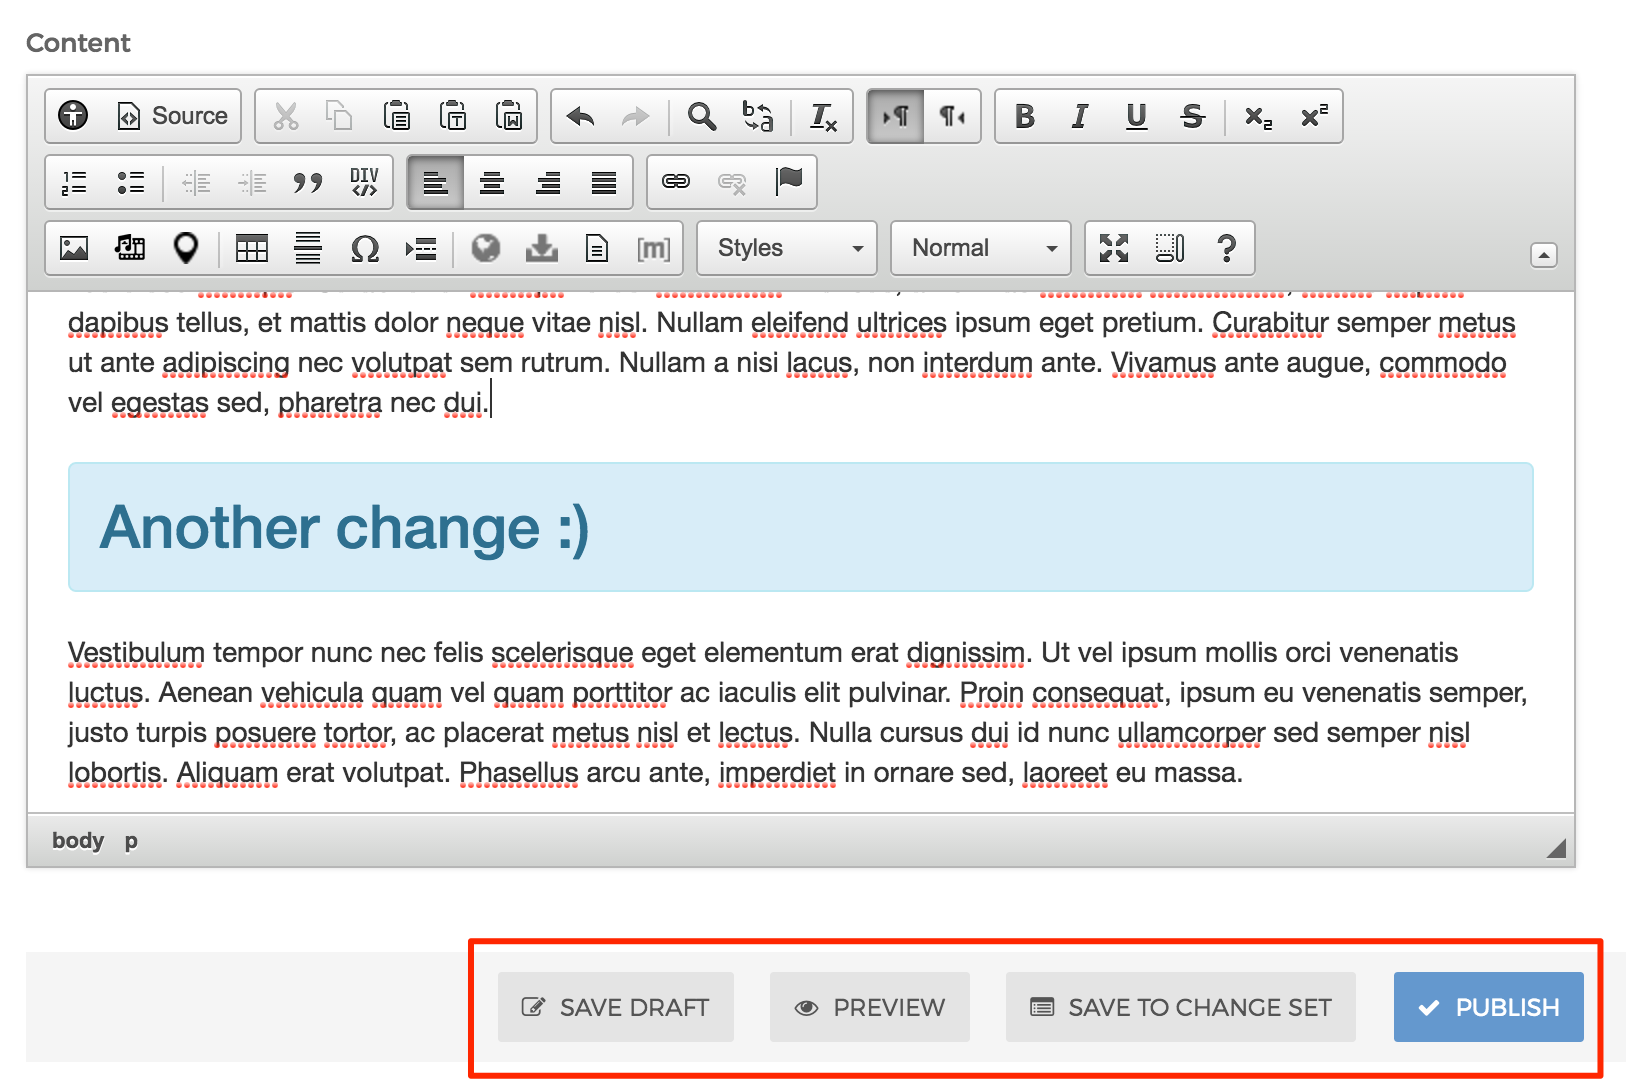
Publishing options in "full edit" modePublishing options in "inline edit" mode
Save Draft
"Save Draft" allows you to save a temporary, non-published version of content for later editing or approval. Draft versions are available for review by the user who created the item, or any site administrators
Preview
"Preview" does the same thing as "Save Draft" and then displays what the content would look like if it were published on the front end view. If using "Preview" from the back end administration area, it will attempt to launch a new window.
Save to Change Set*
"Save to Change Set" saves a version of the content in the desired "change set." A "Change Set" is like a virtual bucket where you can store any changes you want to make "live" at the same time. Change sets are managed via the Content Staging manager. We'll cover Content Staging in a future section. Please note that this option will appear only if the Content Staging Manager module is enabled via Site Settings.
Publish*
"Publish" makes the content "live" and visible to the front end public view of your site. The content item's status will become "Published." This action will also remove any "Draft" versions of the content item.
*Note: "Save to Change Set" and "Publish" options will only appear for groups that have been granted "Editor" roles. They will not appear for groups with "Author" roles.
Back-End Editing
While most content managers tend to make the majority of their content edits using one of the front-end editing options, content can also be edited from the back-end administration area.
There are a couple of different ways to get to the back-end administration area. If you're already logged into the front-end public view of your site, you can simply click the "tree view" icon on the Front-End Toolbar, and you will be taken to a "zoomed-in" tree view of your content.
Otherwise, you can access the back-end administration area by adding "/admin" to your domain name. For example, http://www.yourdomain.com/admin, and then log in.
Once you've accessed the back-end administrator area, go to the "Content" view. Using either the "Tree View" or "List View" locate the content item you wish to edit, and select it.
Now, you should see a familiar "Edit Content" screen. This is pretty much the same screen that you've seen before when using the "full edit" mode to edit content on the front-end public view. However, there are a few additional features, information, and options available from this view such as when the content item was last updated, it's "status" and a list of available "Actions" that we'll review in another section.
From here, simply make your content edit(s) and select your desired publishing option just as you did before on the front-end.
Restoring Deleted Content
Accidents can happen. Sometimes things get deleted, and we need to get them back—pronto. Not a problem. Mura's Trash Bin has every deleted item ready to be restored to its proper location.
Access the Trash Bin
Go to Site Settings > Trash Bin
Search for the content you'd like to restore
Click the "Edit" icon to see the metadata associated with the item you'd like to restore
If you'd like to move the item to another location, use the "Select Parent" button to search for the item you'd like to move it underneath.
Click "Restore" or "Restore All Items in the Delete Transaction" if multiple items were deleted at once, i.e. if the item has any child content that was deleted with it.
The restored item will now be in its proper location with any children that were deleted with it if "Restore All Items" was selected.
Summary
In this section, we covered the basic concepts of Mura CMS. You should now be able to log in to Mura, make simple content edits, and create new content.
In the next section, we'll review Mura's content types and get to know the basics of creating/managing content.