Managing Form Data
Whenever a Mura-created form has been submitted, the information is captured and stored in Mura's database. With Mura, you can view form data, and even export the data for archival purposes and/or to import it into a third-party system such as a Customer Relationship Management (CRM) system.
How to View and/or Download Form Data
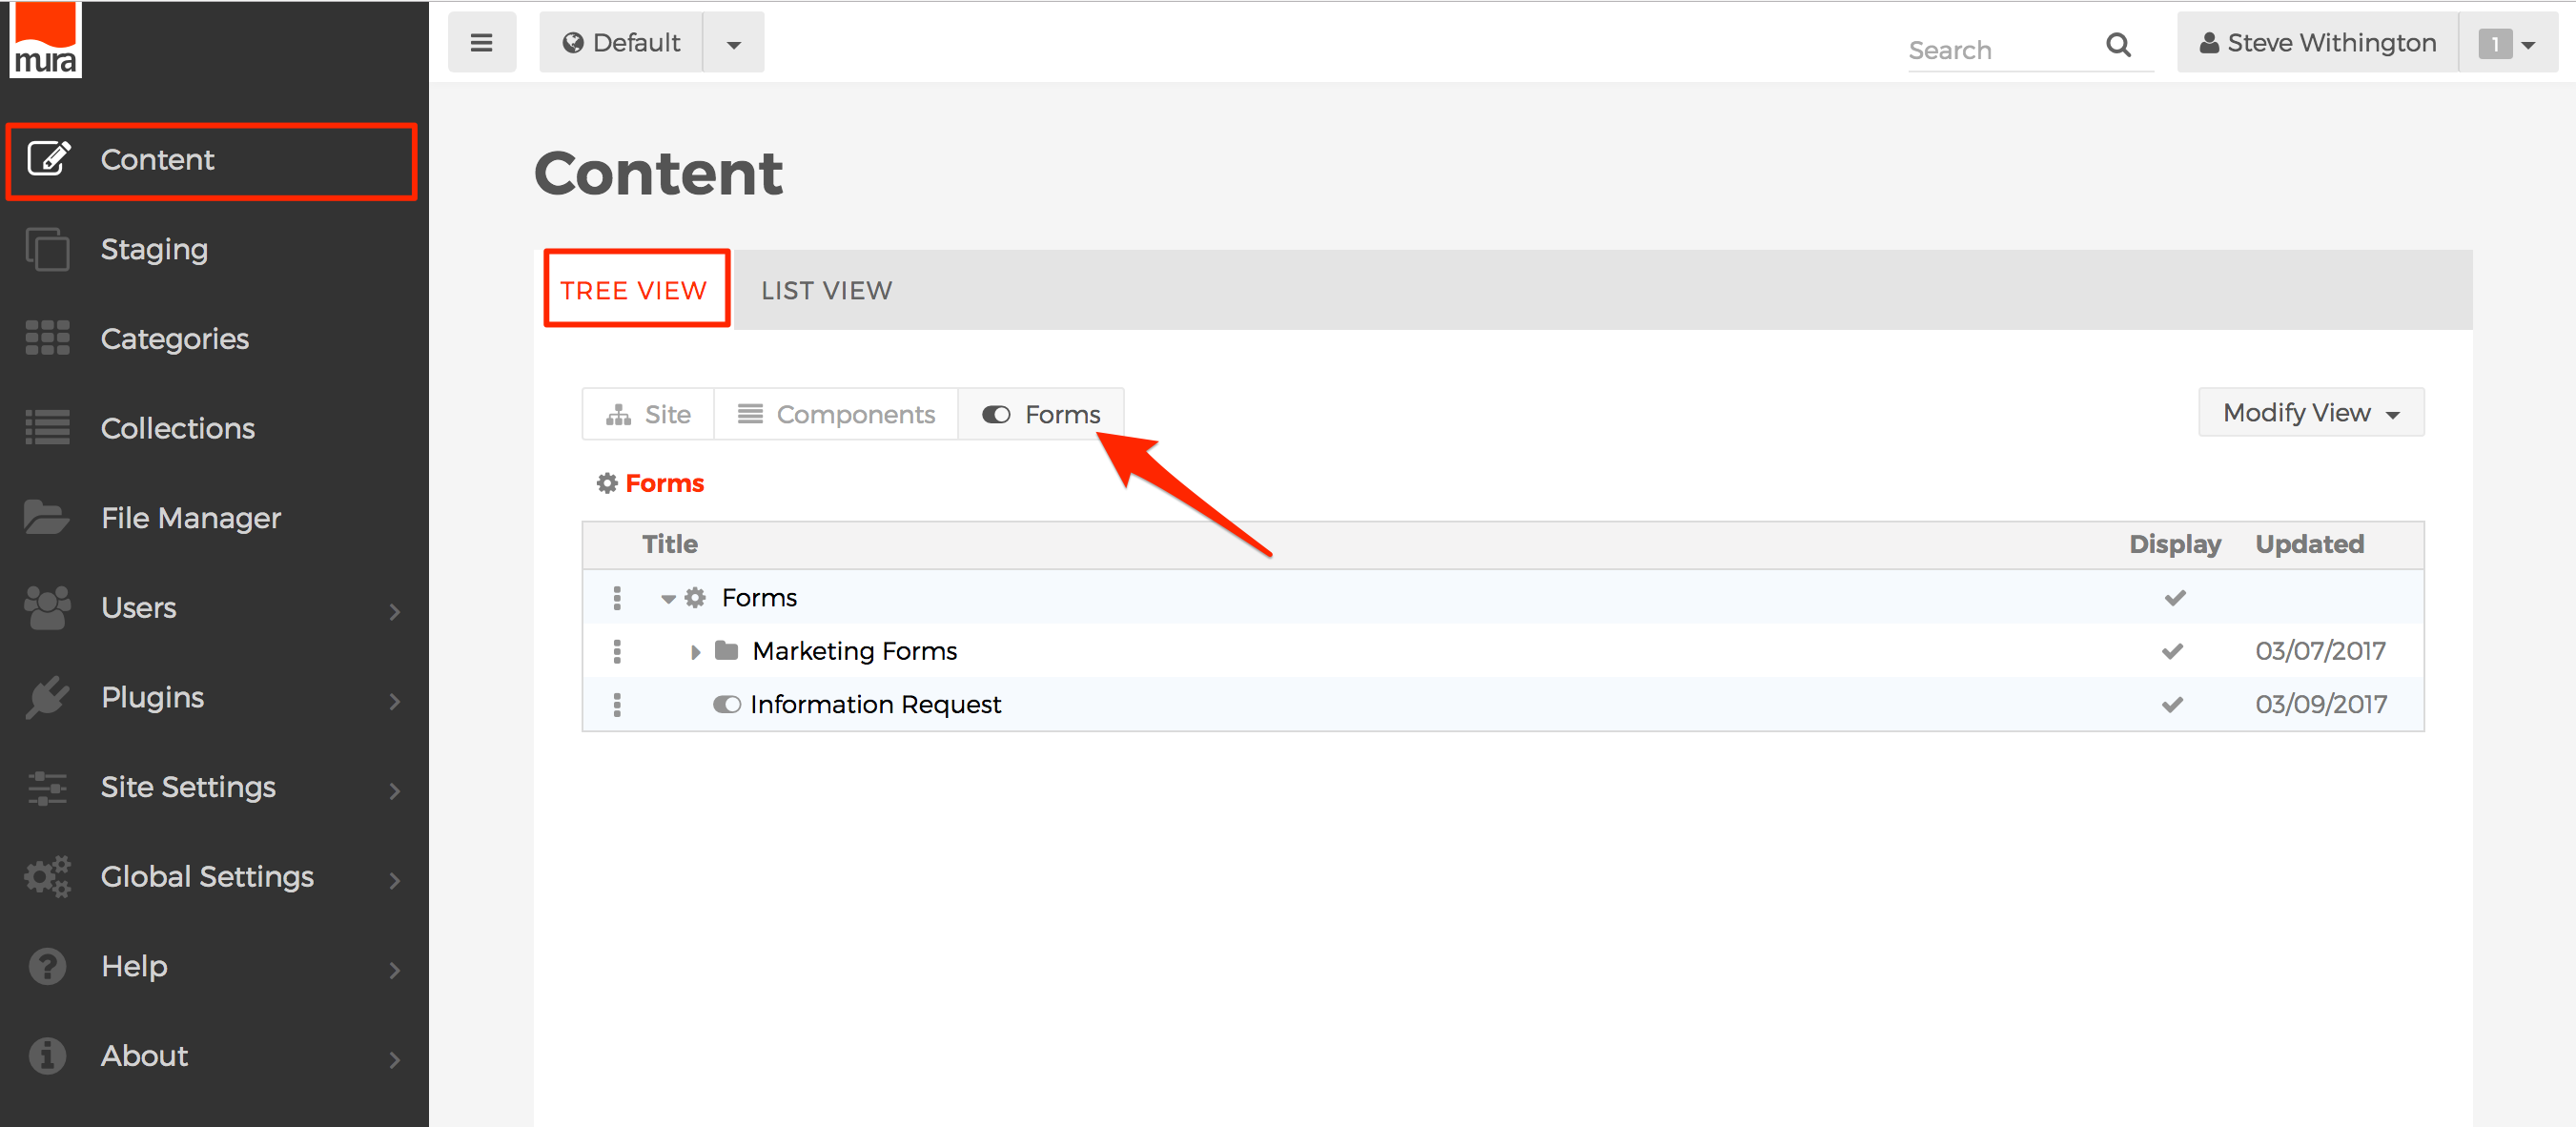
- From the back-end administration area, go to Content, select the Tree View tab, click the Forms button.
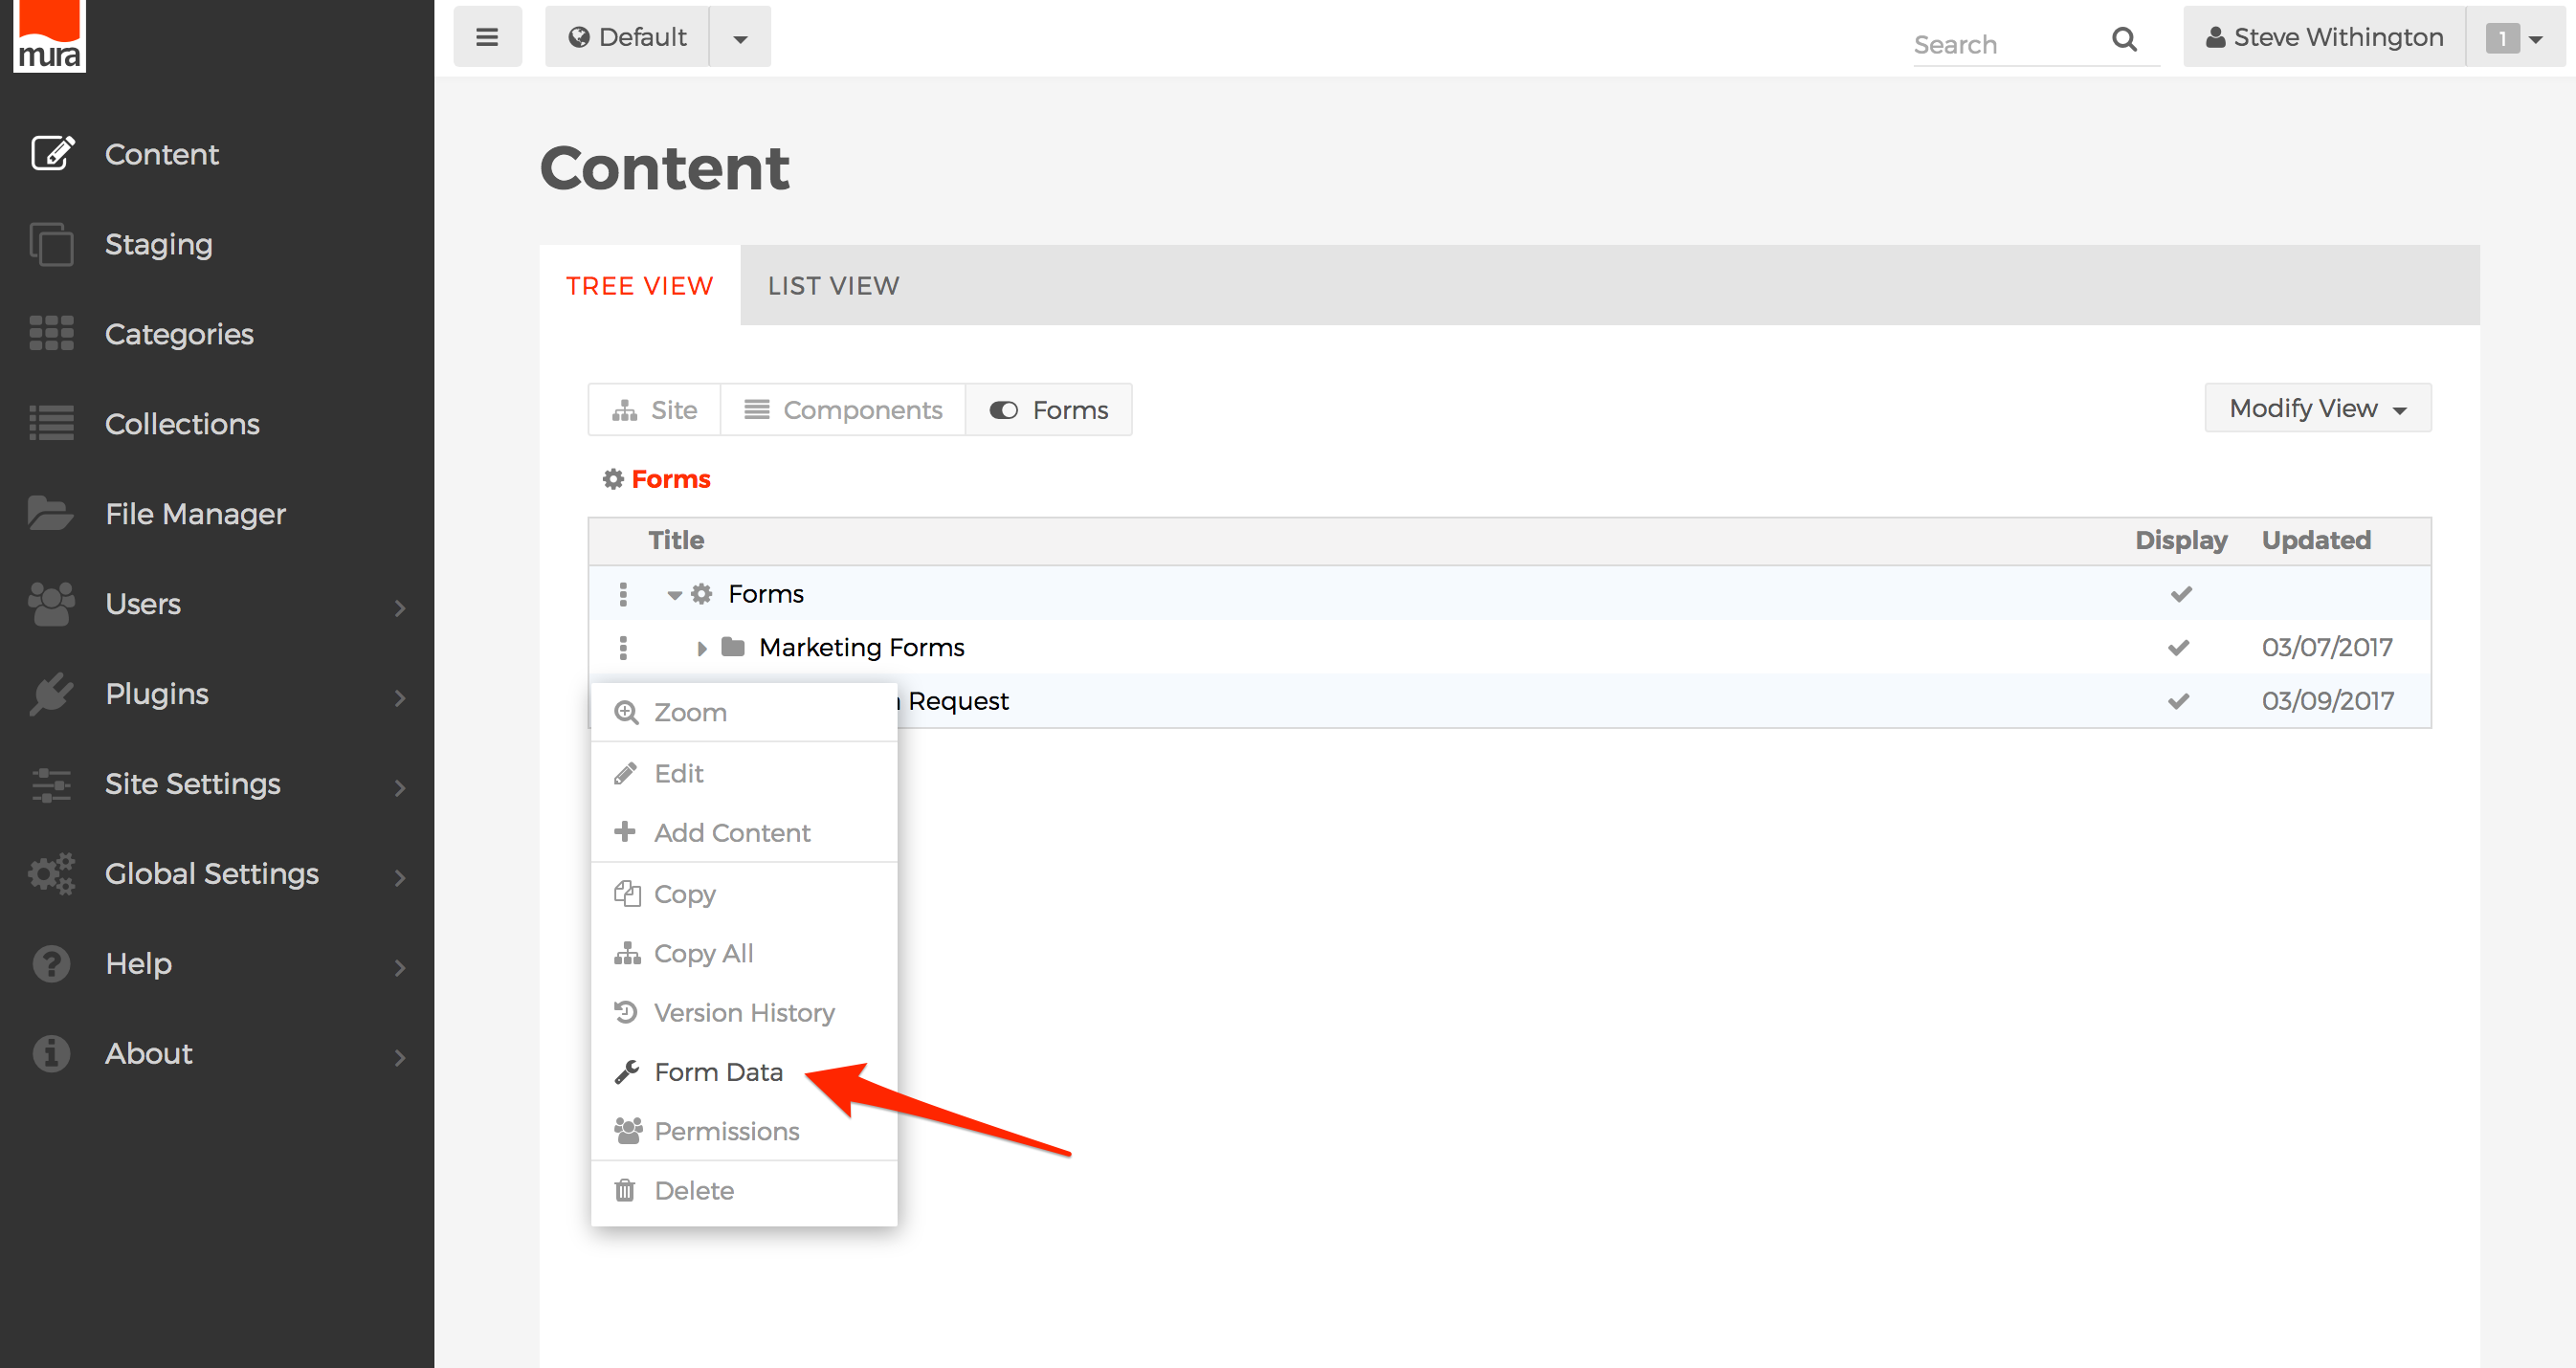
- Click the three-dot menu next to the row of the form you wish to view/download data for, and select Form Data.
- Or, select the form you wish to view/download data for.
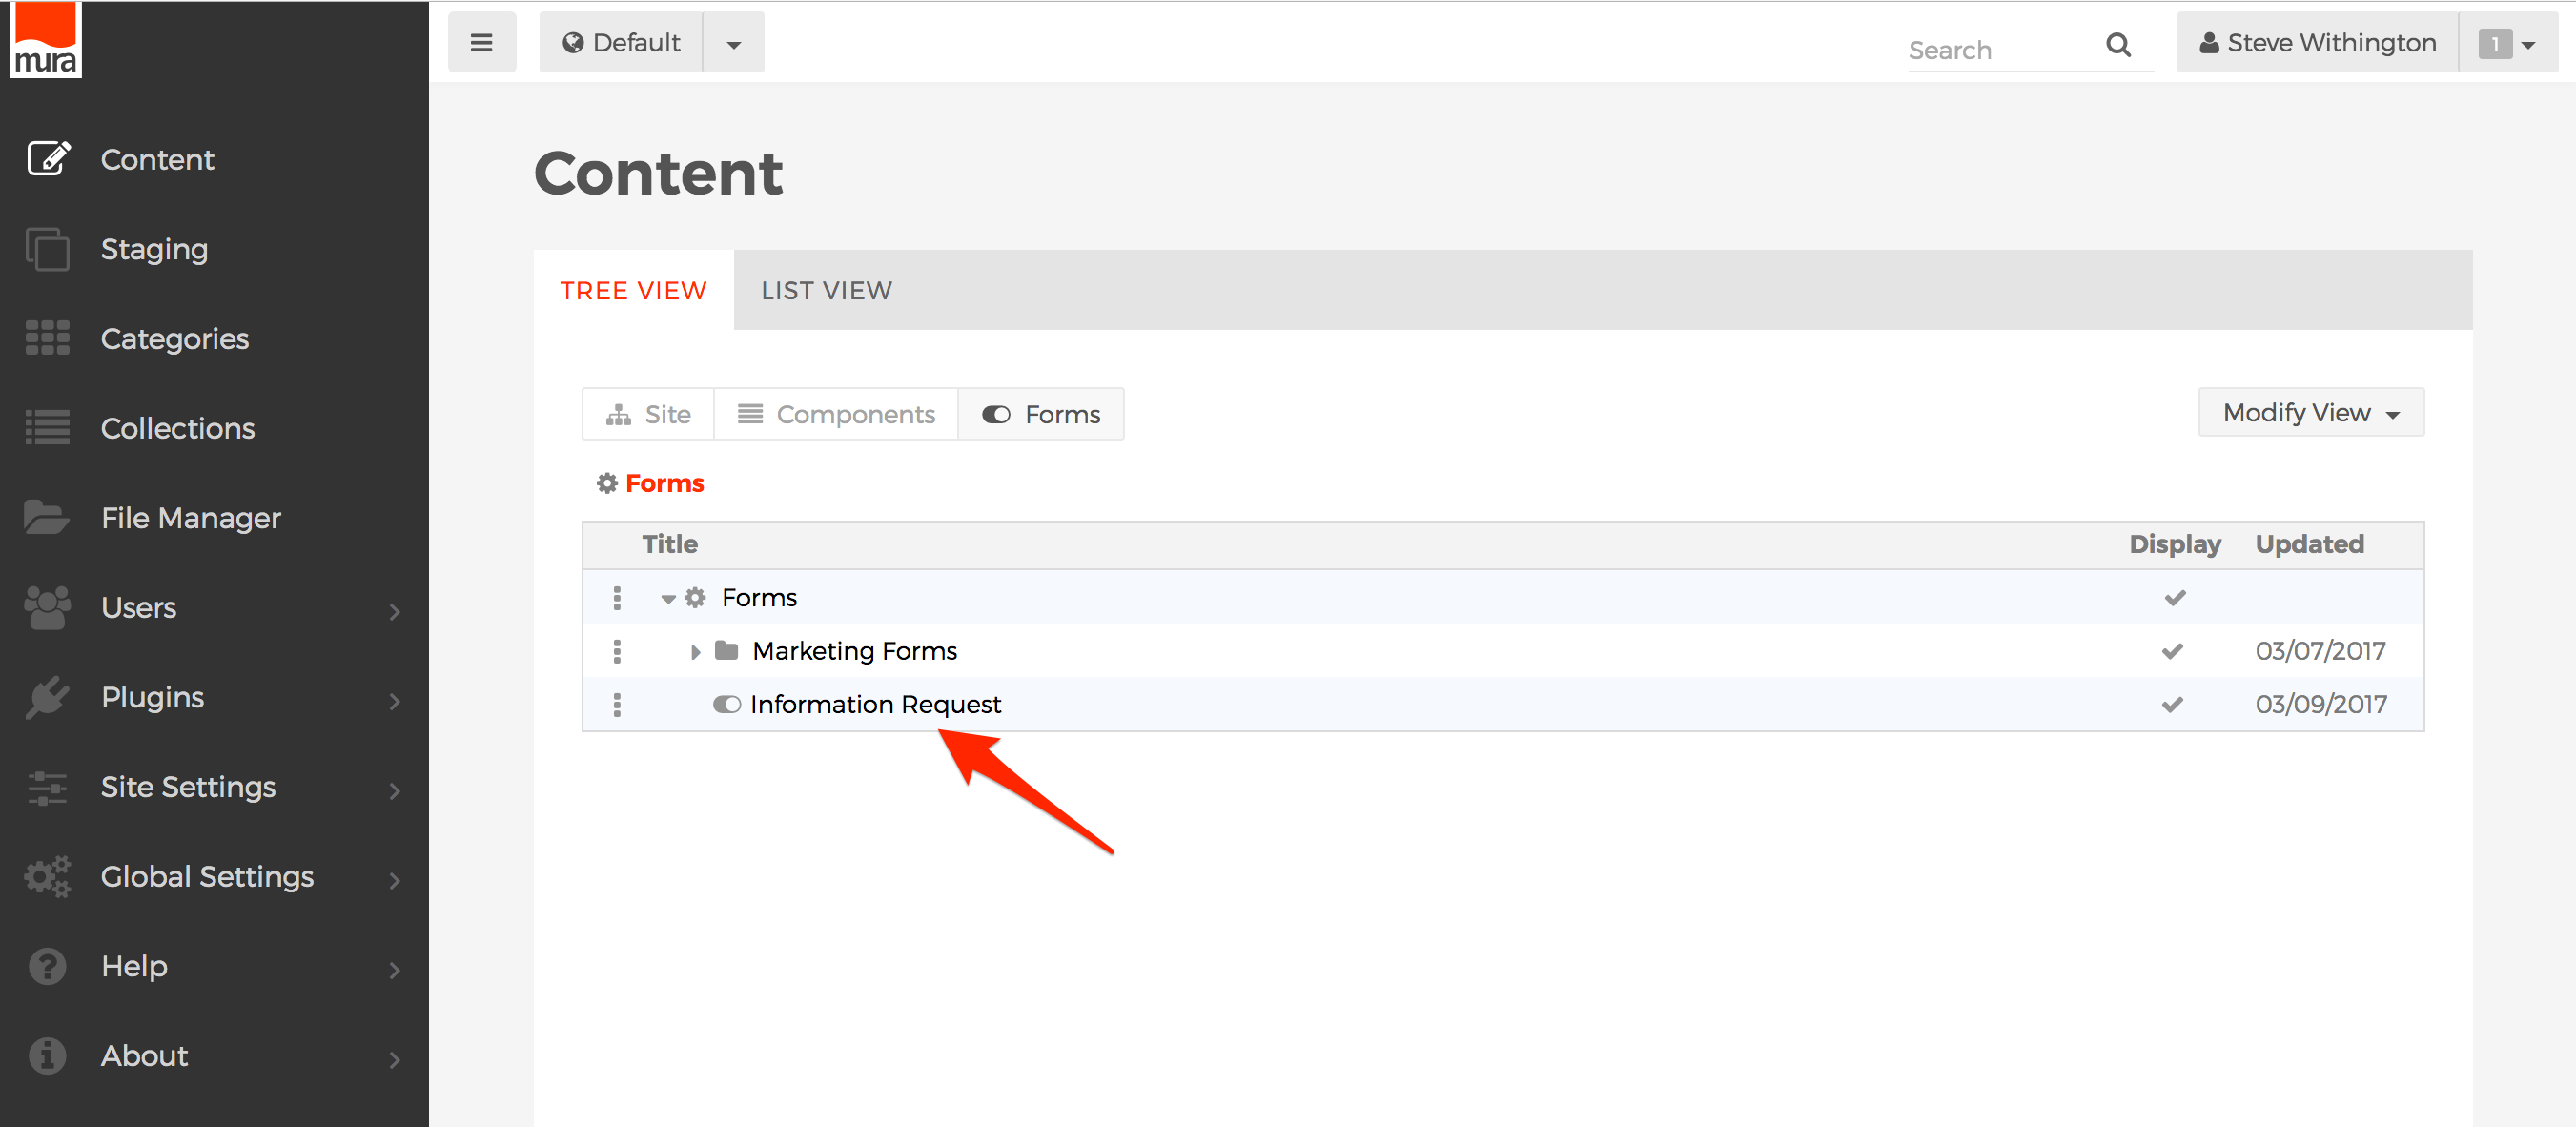
- Then, click the Form Data button.
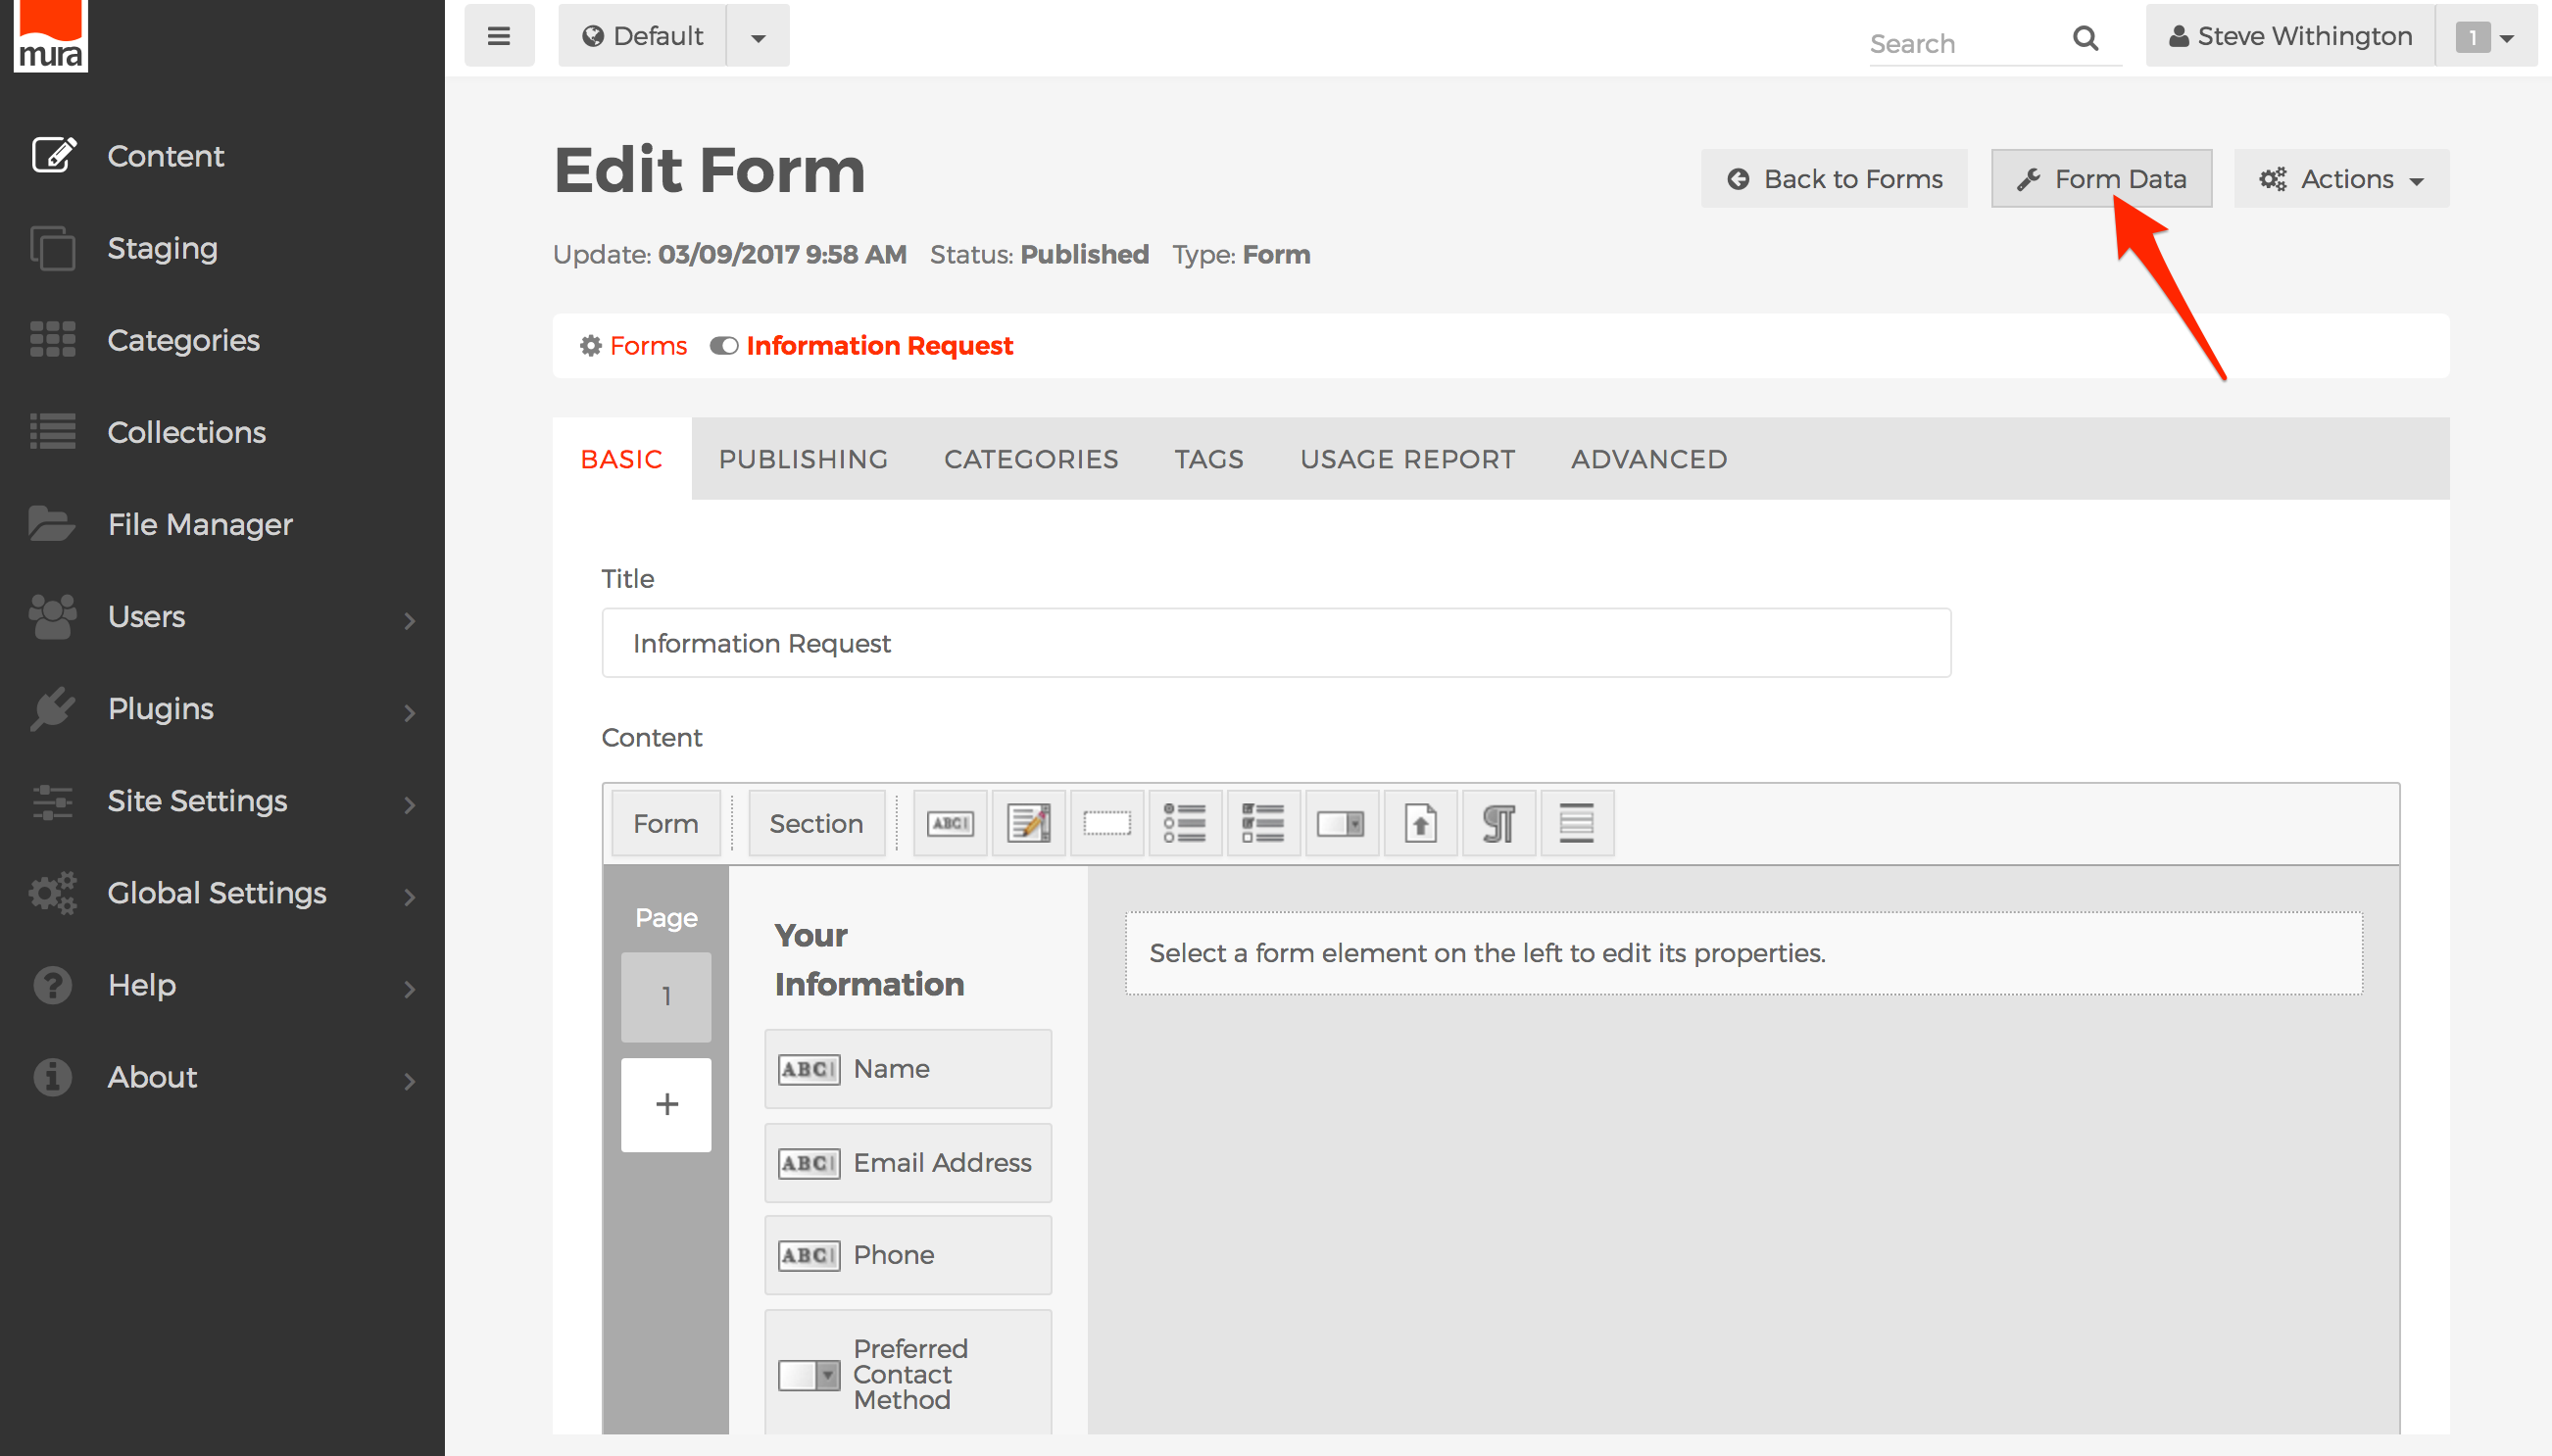
- Then, click the Form Data button.
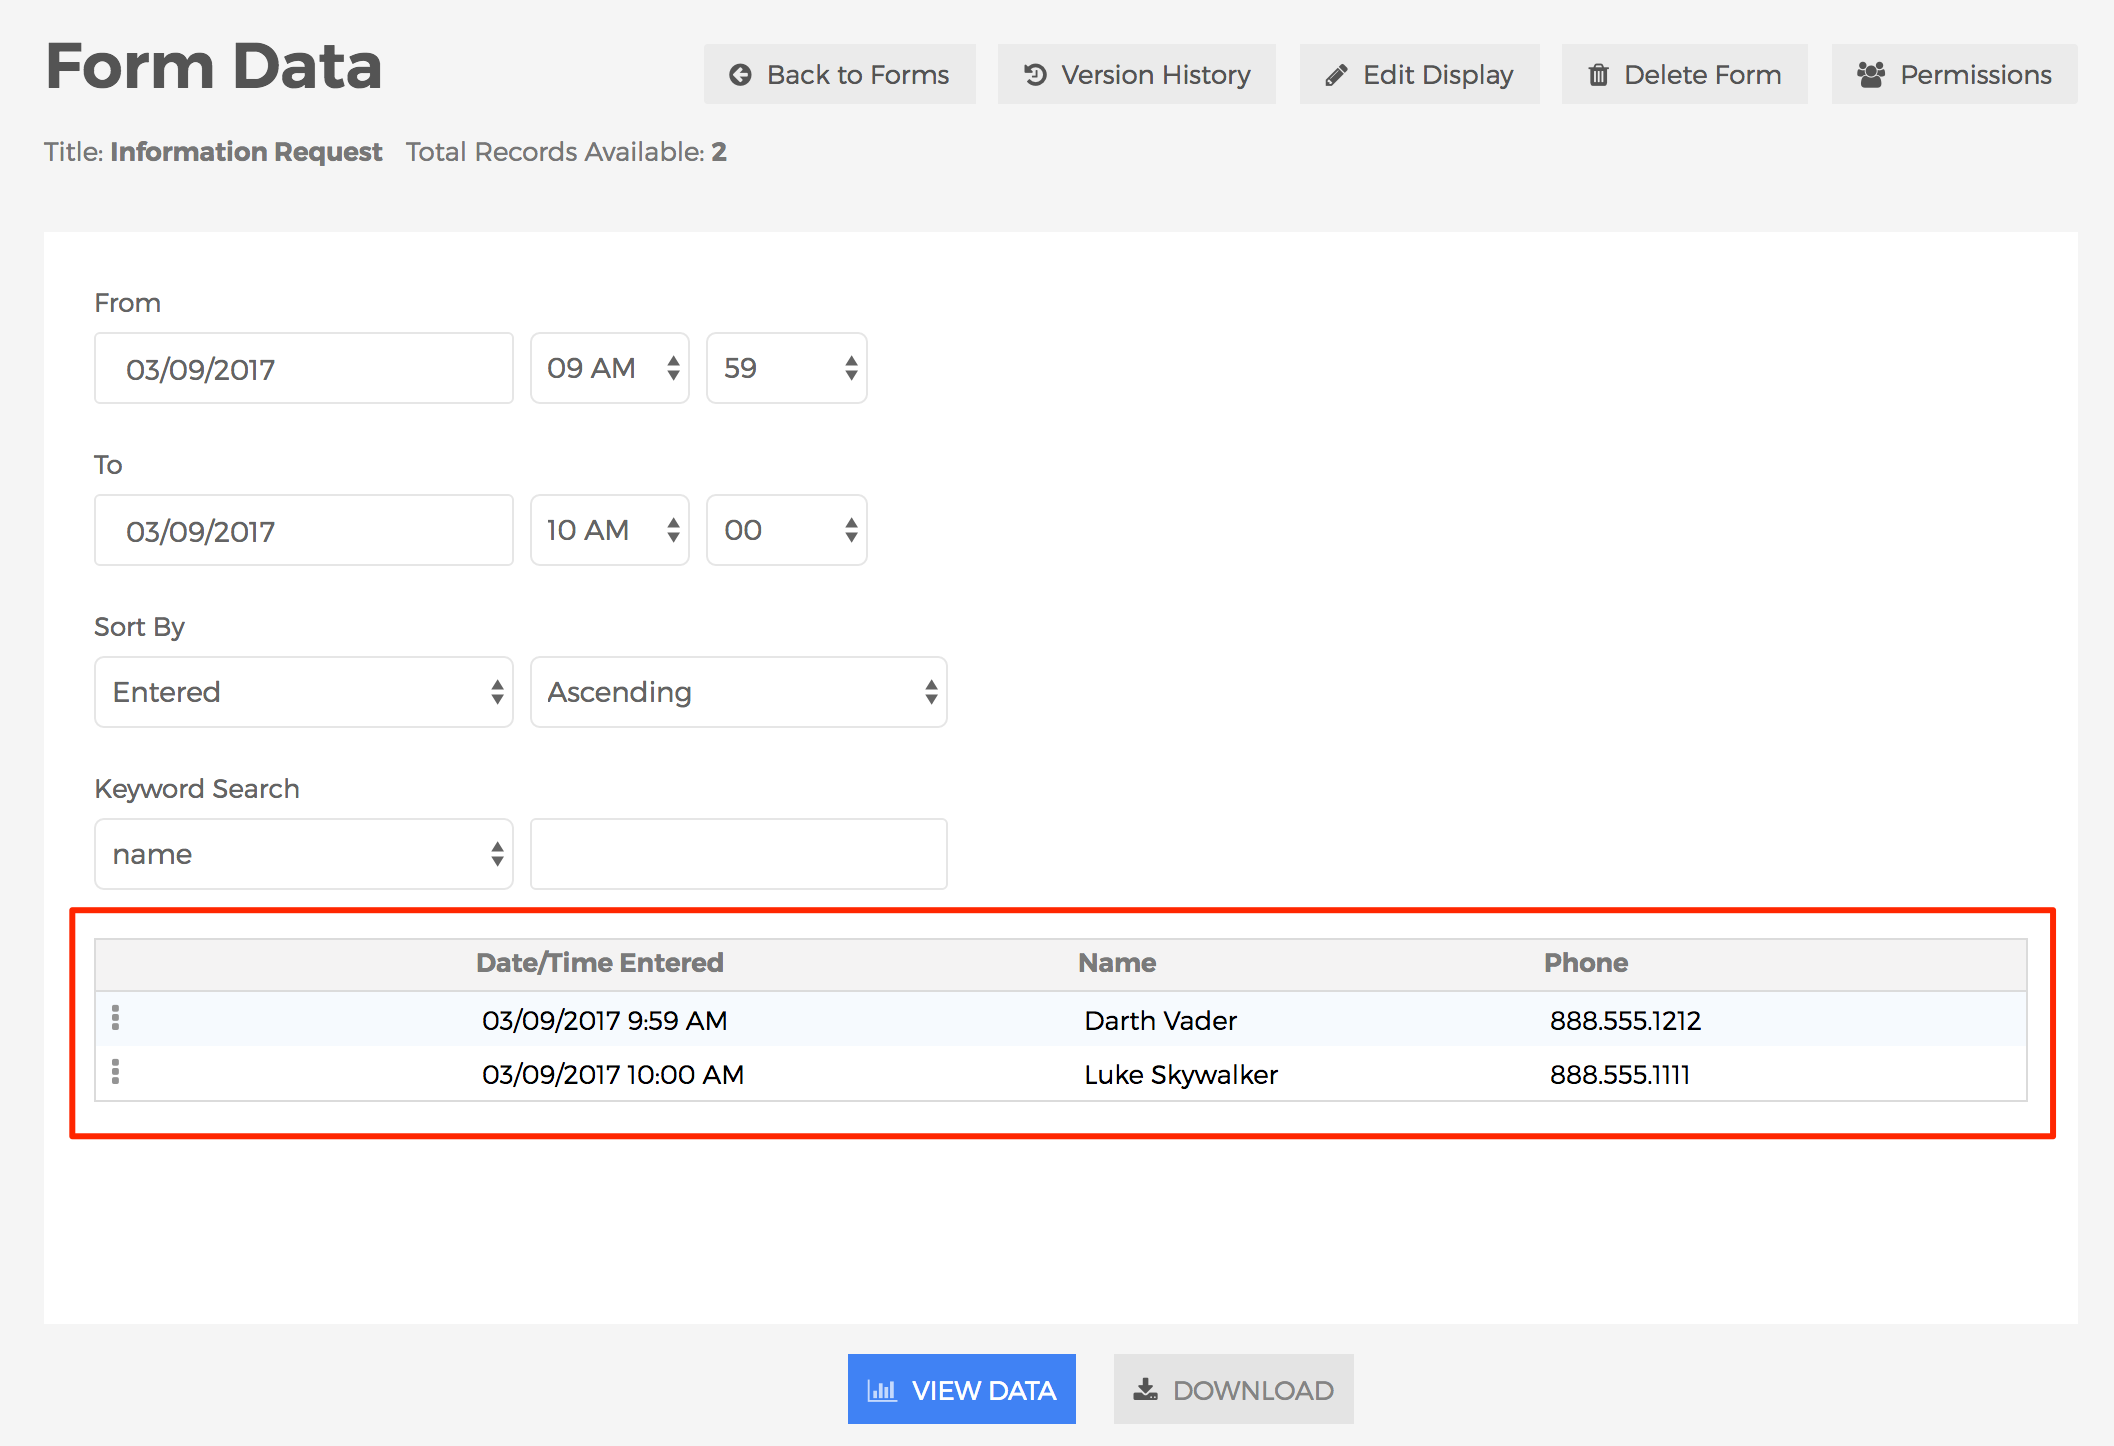
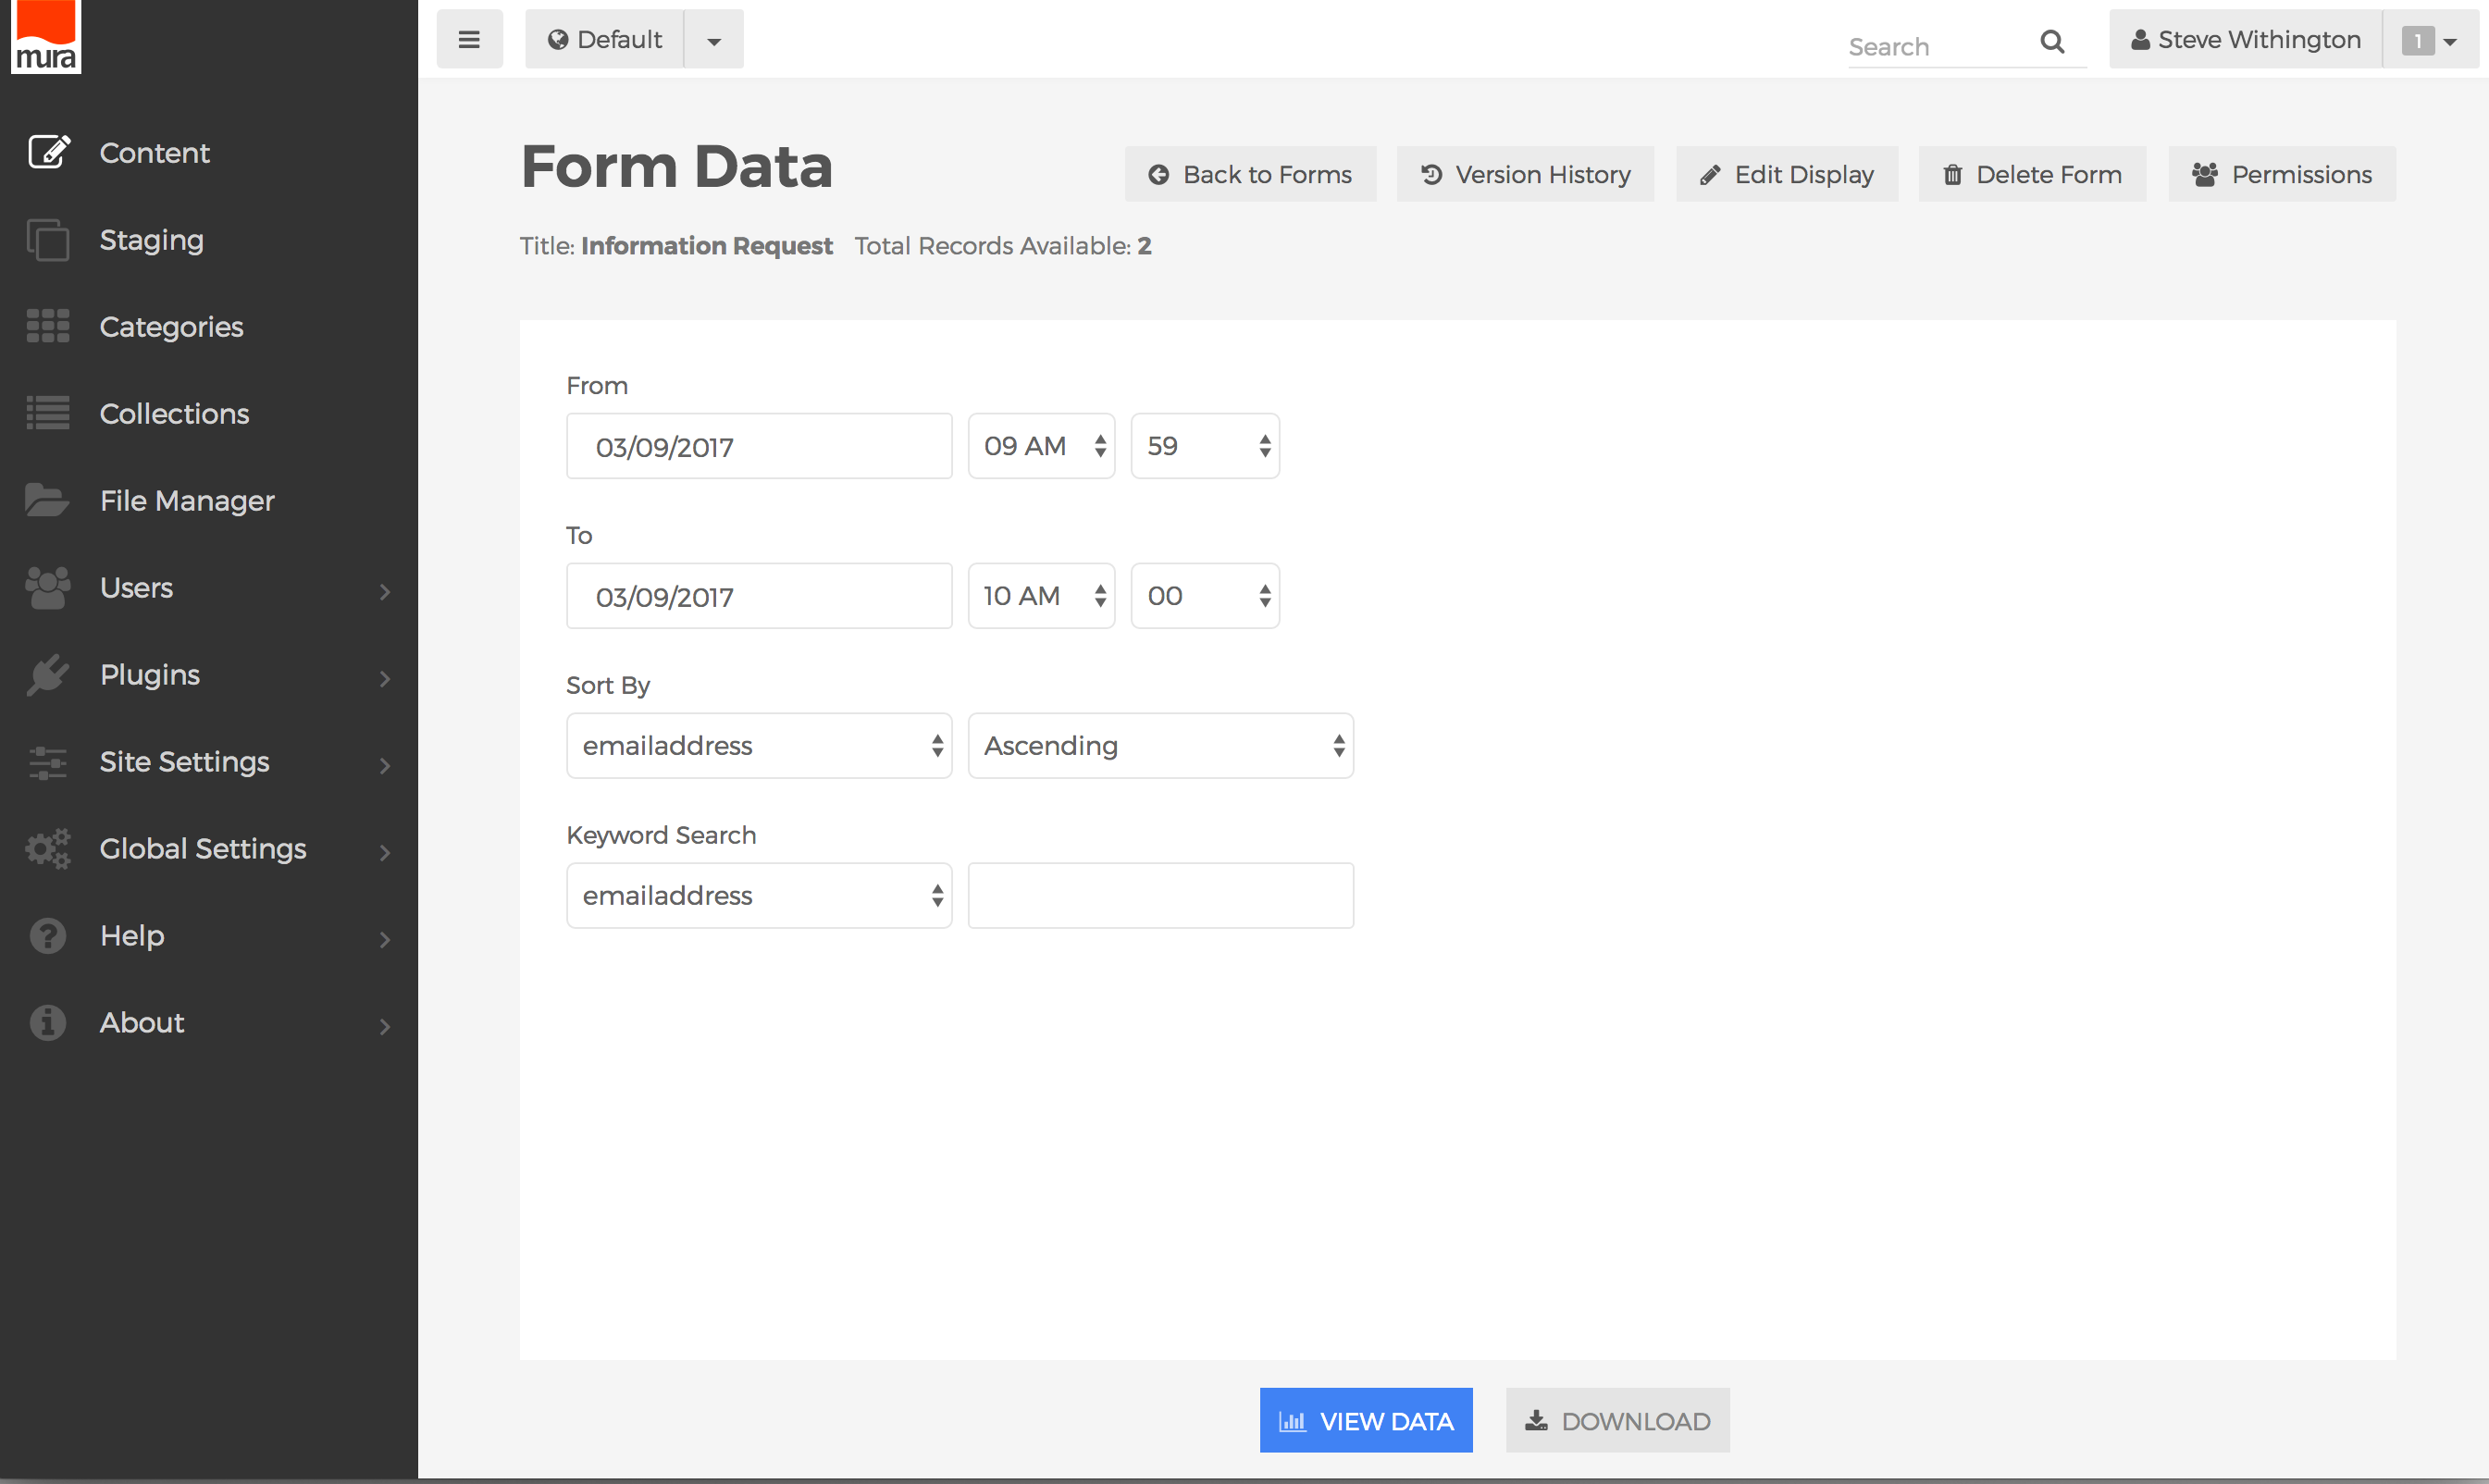
- You should see the Form Data Screen.
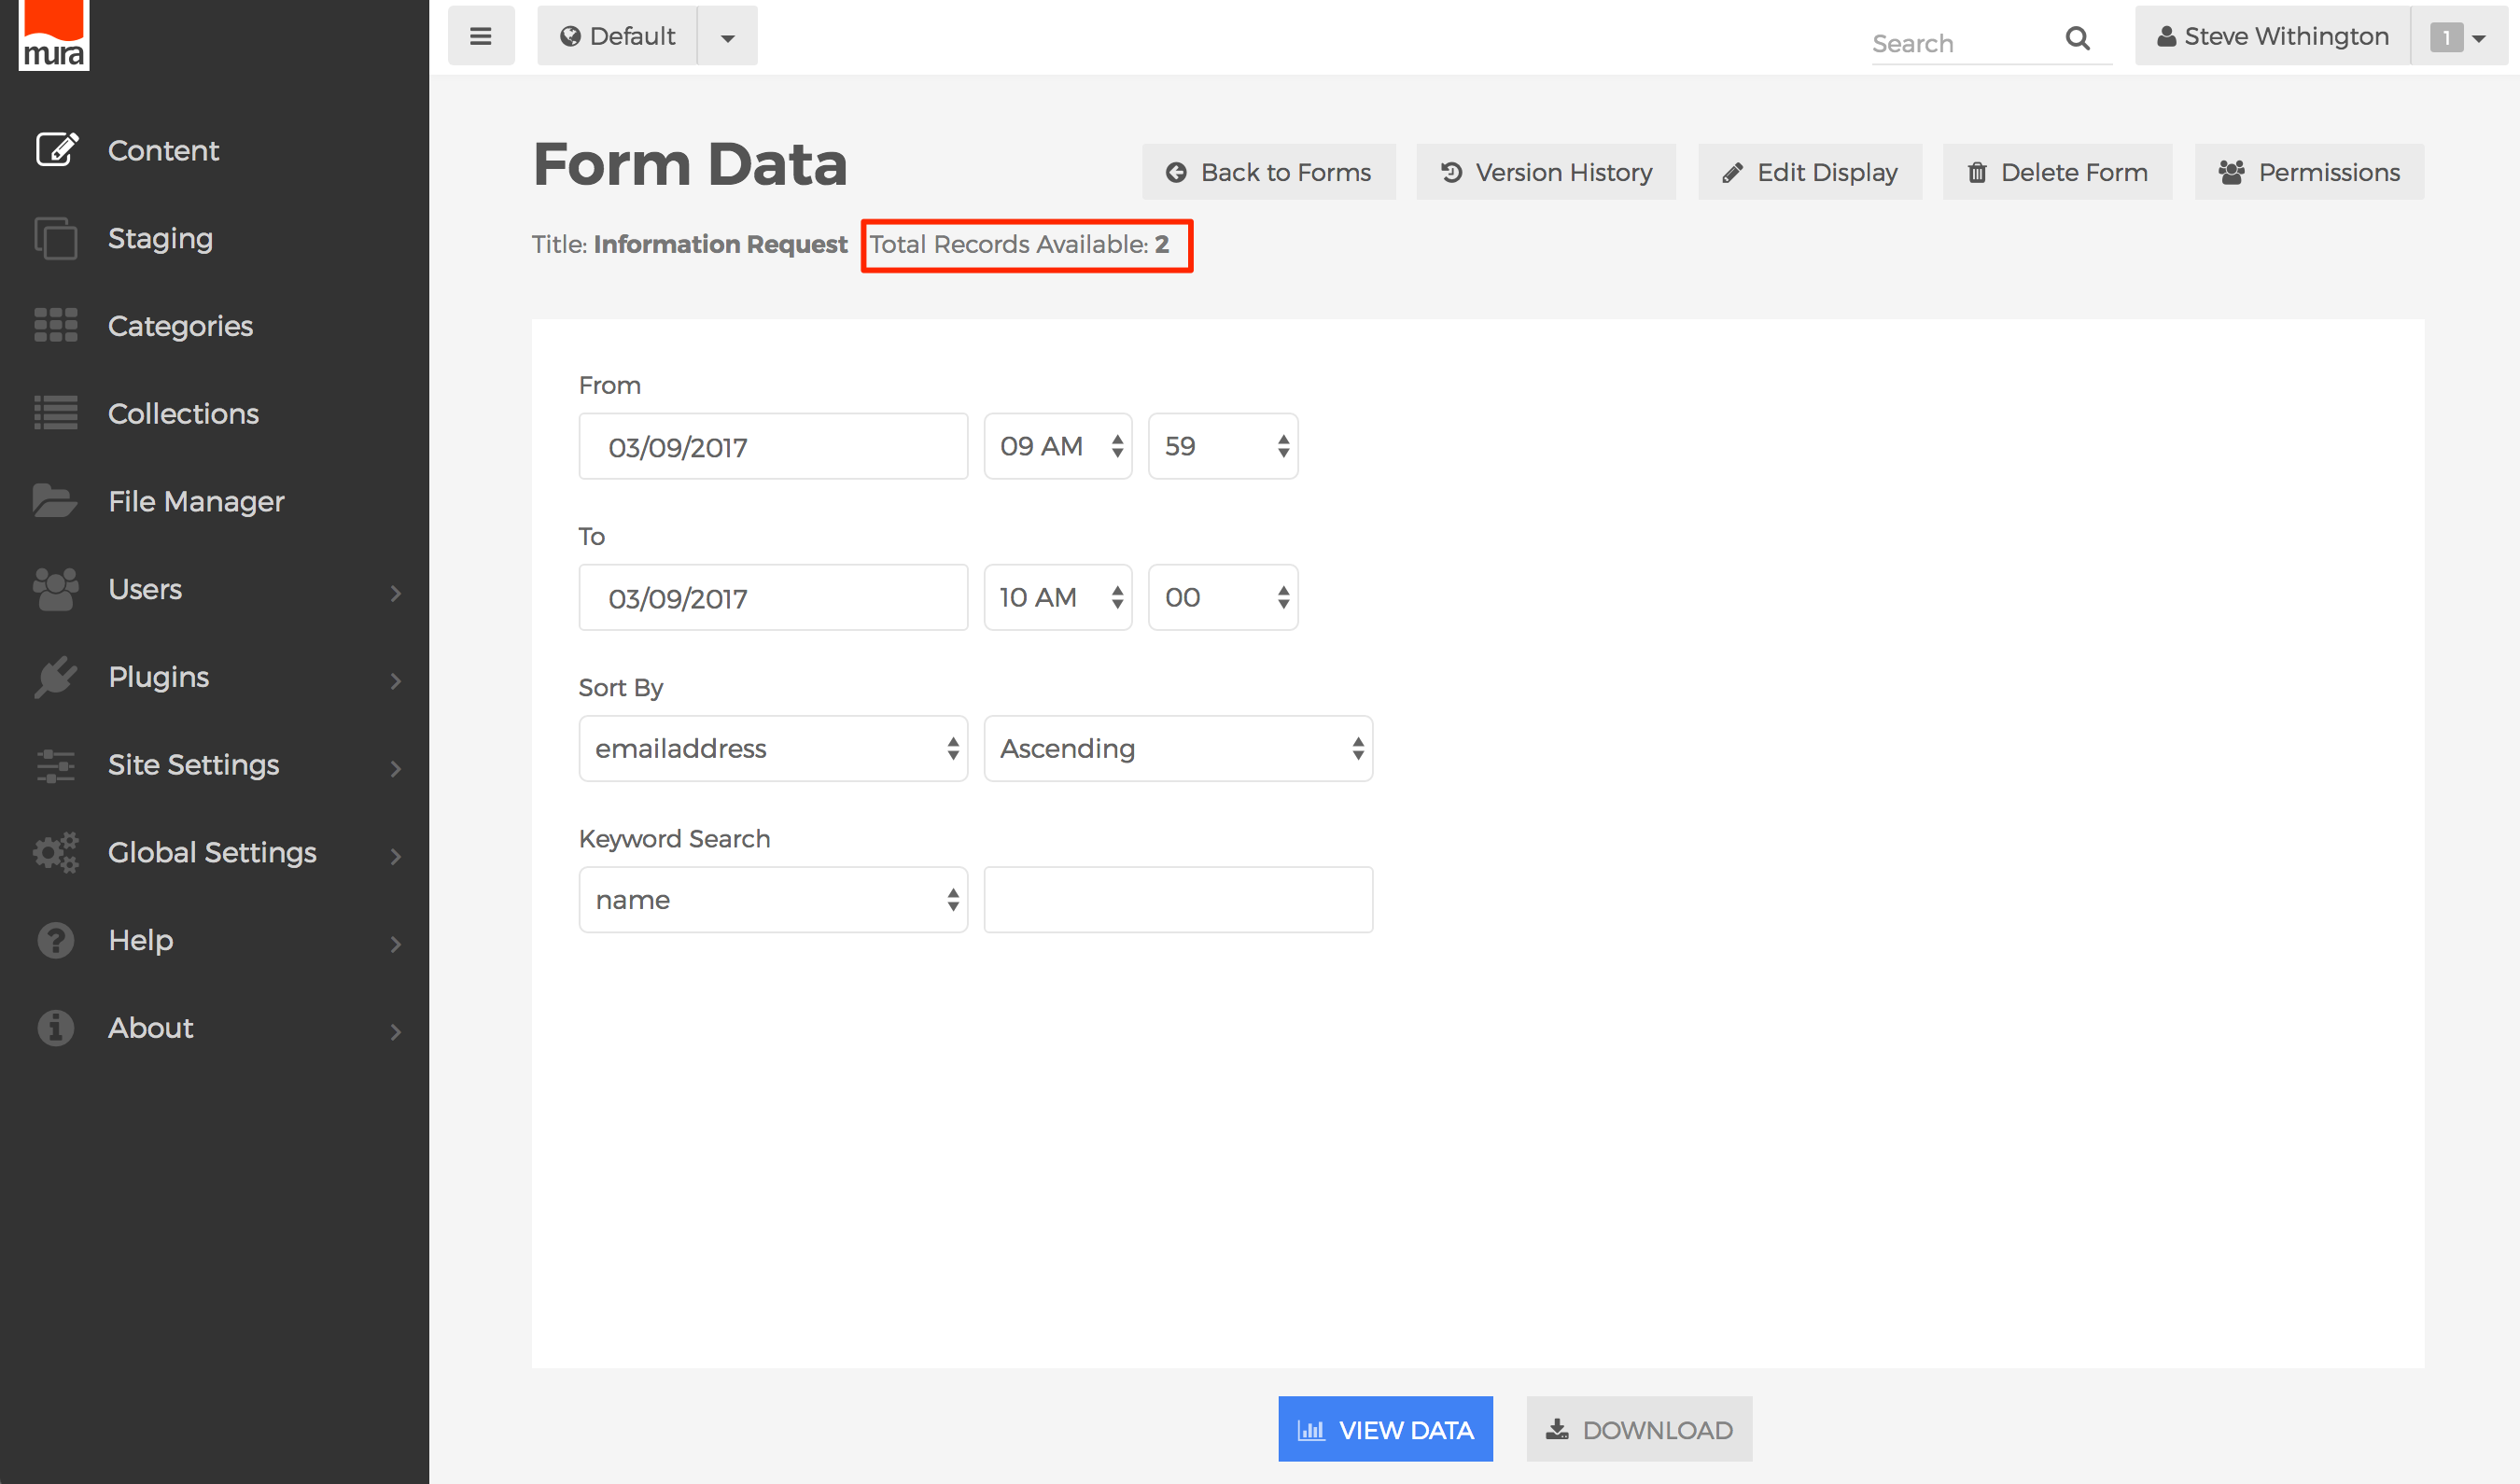
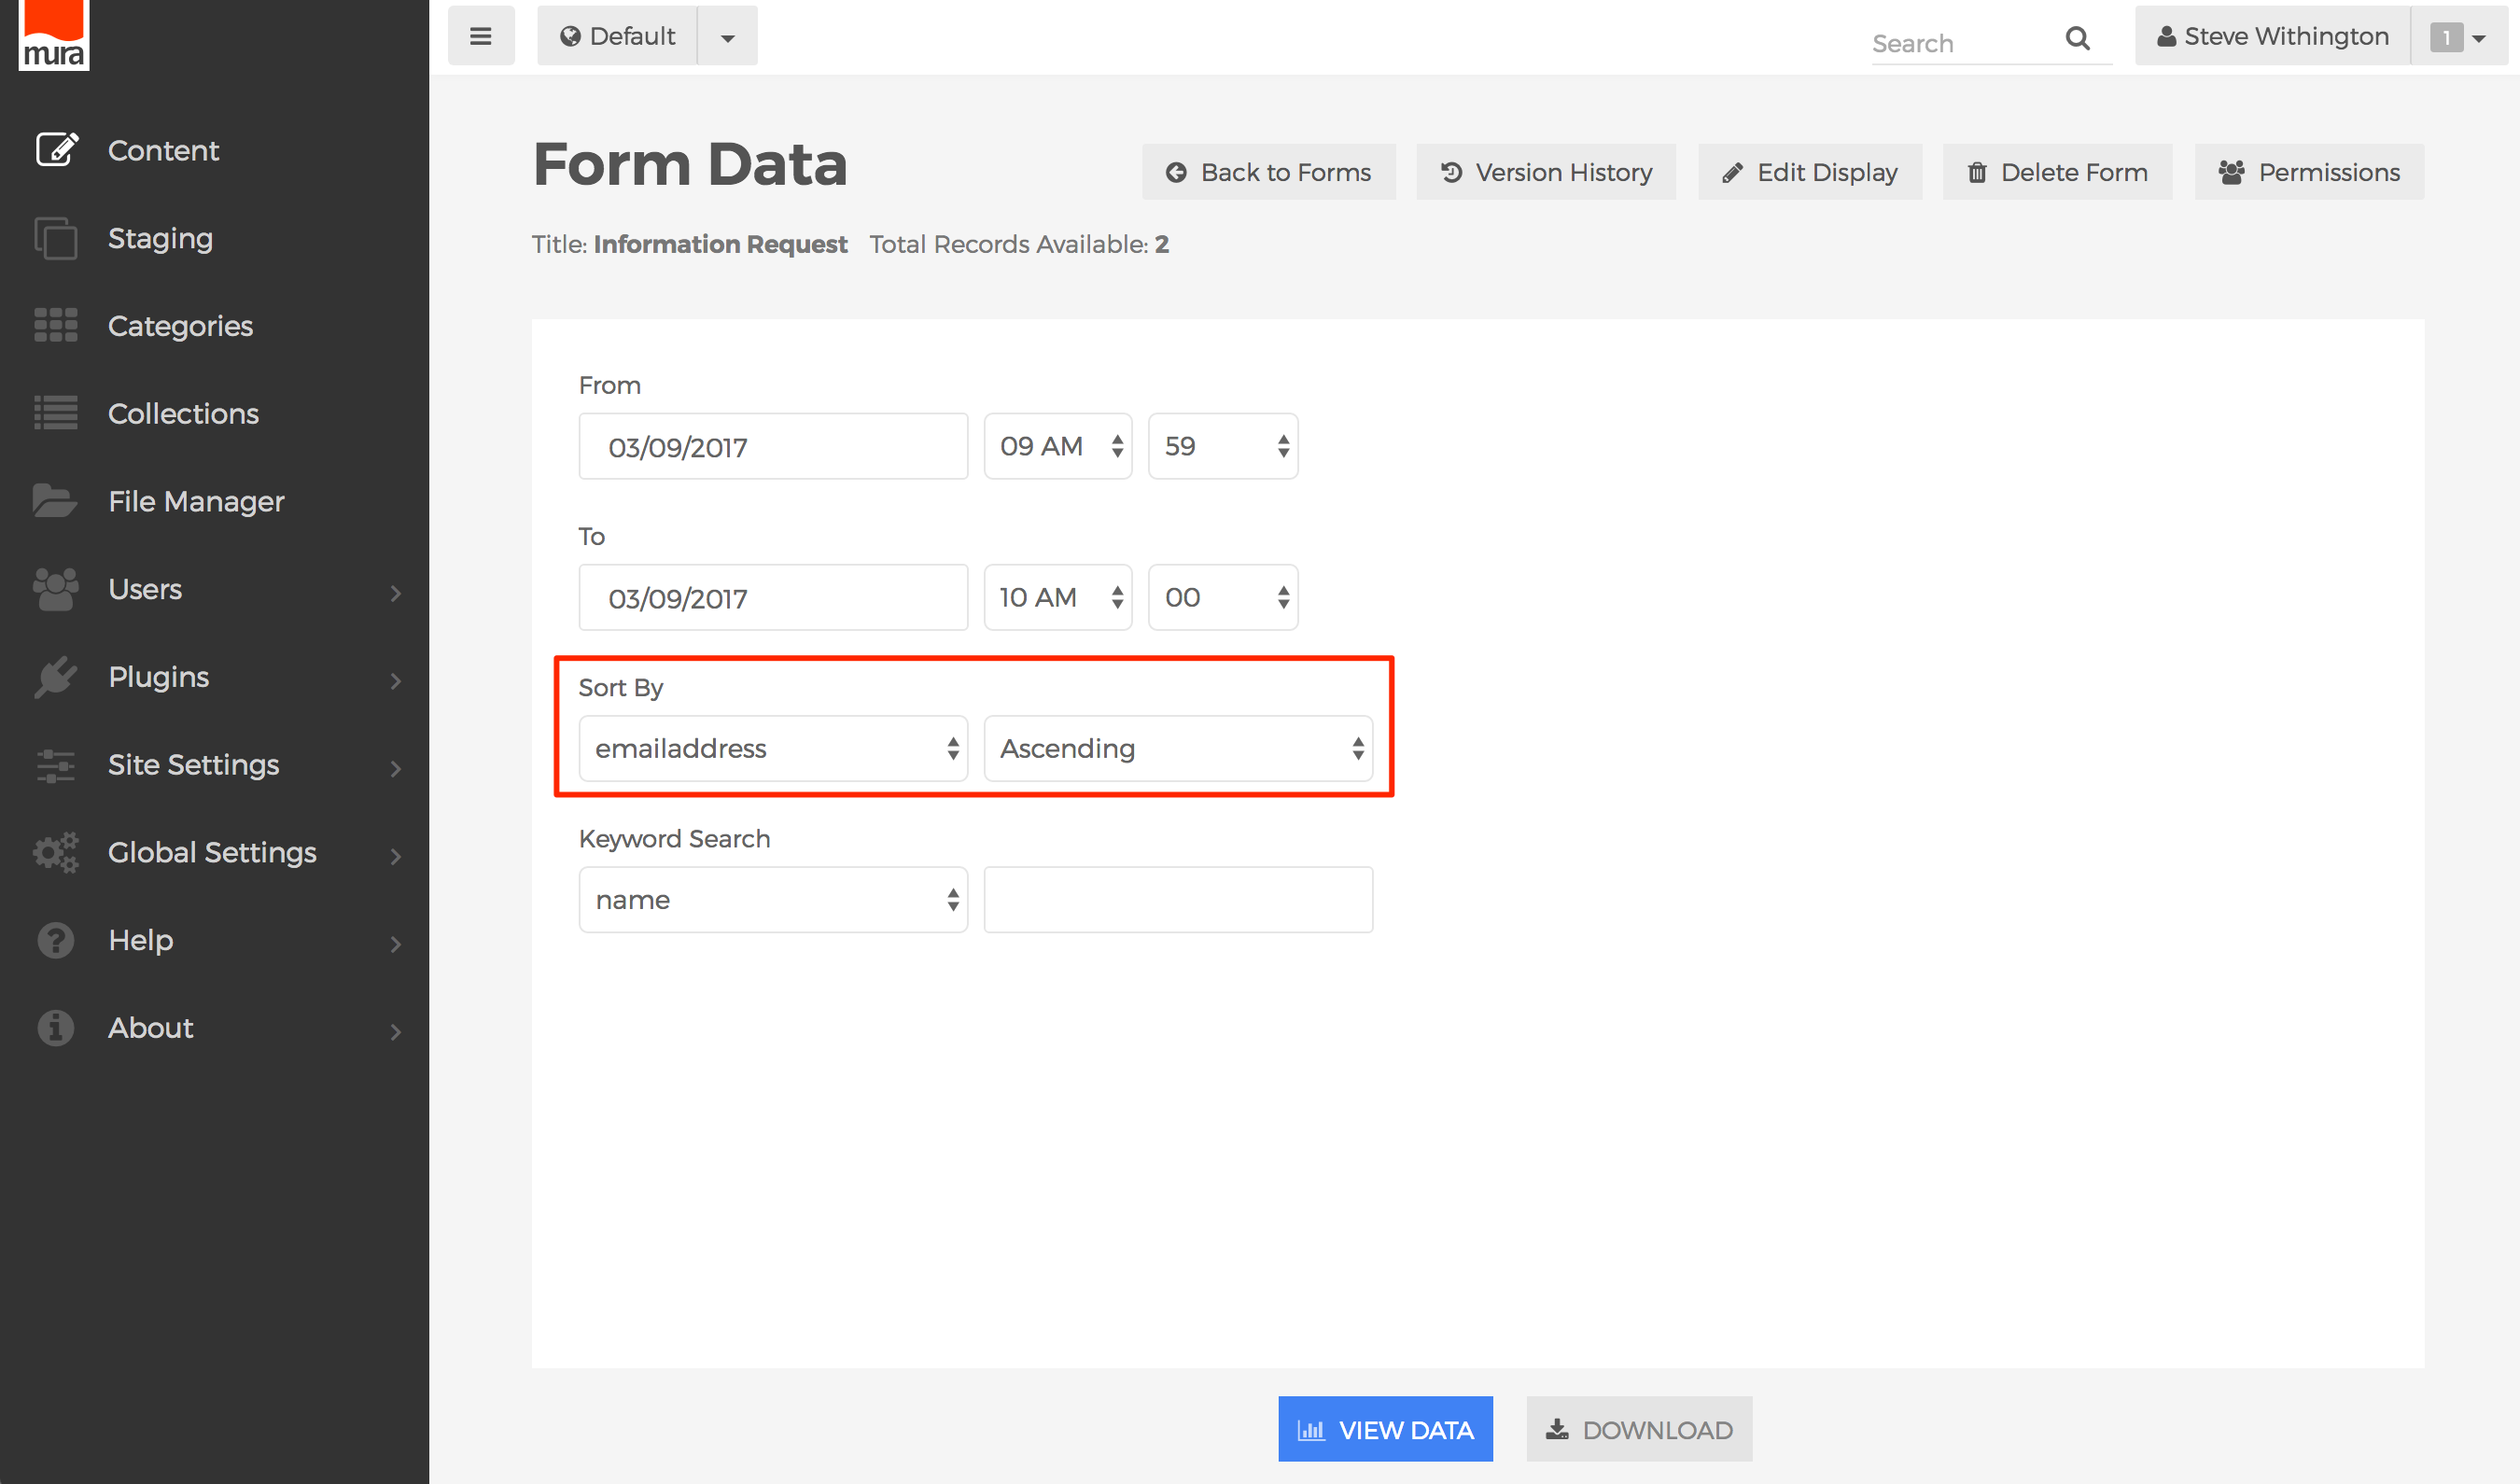
- From the Form Data screen, you can see the Total Records Available at the top of the screen.
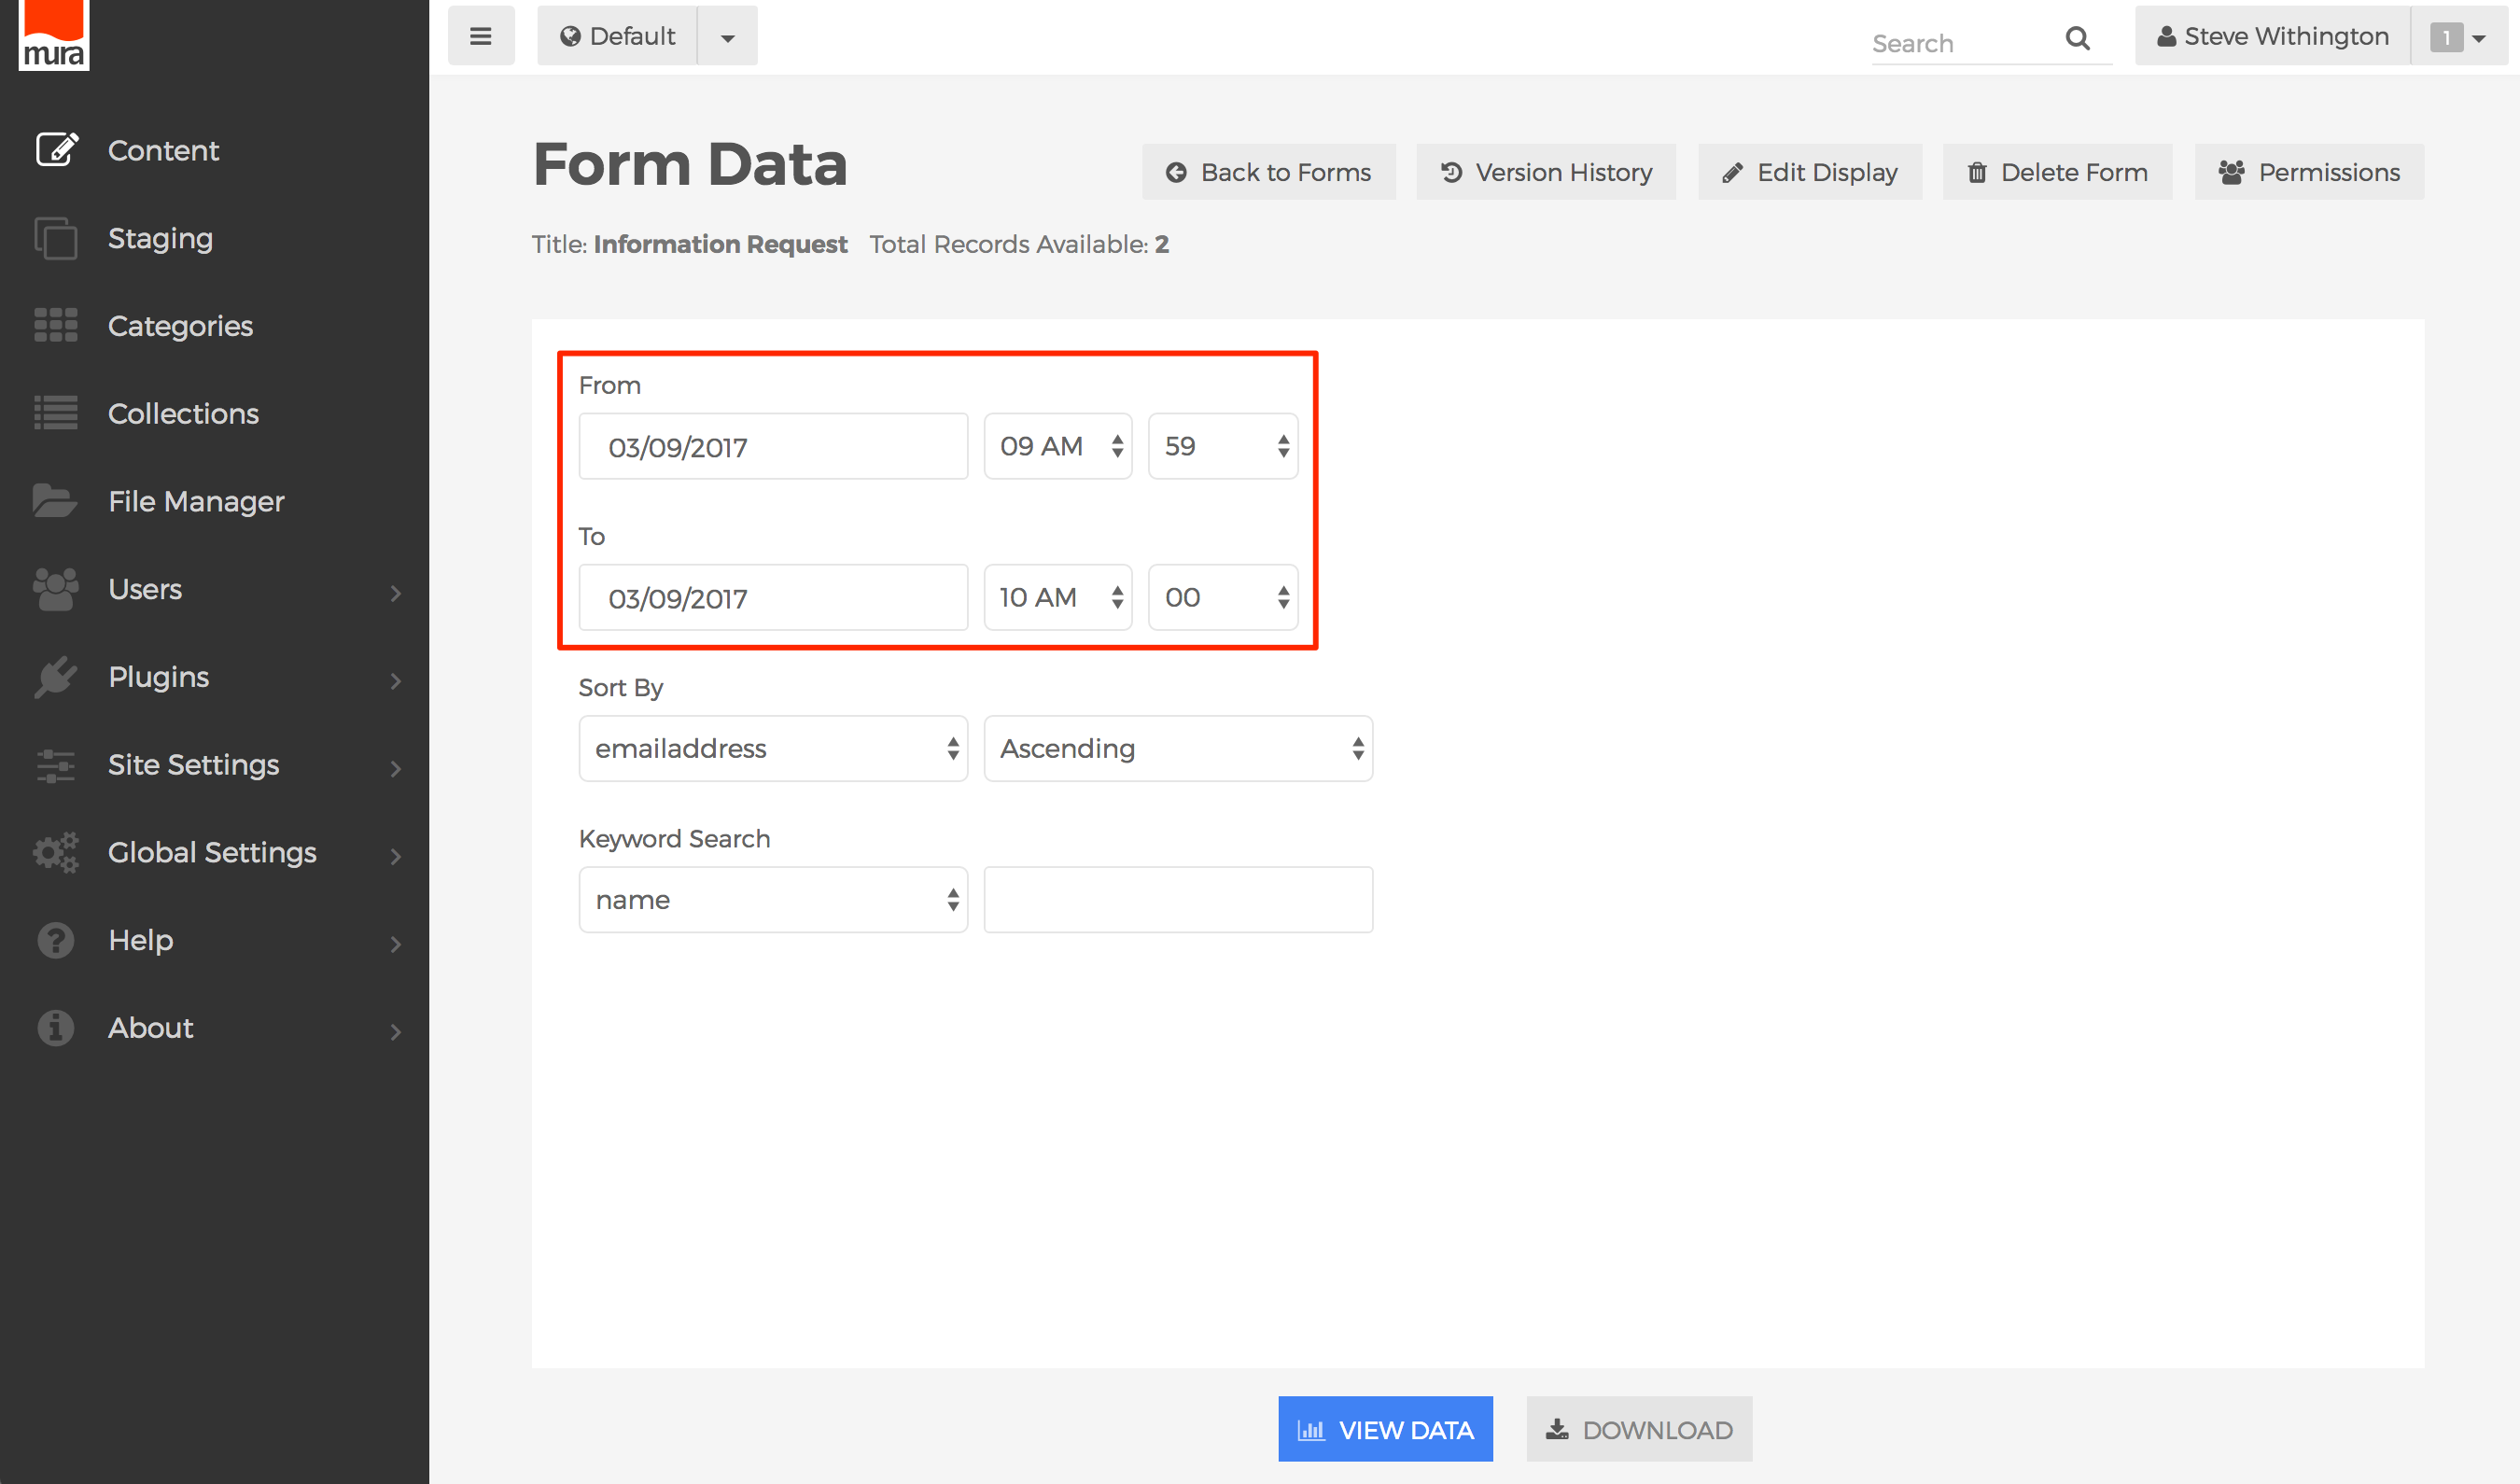
- By default, the From field is pre-populated with the oldest form submission stored in the database, and the To field is pre-populated with the most recent form submission stored in the database. You may change these to your desired time range to limit the results to be returned.
- You can also choose which form field you would like to sort the results by and the sort direction.
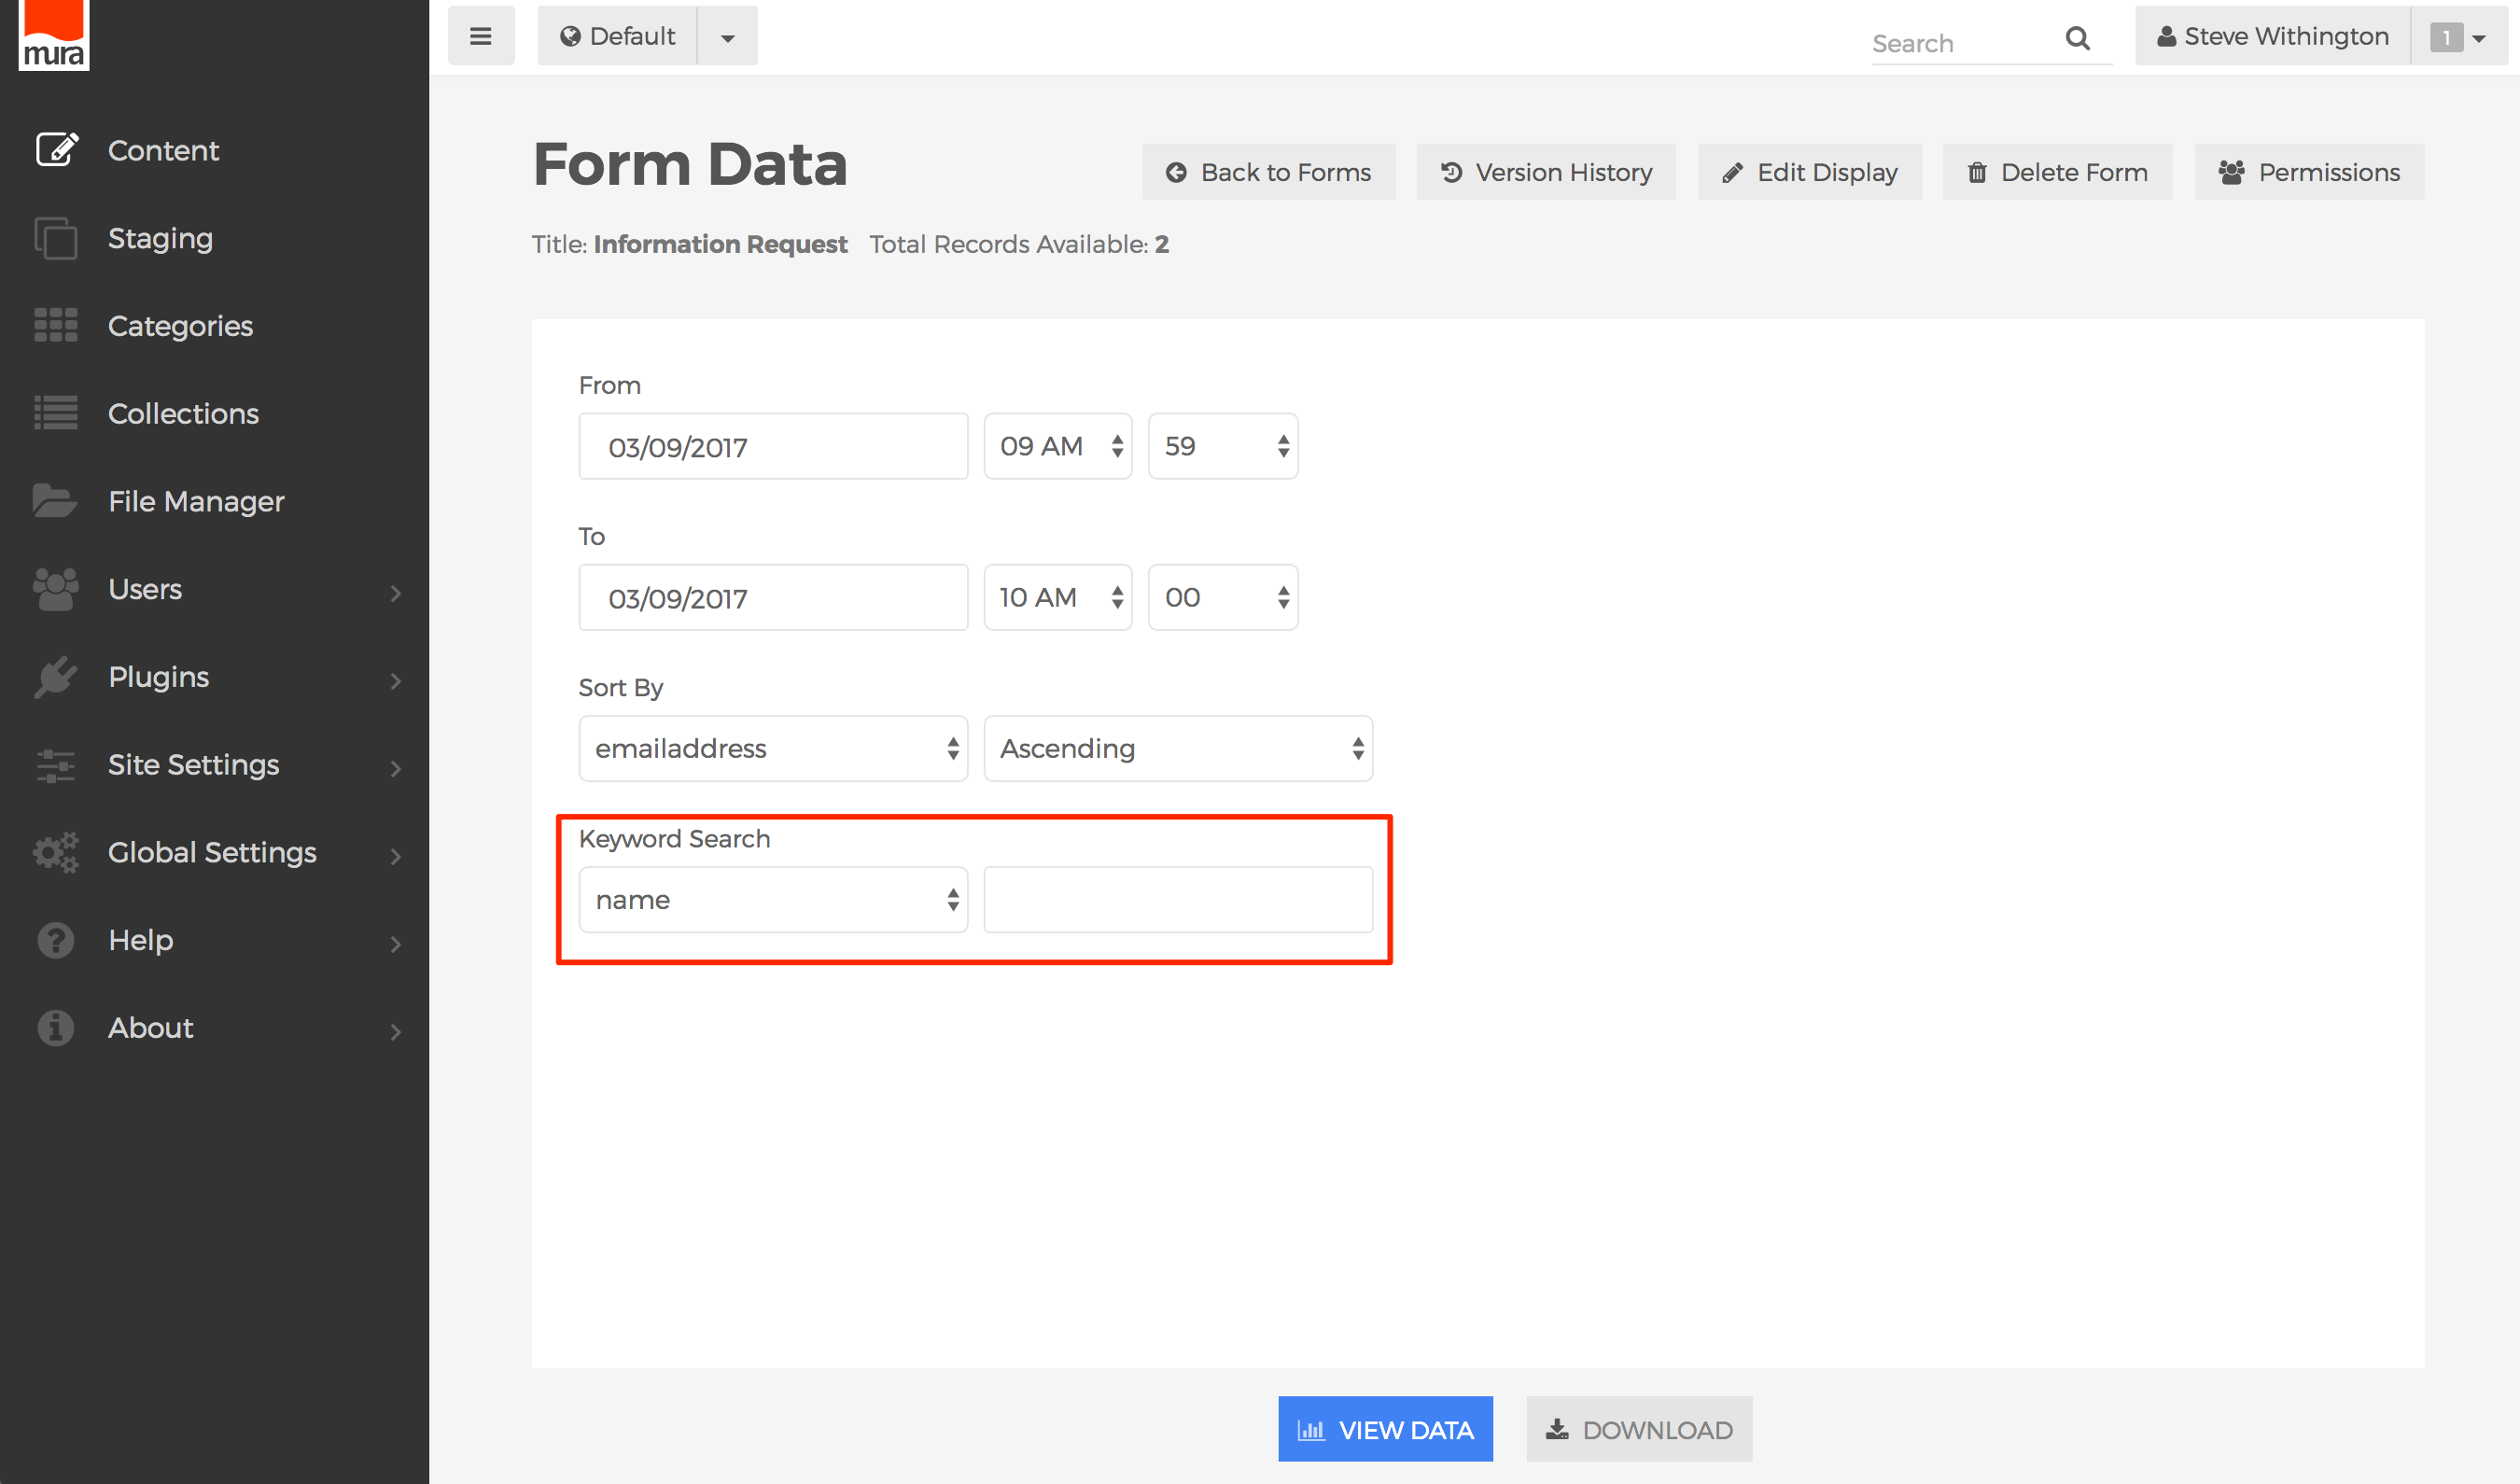
- You may also perform a Keyword Search of form submissions by specific form fields.
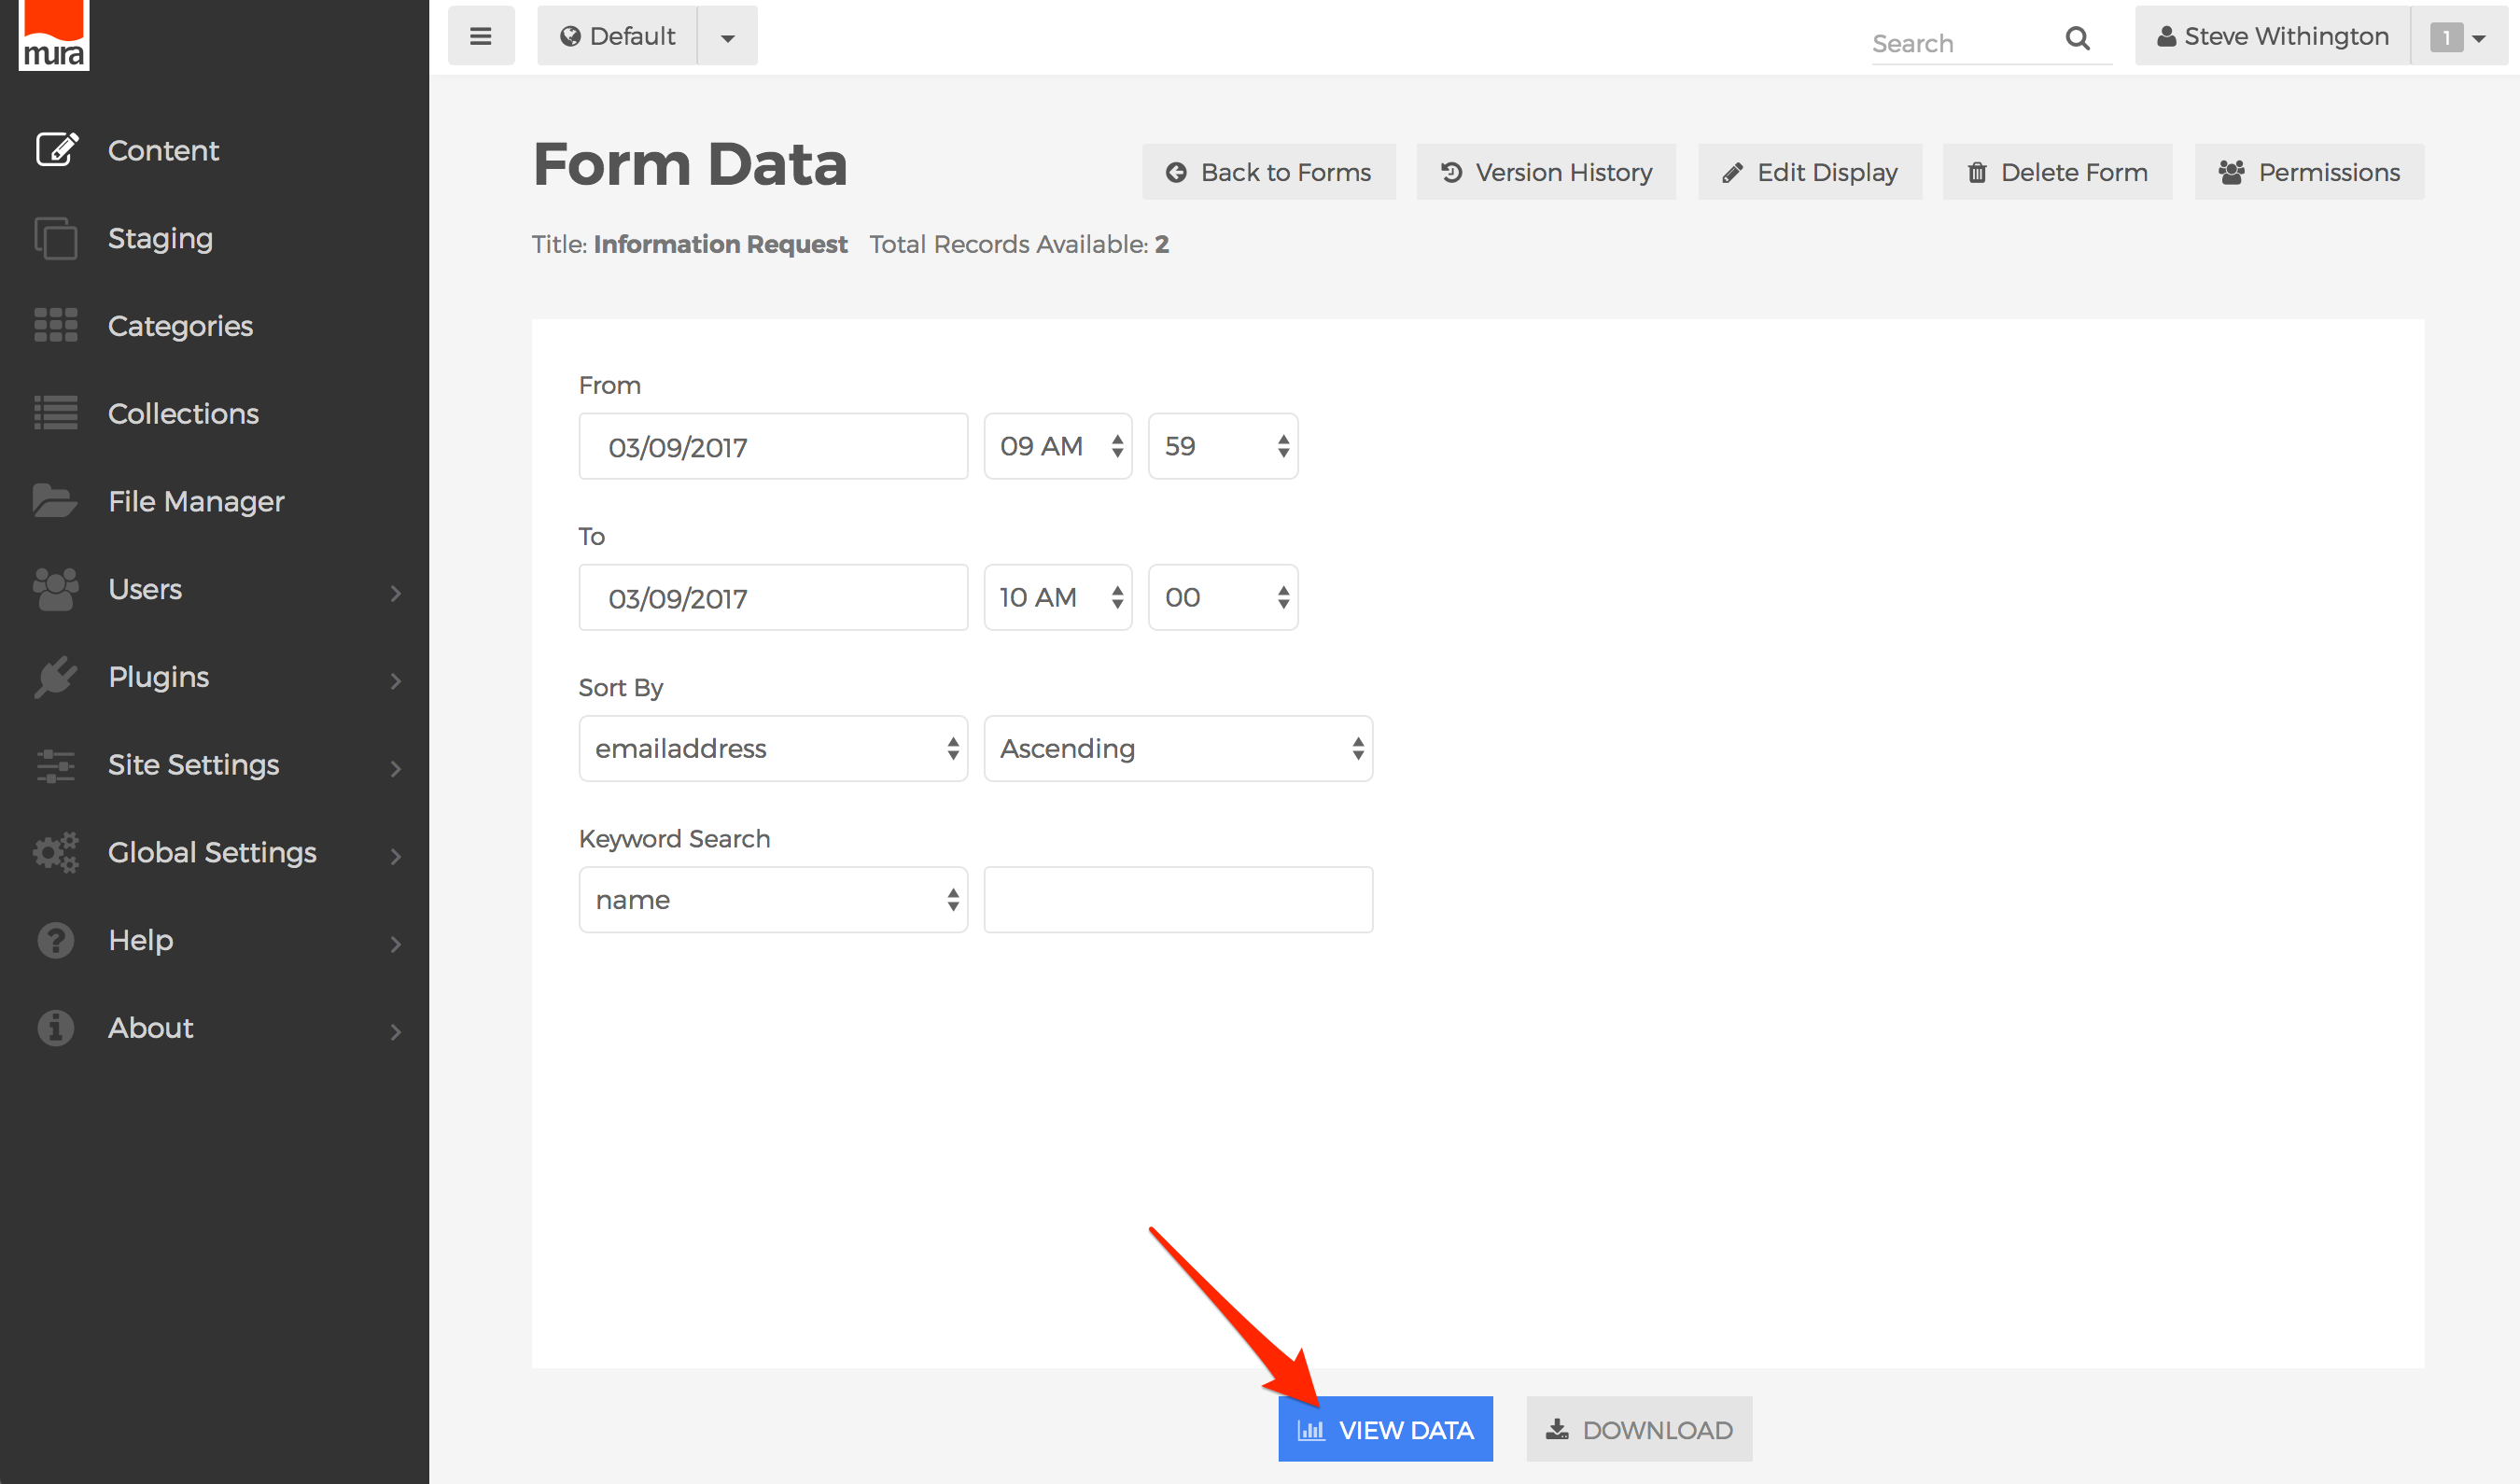
- To view the data on the screen, click the View Data button.
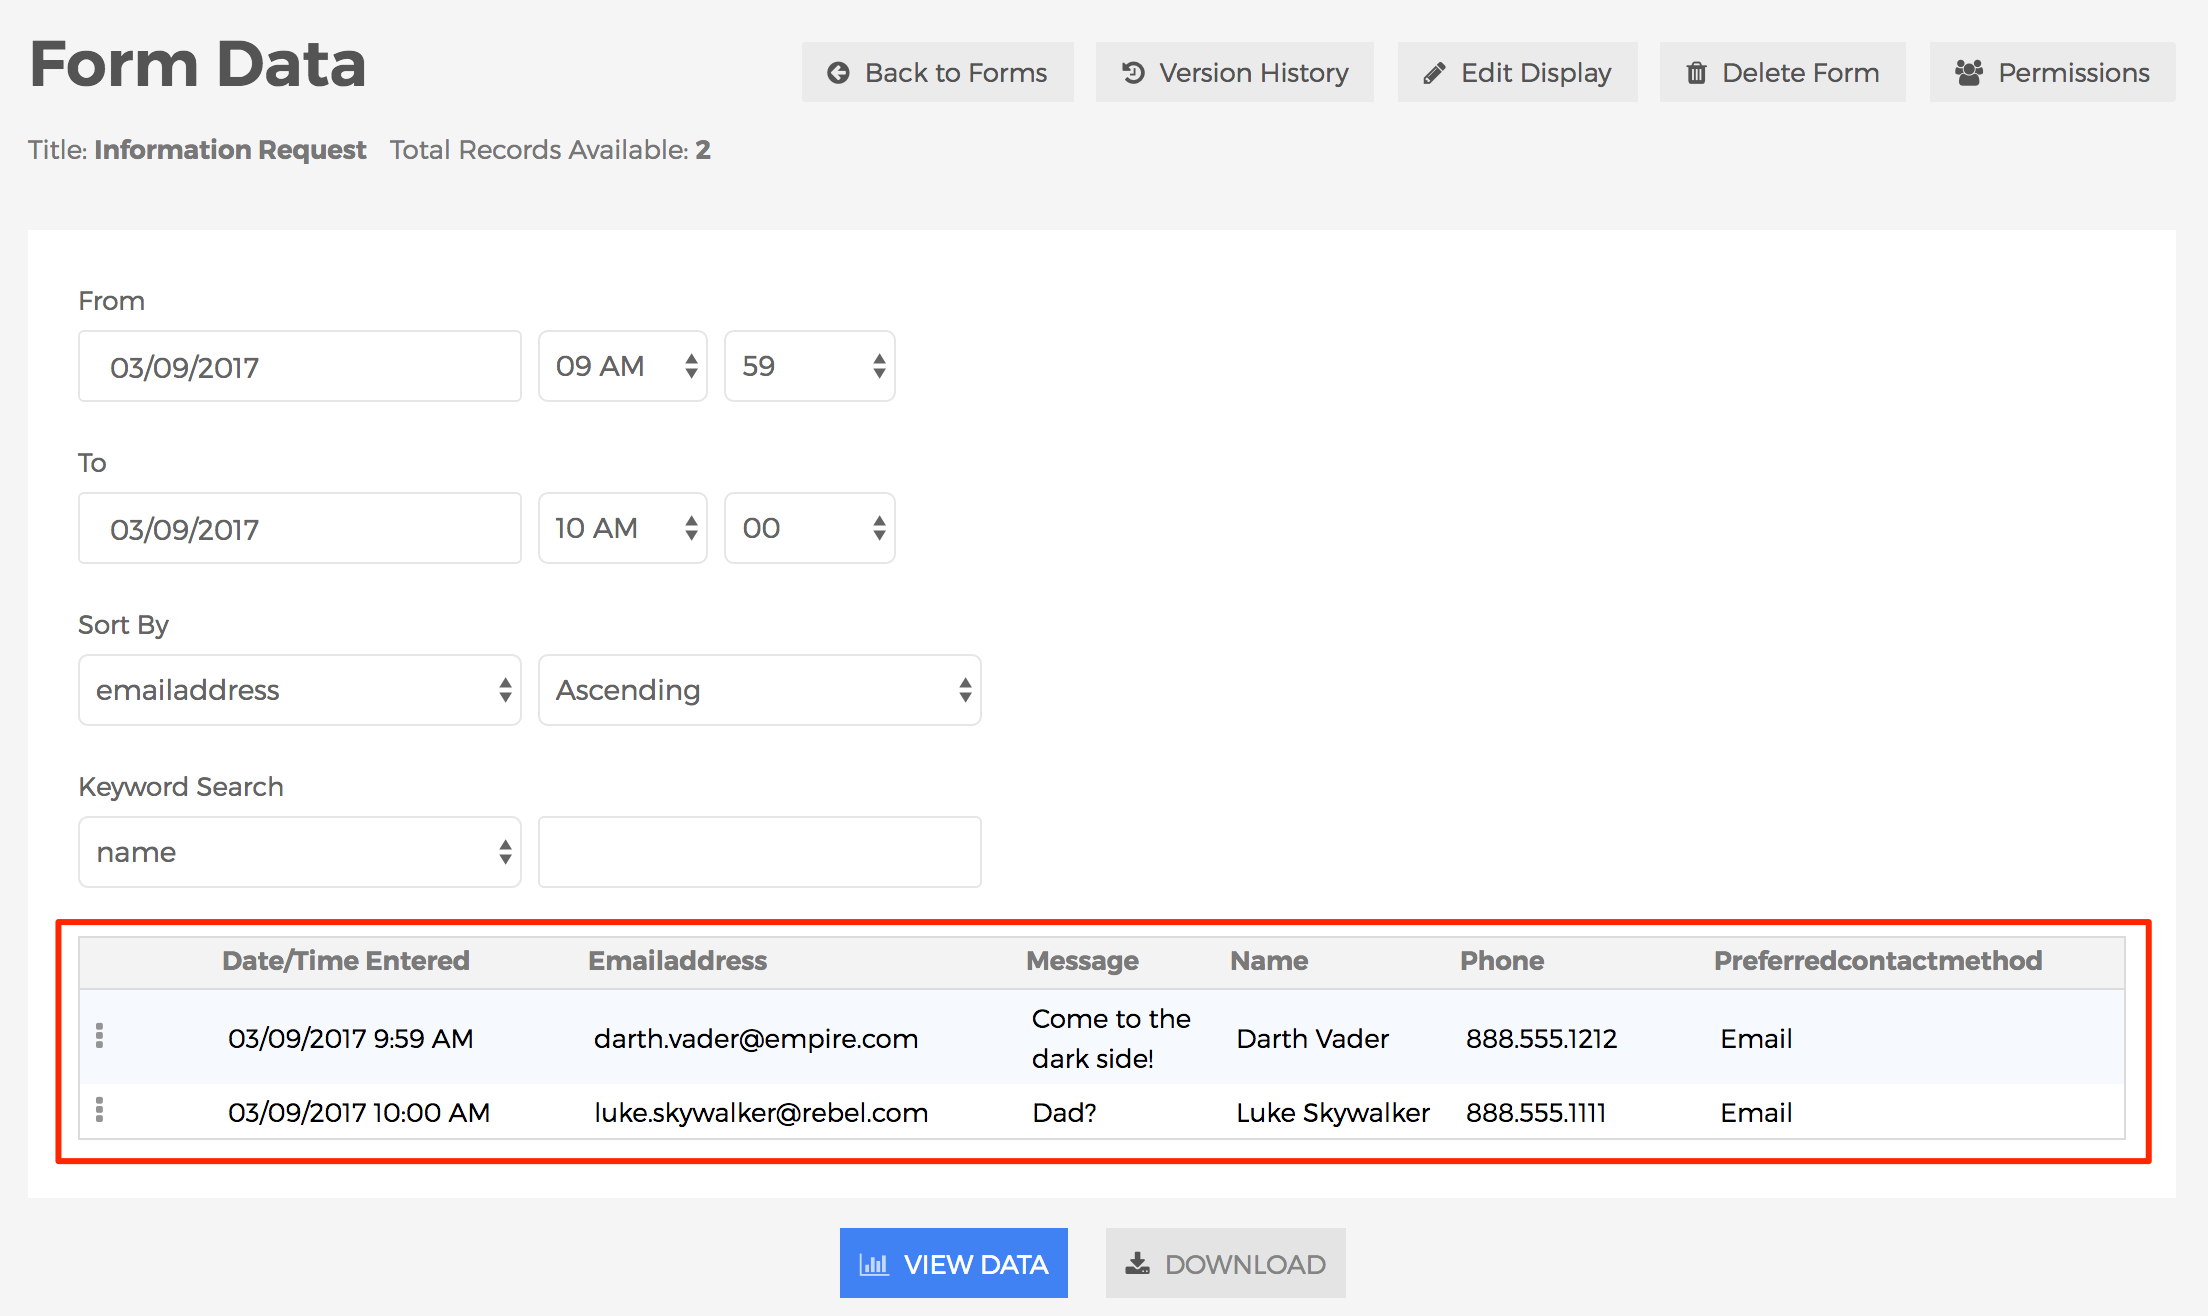
- The form data results should now appear on the screen.
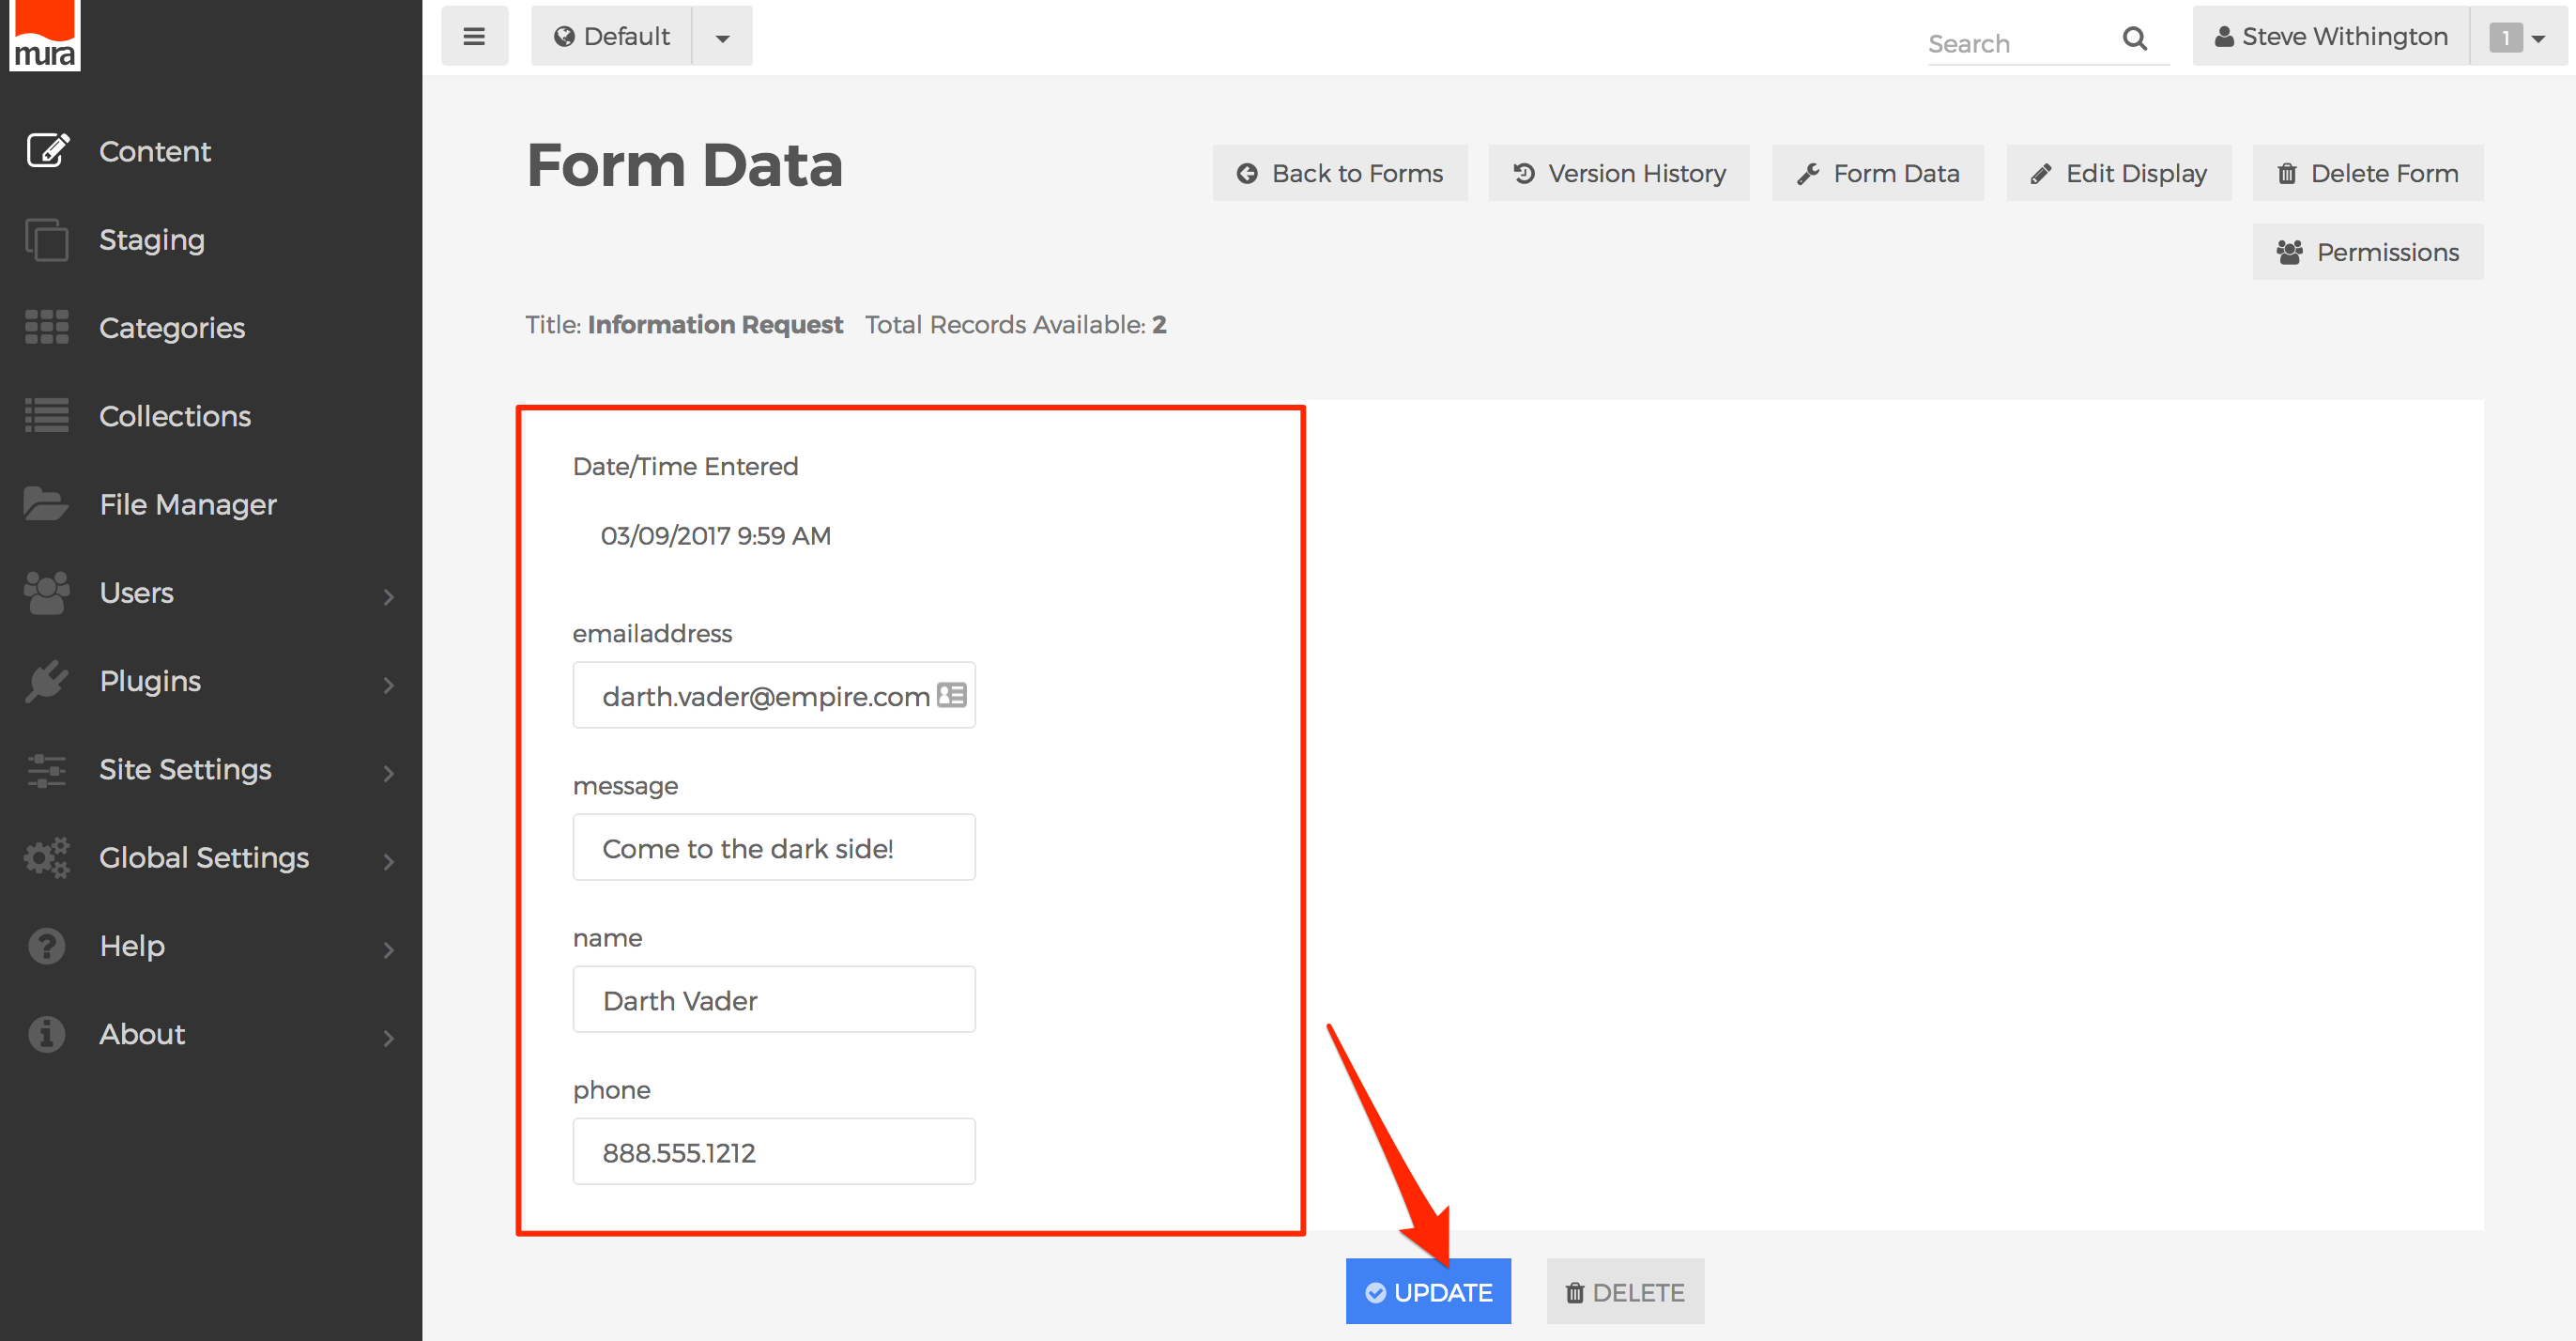
- You can edit and/or view more details of each result by clicking the three-dot menu and selecting Edit.

- From the form detail screen, you can make edits to your desired form fields, then Update or even Delete the form entry entirely.
- You can edit and/or view more details of each result by clicking the three-dot menu and selecting Edit.
- To download for results, from the Form Data screen, click the Download button.
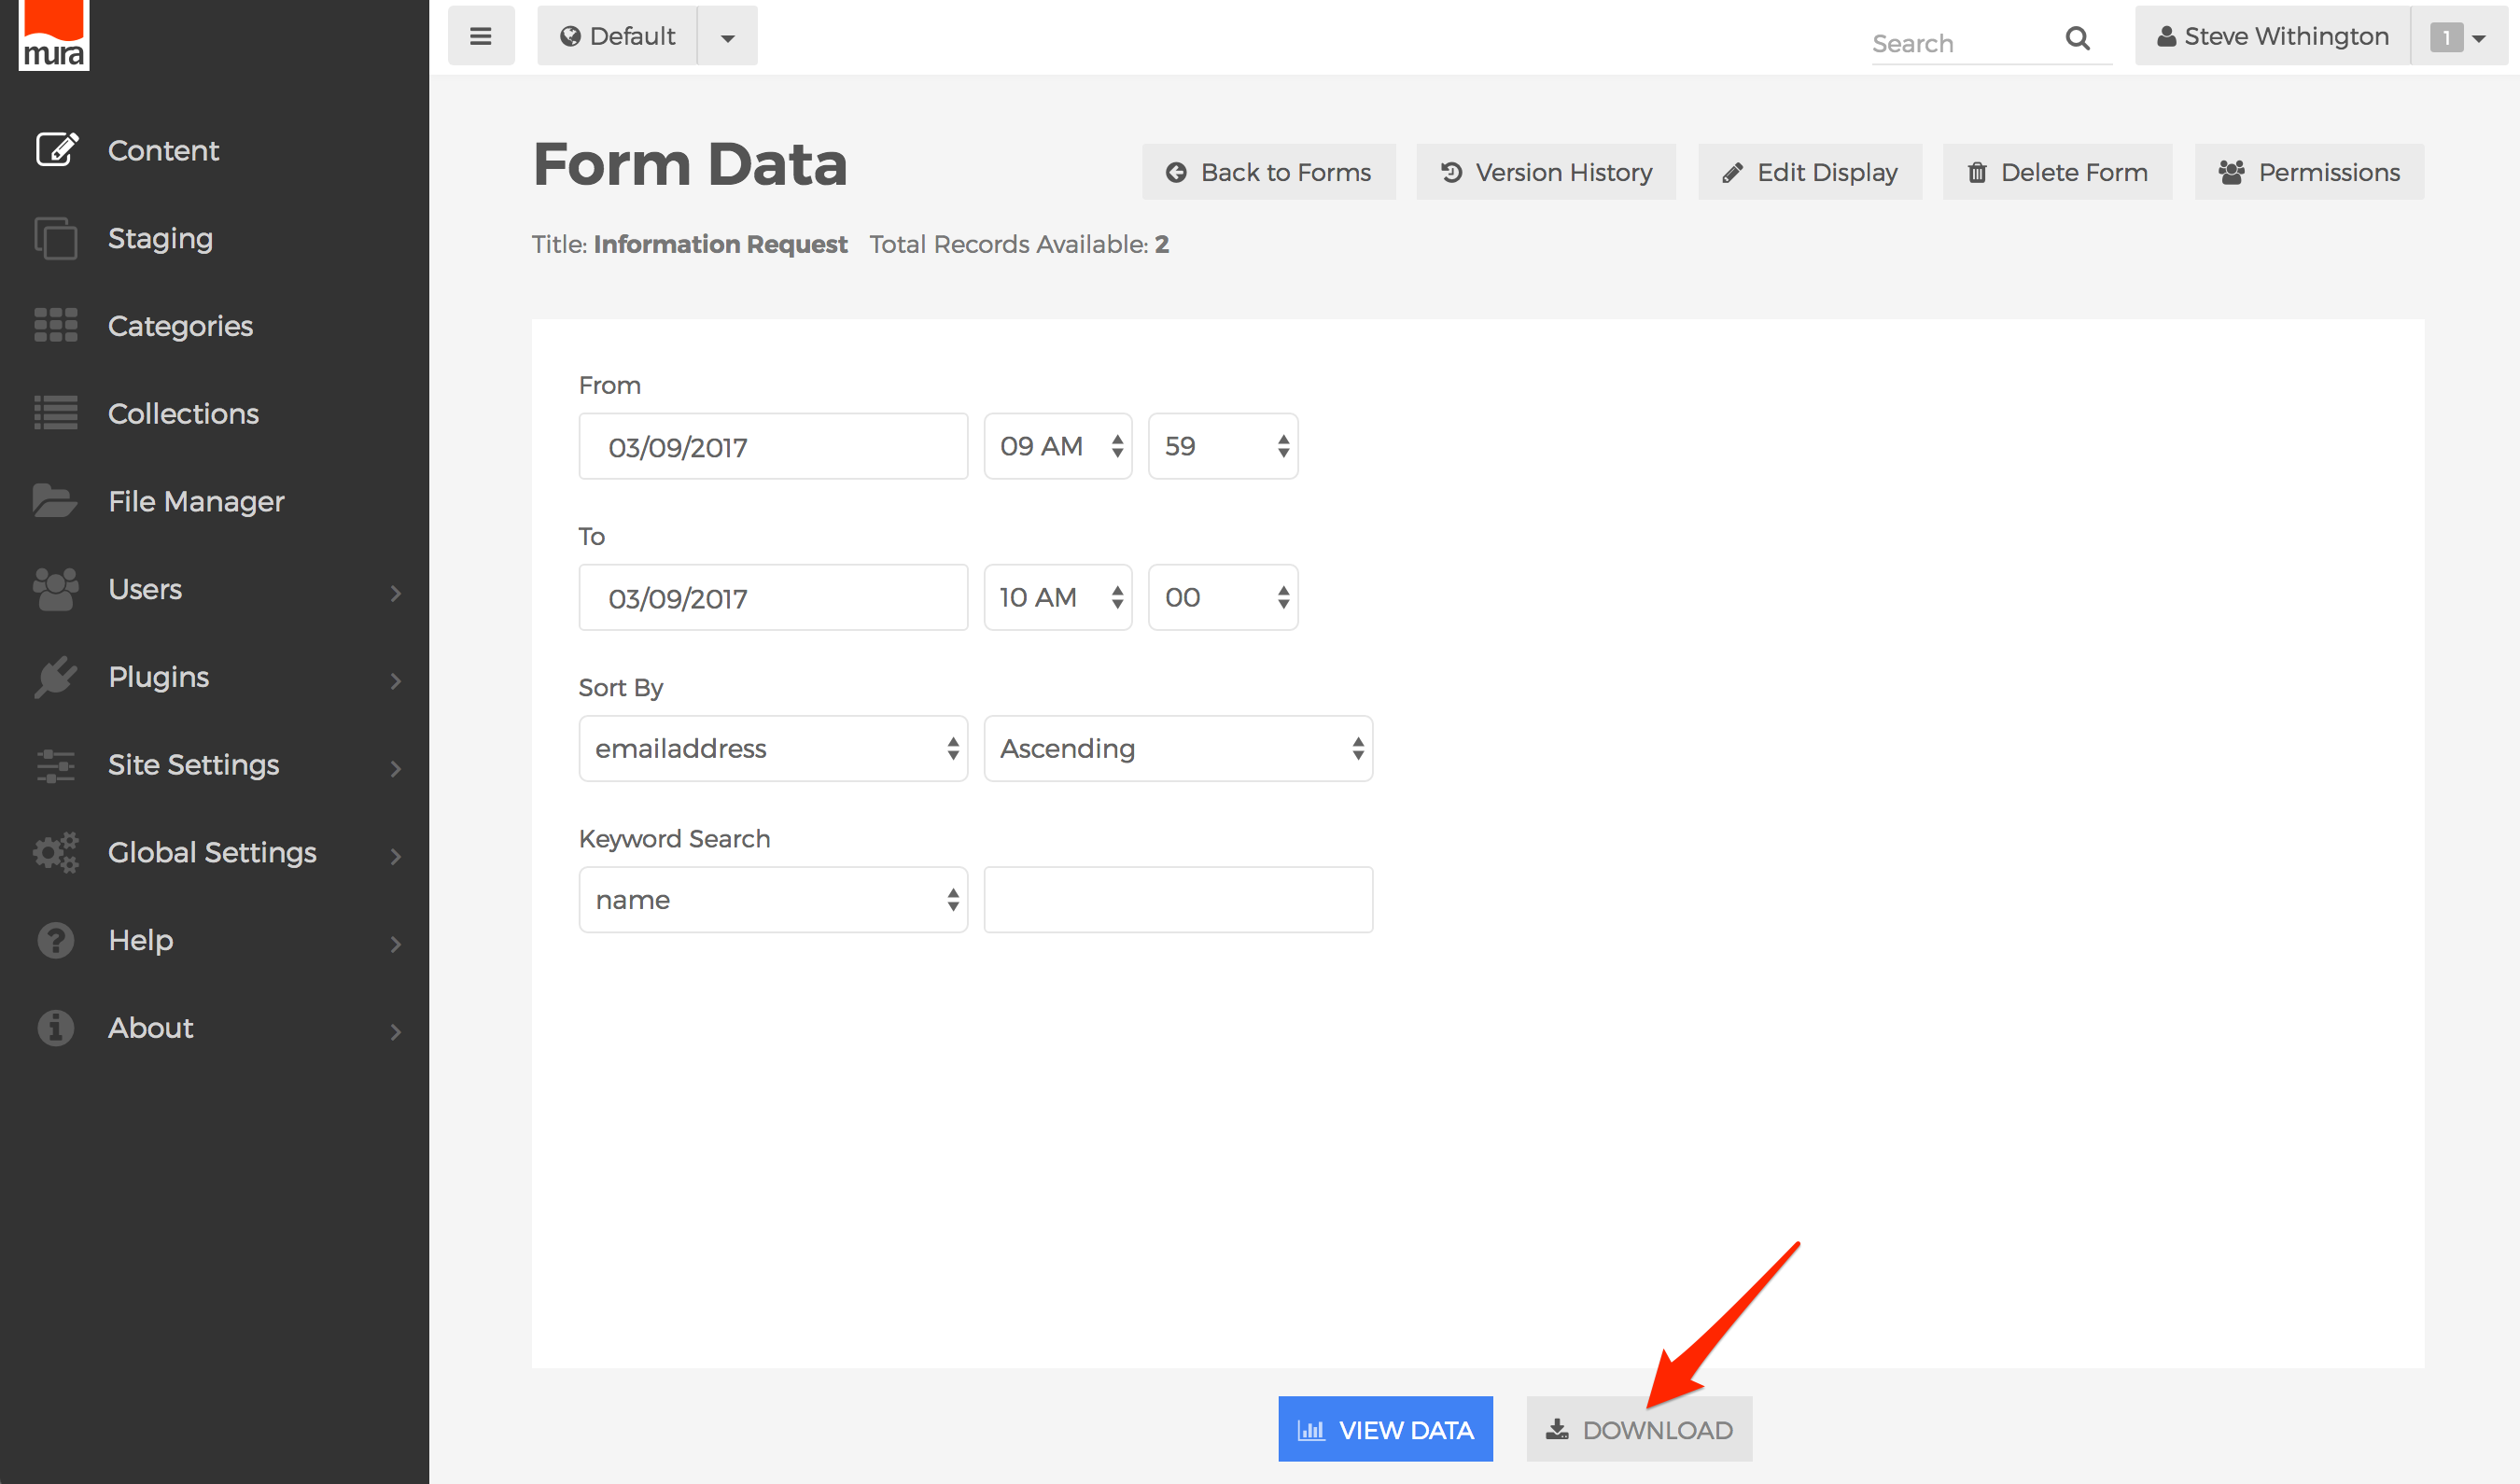
- You should be prompted to save the file. The data will be exported as a .CSV (comm-separated values) file. This makes it easy to open in popular spreadsheet software programs, and even import the data into a third-party system such as a Customer Relationship Management (CRM) tool.
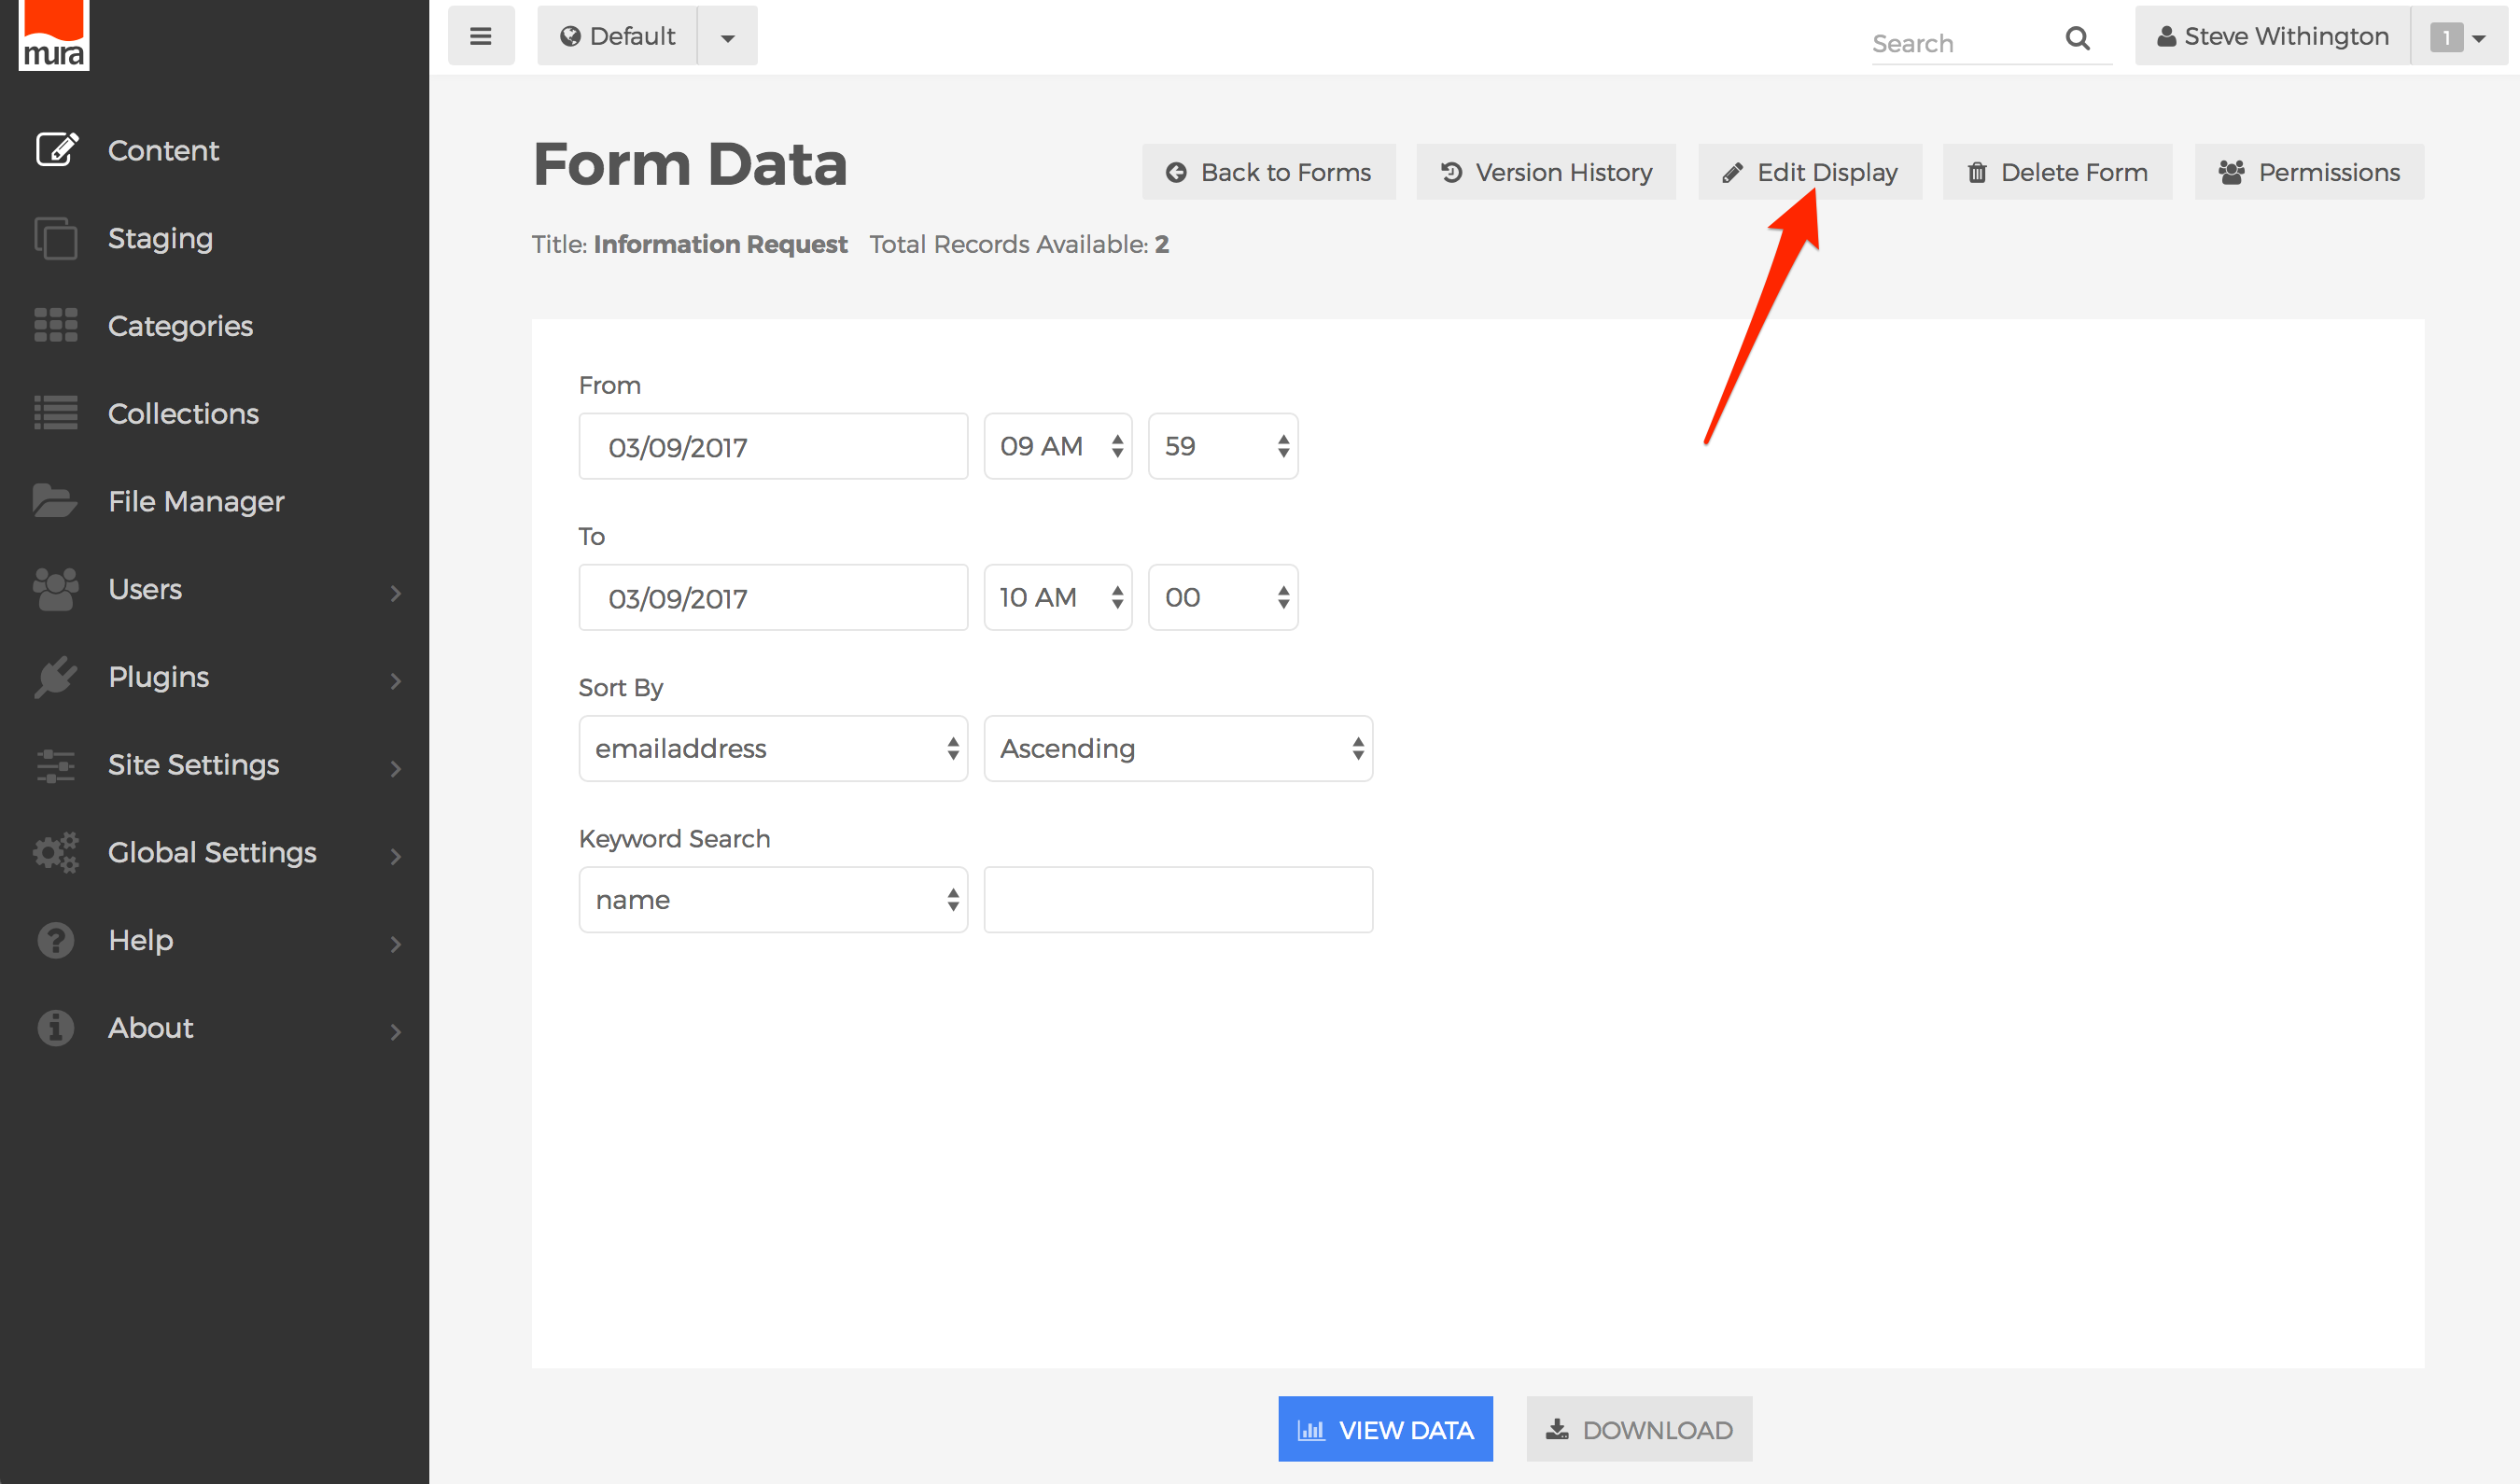
- You can also choose which form fields to display and/or export. To do so, click the Edit Display button at the top of the Form Data screen.
- You should now see a screen with a number of configuration options. Under the Available Fields menu, you can select a field you wish to display, then click the double right arrows pointing to the Summary Display Fields, or if you wish to modify the display of the "form detail" screen, you can select the double right arrows under the Detail Display Fields. To remove a form field from the display, simply click the form item in the display, and then click the double left arrows and it will be removed. You can also control the order of the display fields by selecting a field, and then clicking the Up or Down button, as desired. If you leave the Summary Display Fields empty or blank, by default, Mura will display and/or export all form fields.
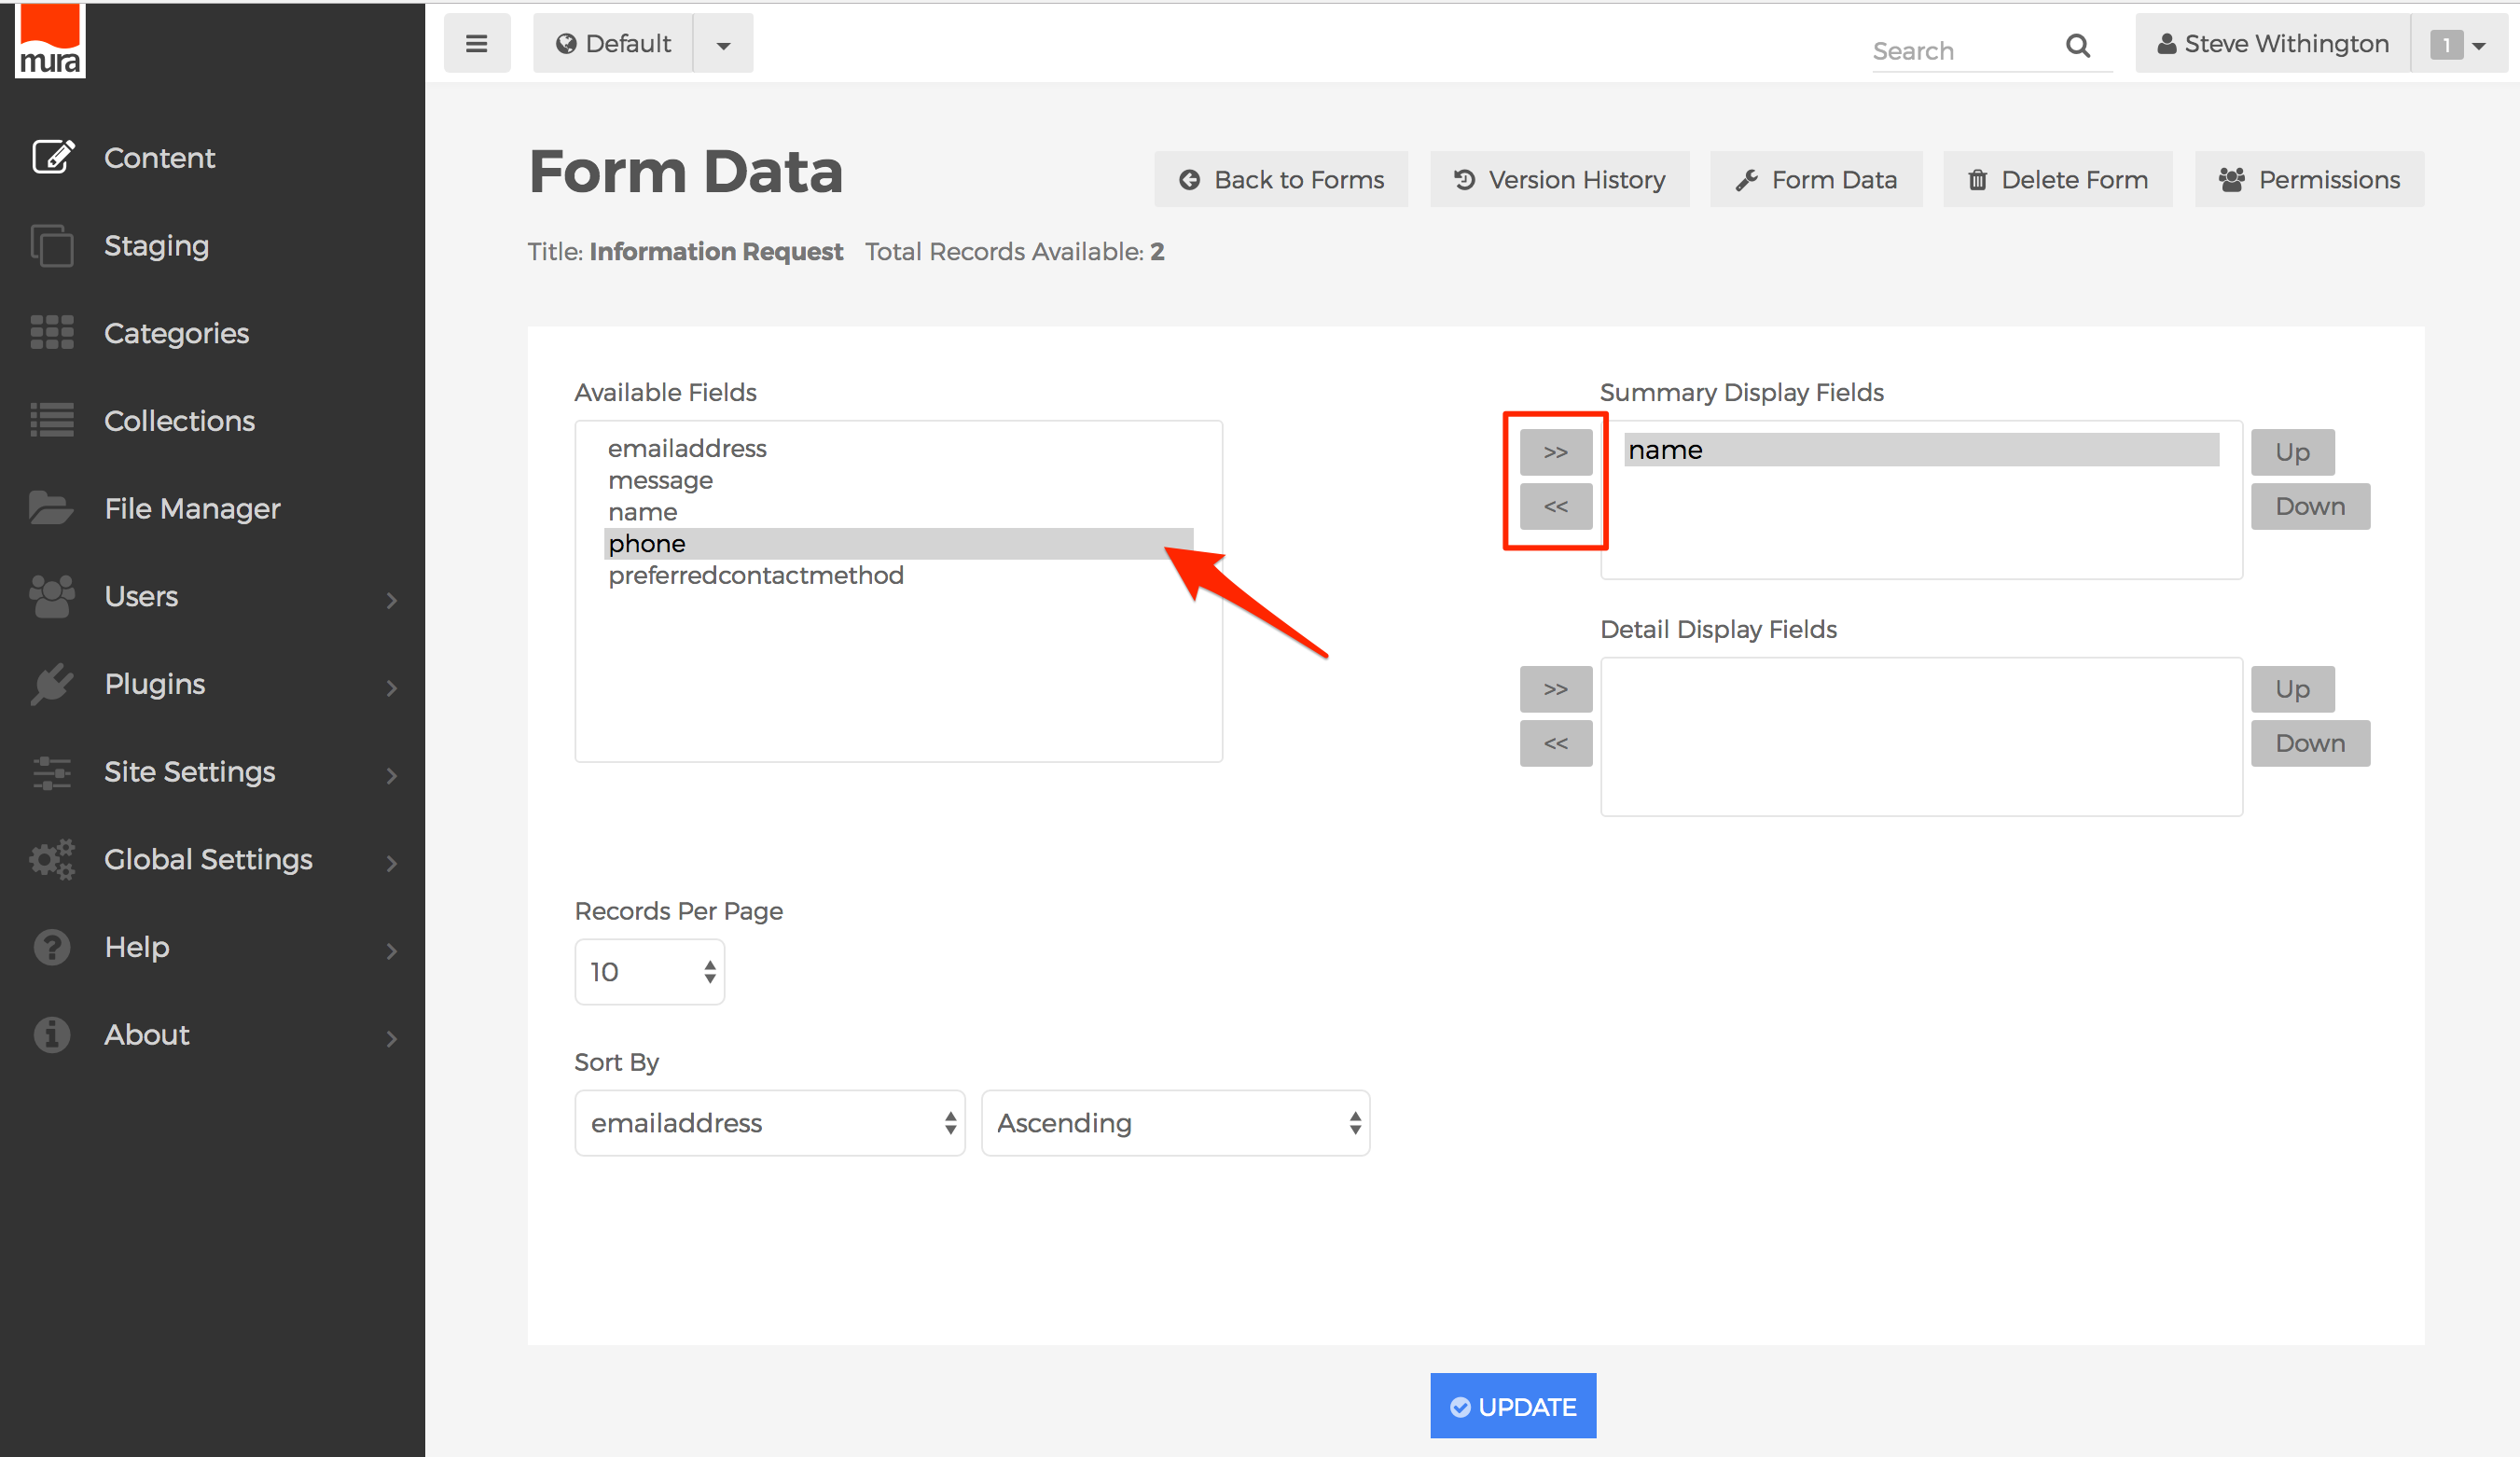
- Once you've made your desired changes, click Update to save the new displays.
- Next time you either View Data or Download, you will only see the form fields selected, plus the default "Date/Time Entered" form field, which is created by Mura for all form entries.