Plugin Anatomy
Mura plugins are distributed as ".zip" files. However, the .zip archive itself contains the underlying files which comprise the plugin. In this section, we'll cover the anatomy of a Mura plugin, and the directories and files Mura requires in order to function properly.
When you begin creating a plugin, all of your plugin's directories and files must be packaged together under a common directory, and will ultimately be deployed under Mura as:
{context}/plugins/{YourPluginDirectoryName}/
Be careful when naming your plugin's containing directory, as some operating systems will not accept special characters in the name. This is also important, because Mura will automatically create a CFML Application variable using "this.mappings" to your plugin using the value of your directory name.
A basic directory structure of a Mura plugin is detailed below, and assumes all listed directories/files are located under {context}/plugins/{YourPluginDirectoryName}/
| Directory or File |
Req/Opt |
Description |
| /plugin/ |
Req |
This directory is required, and contains configuration files required for plugin registration and deployment. |
| /plugin/config.xml.cfm |
Req |
Technically, this is the only required file, and contains the configuration settings and data required for your plugin. |
| /plugin/plugin.cfc |
Opt |
If this file exists, Mura will attempt to invoke specific methods during various phases of the plugin deployment, update, and/or deletion lifecycles. This allows developers to do things such as create custom database tables, connect to your custom API for authentication, and more. |
| /plugin/config.cfm |
Opt |
This file is completely optional, and merely contains some plugin configuration variables to be included in your application, if desired. |
| index.cfm |
Opt |
While this file is technically optional, it is highly recommended you include it. When an administrator navigates to your plugin via the back-end administration area, this is the file that will be rendered. So, if it doesn't exist, administrators will be presented with an error. |
| license.txt |
Opt |
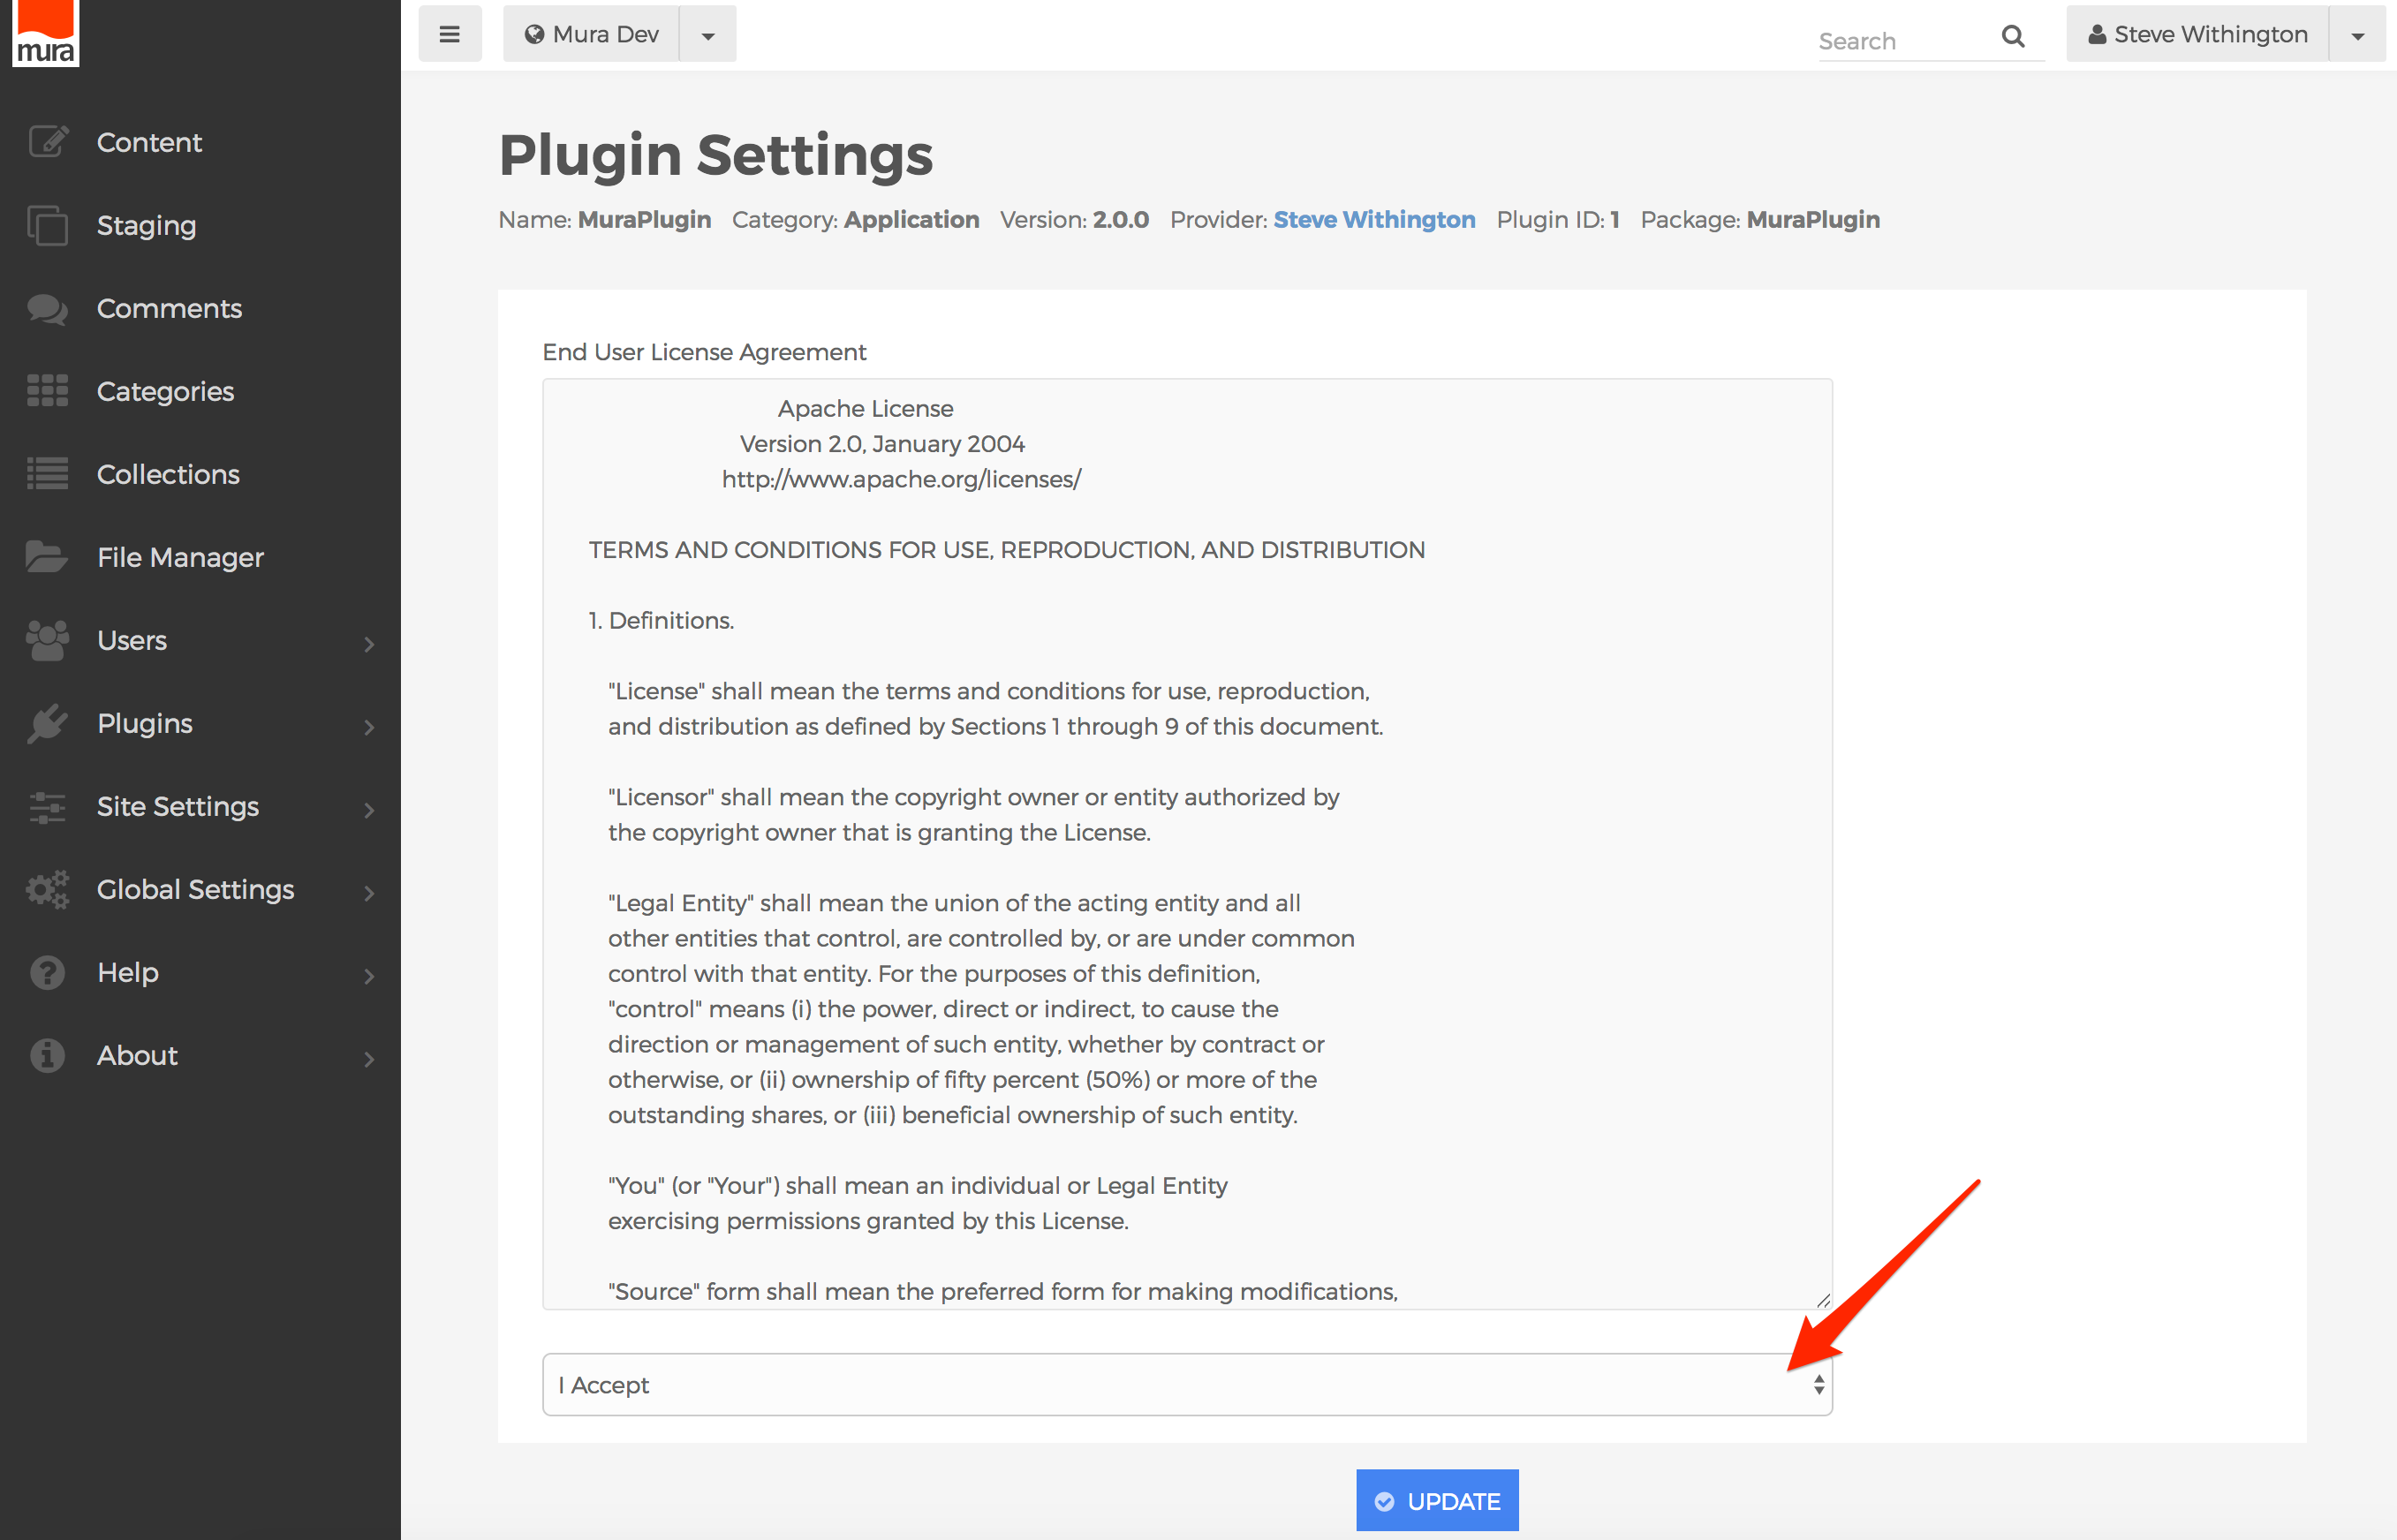
If this file exists, the content will be used as an End Users License Agreement (EULA). When an administrator deploys the plugin, they will be presented with the EULA, and have to "accept" the terms before continuing to install and deploy the plugin. |
| /content_types/ |
Opt |
If this directory exists, Mura will automatically and discover any custom content types found within it, and register them accordingly to any sites the plugin has been enabled for. See the Mura Content Types section for more information. |
| /modules/ |
Opt |
If this directory exists, Mura will automatically discover any modules found within it, and register them accordingly to any sites the plugin has been enabled for. See the Mura Modules section for more information. |
Note: By default, Mura does not automatically scan for a "model" directory within plugins. This is intentional to avoid any collisions, as your plugin may have its own bean factory which scans for this directory as well.
The files outlined above represent a very basic plugin. Your plugin may contain many more directories and files than those listed here. Be sure to review the links for each file noted above for more details on their importance, and why may wish to include them in your own plugin.
Outside of the required and recommended directories and files, your plugin can be a completely separate, and independent application. If your application will merely be a portal of some kind, then maybe all you'll need is the "index.cfm" file and "config.xml.cfm" file.
However, in most cases, you're going to want to include some functionality to either add to, or even replace, Mura's business logic. As such, you'll want to do things such as register a custom event handler, so you can also register a custom "model" directory, and more. Be sure to review The Plugin's "config.xml.cfm" File section for more details.
The Plugin's "config.xml.cfm" File
This file is where you create the required plugin setup variables. In addition to that, you can optionally register custom event handlers, class extensions, custom image sizes, custom tag paths, custom mappings, and more.
If you haven't already done so, you should familiarize yourself with the Elements Of The "config.xml.cfm" File section. Each of the subordinate elements within the <mura> element apply to plugins. However, instead of a top level <mura> element, the document should contain the mandatory <plugin> element. There are no attributes available for this element.
Plugin-Specific Subordinate Elements
In addition to the elements available to the standard config.xml.cfm file, there are many other elements available for plugins. Please review the list below for details, and examples.
| Element |
Req/Opt |
Description |
| name |
Req |
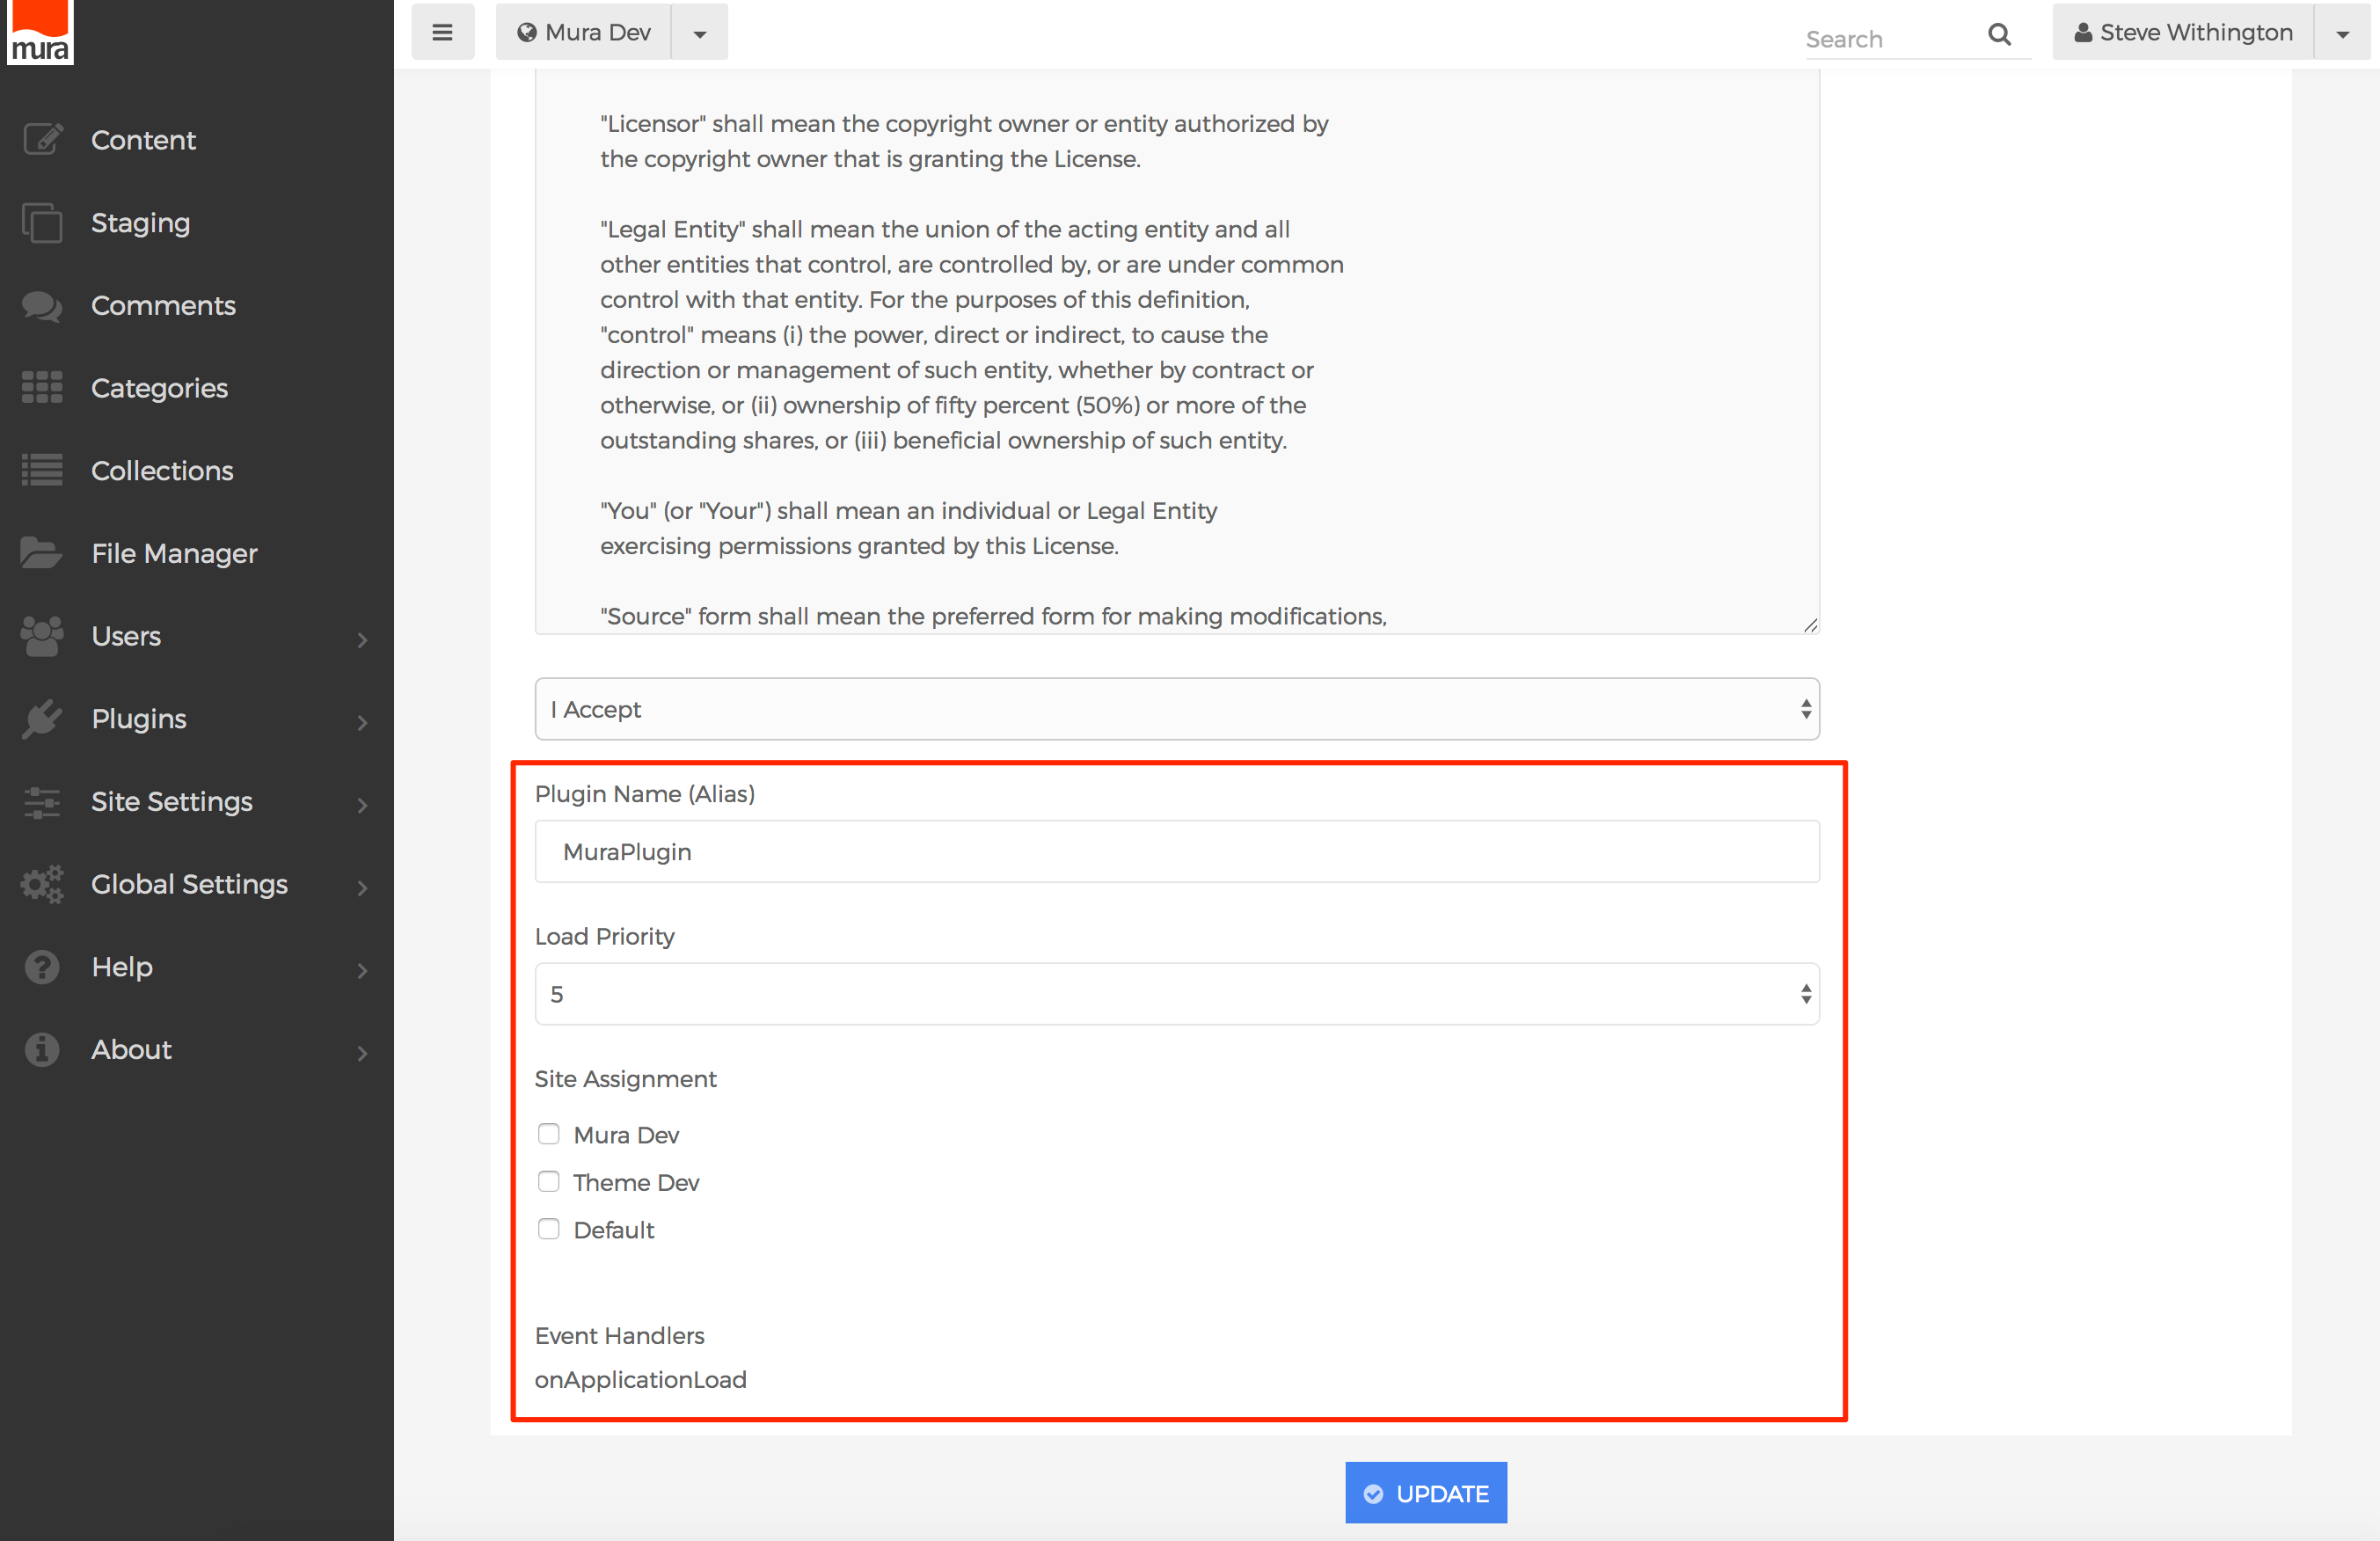
This is the default "Name (Alias)" of the plugin. When an administrator installs/deploys the plugin, they are given the opportunity to update this value. |
| package |
Req |
This should be a unique, variable-safe string to use as way to reference the plugin. This value is used for the directory name when the directoryFormat element is set to the recommended value of 'packageOnly'. |
| directoryFormat |
Req |
This setting controls the naming format for the plugin directory itself. Valid options are 'default' (names your plugins as {packageName}_{autoIncrement}) or 'packageOnly' (names your plugins using the value entered in package element. The recommended value to use is 'packageOnly'. |
| loadPriority |
Req |
This setting determines the order plugins will be invoked during the onApplicationLoad event. This allows plugins to use other plugins as services or dependencies. However, this does not affect the order in which regular events are triggered. Valid options are 1 through 10. |
| version |
Req |
May contain any versioning values you wish. This is merely meta data for users of your plugin to identify which version they are currently using. |
| provider |
Req |
The name of the creator or organization who developed the plugin. |
| providerURL |
Req |
The URL of the creator or organization who developed the plugin. |
| category |
Req |
Most plugins fall under either 'Application' or 'Utility'. However, you may enter any string value desired. If anything other than 'Application' or 'Utility', a new tab will be displayed with the category name when viewing a site's applied plugins. |
| eventHandlers |
Req |
See eventHandlers Element below. |
| ormCFCLocation |
Opt |
May contain a list of paths where Mura should look for custom ColdFusion ORM components. This does not pertain to Mura ORM. |
| customTagPaths |
Opt |
May contain a list of paths where Mura should look for ColdFusion custom tags. |
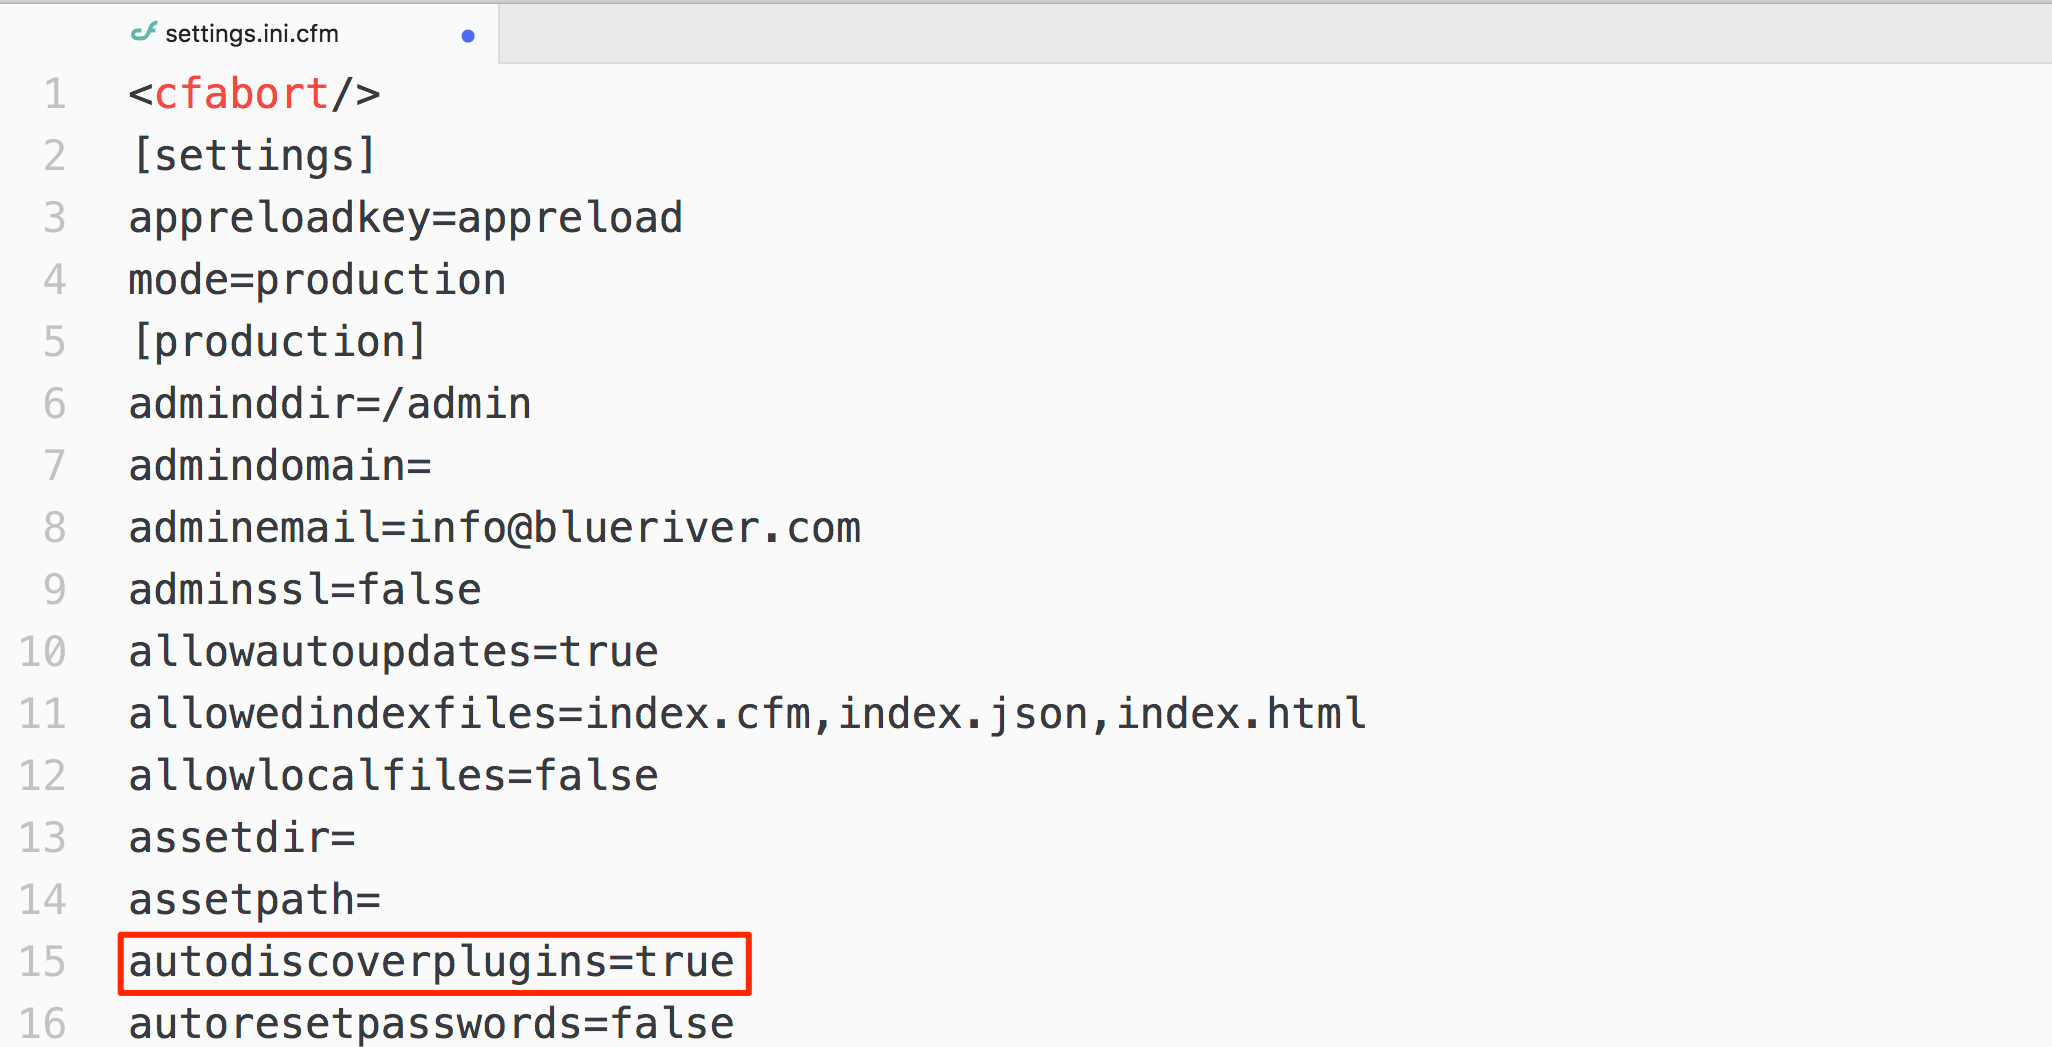
| autoDeploy |
Opt |
This setting works with Mura's plugin auto-discovery feature. If true, whenever Mura reloads, it will auto-install the plugin, and apply it to any sites identified in the siteID element. If false, or if it's not defined, Mura will simply deploy the plugin with the default setting values, and a Super Admin will need to log in and manually complete the deployment process. |
| siteID |
Opt |
This setting works in conjunction with the autoDeploy element. May contain a comma-delimited list of SiteIDs that you would like to assign the plugin to during the auto-deploy process. |
| settings |
Opt |
See Settings Element below. |
| mappings |
Opt |
See Mappings Element below. |
eventHandlers Element
This is where you register your event handlers.
<eventHandler> is a sub-element of <eventHandlers>
The following table describes available attributes of the <eventHandler> element. Technically speaking, developers really only have to register one (1) event, onApplicationLoad. Then, within the onApplicationLoad event, you can register any other handlers you wish, including the .CFC that the onApplicationLoad event is in.
Note: See the Example Plugin Event Handlers section for more information on plugin event handler files themselves.
| Attribute |
Req/Opt |
Description |
| event |
Req |
The name of the Mura event you wish to register. For example, onApplicationLoad. |
| component |
Req |
The dotted-notation path to where the .CFC file resides. The path is relative to the plugin directory. So, if the .CFC file is located under {context}/plugins/yourplugin/model/handlers/eventHandler.cfc, the value would be "model.handlers.eventHandler". |
Example <eventHandler> Element
<eventHandlers>

  <eventHandler event="onApplicationLoad"
                component="model.handlers.eventHandler" />

</eventHandlers>
Settings Element
Settings allows you to collect additional data for your plugin. For example, if you wish to collect an API key that you issued to the user, you can do that using a custom setting.
<setting> is a sub-element of <settings>
The following table describes available elements of the <setting> element.
| Element |
Req/Opt |
Description |
| name |
Req |
This is the variable name of your attribute, which you will be able to then access using the pluginConfig.getSetting('{name}') syntax. |
| label |
Req |
The text value entered here will be displayed as the label for the form field. |
| hint |
Opt |
The string entered here will be used to display help text to end users when completing the form field. |
| type |
Req |
Determines the type of form field to be displayed. Valid options are:
- text
- radioGroup
- textArea
- select
- multiSelectBox
|
| required |
Req |
If true, the form field will be required. |
| validation |
Req |
Determines the type of validation to apply to the form field. Valid options are:
- none
- email
- date
- numeric
- regex
|
| regex |
Opt |
If the value for validation is regex, enter a JavaScript regular expression here. |
| message |
Opt |
The string entered here will display if the form field fails validation or is required and no value has been entered. |
| defaultvalue |
Opt |
The value entered here will be used as the default value for the form field. |
| optionlist |
Opt |
If the form field type is a radioGroup, select, or multiSelectBox, you may enter a carat ("^") delimited list of values to use as the value to be stored in the database. For example: <optionlist>true^false</optionlist> |
| optionalabellist |
Opt |
If the form field type is a radioGroup, select, or multiSelectBox, you may enter a carat ("^") delimited list of values to use as the labels to be used for display. These should coordinate with the values entered in optionlist. For example <optionlabellist>Yes^No</optionlabellist> |
Example <settings> Element
<settings>

    <setting>
        <name>country</name>
        <label>Country</label>
        <hint>The country where you live</hint>
        <type>select</type>
        <required>true</required>
        <validation>none</validation>
        <regex></regex>
        <message>Please select a Country</message>
        <defaultvalue>US</defaultvalue>
        <optionlist>US^UK^FR</optionlist>
        <optionlabellist>United States^United Kingdom^France</optionlabellist>
    </setting>

</settings>
Mappings Element
Mappings allow you to create custom ColdFusion mappings.
<mapping> is a sub-element of <mappings>
The following table describes available attributes of the <mapping> element.
| Attribute |
Req/Opt |
Description |
| name |
Req |
The name to use for the CFML mapping. |
| directory |
Req |
A plugin-relative path to your desired directory. |
Example <mappings> Element
<mappings>
  <mapping name="yourmapping" directory="somedir/anotherdir" />
</mappings>
Mappings will automatically be bound to the directory your plugin is installed, so the above example would refer to: {context}/plugins/{package}/somedir/anotherdir/.
Example config.xml.cfm
<?xml version="1.0" encoding="UTF-8"?>
    <plugin>
        <name>Your Plugin</name>
        <package>yourplugin</package>
        <directoryFormat>packageOnly</directoryFormat>
        <loadPriority>5</loadPriority>
        <version>0.0.1</version>
        <provider>Blue River</provider>
        <providerURL>http://blueriver.com</providerURL>
        <category>Application</category>

        <!-- Event Handlers -->
        <eventHandlers>
            <eventHandler event="onApplicationLoad"
                          component="model.handlers.muraplugin" />
        </eventHandlers>

        <!-- CFML Mappings -->
        <mappings>
          <mapping name="yourmapping" directory="somedir/anotherdir" />
        </mappings>

        <!-- Settings -->
        <settings>

            <setting>
                <name>country</name>
                <label>Country</label>
                <hint>The country where you live</hint>
                <type>select</type>
                <required>true</required>
                <validation>none</validation>
                <regex></regex>
                <message>Please select a Country</message>
                <defaultvalue>US</defaultvalue>
                <optionlist>US^UK^FR</optionlist>
                <optionlabellist>United States^United Kingdom^France</optionlabellist>
            </setting>

        </settings>

        <!-- Image Sizes -->
        <imagesizes>
          <imagesize name="myimage"
                     width="600"
                     height="400" />
        </imagesizes>

        <!-- Class Extensions -->
        <extensions>
            <!-- <extension> elements -->
        </extensions>
    </plugin>
Example Plugin Event Handlers
Plugin event handlers should "mura.plugin.pluginGenericEventHandler". The example below illustrates how to register the event handler using the onApplicationLoad event, so that any other Mura events may also be included in the file, and Mura will automatically invoke them when announced, using the pluginConfig.addEventHandler(this) method.
component extends='mura.plugin.pluginGenericEventHandler' output=false {

    public any function onApplicationLoad(required struct m) {
        // Register all event handlers/listeners of this .cfc with Mura CMS
        variables.pluginConfig.addEventHandler(this);
    }

    // Add any event handlers here

}
If you wish to register another event handler .CFC file, you can follow the example below.
component extends='mura.plugin.pluginGenericEventHandler' output=false {

    public any function onApplicationLoad(required struct m) {
        // Register all event handlers/listeners of this .cfc with Mura CMS
        variables.pluginConfig.addEventHandler(this);

        // Register another event handler
        // Assumes you have a customHandler.cfc located under the same directory.
        var anotherEventHandler = new customHandler();
        variables.pluginConfig.addEventHandler(anotherEventHandler);
    }

    // Add any event handlers here

}
Register a Custom Model Directory
This example shows how to register a custom "model" directory.
component extends='mura.plugin.pluginGenericEventHandler' output=false {

    public any function onApplicationLoad(required struct m) {
        // Register all event handlers/listeners of this .cfc with Mura CMS
        variables.pluginConfig.addEventHandler(this);

        // Register a custom 'model' directory
        variables.pluginConfig.registerModelDir(
          dir='path/from/plugin/to/model/dir'
        );
    }

    // Add any event handlers here

}
Register a Custom Modules Directory
This example shows how to register a custom "modules" directory.
component extends='mura.plugin.pluginGenericEventHandler' output=false {

    public any function onApplicationLoad(required struct m) {
        // Register all event handlers/listeners of this .cfc with Mura CMS
        variables.pluginConfig.addEventHandler(this);

        // Register a custom 'module' directory
        variables.pluginConfig.registerModuleDir(
          dir='path/from/plugin/to/modules/'
        );
    }

    // Add any event handlers here

}
Register a Custom Content Types Directory
This example shows how to register a custom "content_types" directory.
component extends='mura.plugin.pluginGenericEventHandler' output=false {

    public any function onApplicationLoad(required struct m) {
        // Register all event handlers/listeners of this .cfc with Mura CMS
        variables.pluginConfig.addEventHandler(this);

        // Register a custom 'content_types' directory
        variables.pluginConfig.registerContentTypeDir(
          dir='path/from/plugin/to/content_types/'
        );
    }

    // Add any event handlers here

}
The "plugin.cfc" File
If this file exists, Mura will attempt to invoke specific methods during various phases of the plugin deployment, update, and/or deletion lifecycles. This allows developers to do things such as create custom database tables, connect to your custom API for authentication, and more.
The example code below illustrates a basic plugin.cfc file.
component extends='mura.plugin.plugincfc' output=false {

    // pluginConfig is automatically available as variables.pluginConfig

    public void function install() {
        // Do custom installation stuff
    }

    public void function update() {
        // Do custom update stuff
    }

    public void function delete() {
        // Do custom delete stuff
    }

    public void function toBundle(pluginConfig, bundle, siteid) output=false {
        // Do custom toBundle stuff
    }

    public void function fromBundle(bundle, keyFactory, siteid) output=false {
        // Do custom fromBundle stuff
    }

}
The "config.cfm" File
This file is completely optional. However, if you have an ultra-simple plugin, this file can come in handy. In short, it simply contains a few variables you can share across the administrative pages of your plugin using the "cfinclude" method.
The Mura Scope Variable
As a Mura developer, you probably want a way to access the Mura Scope. Since your plugin is running under the Mura application itself, you will have access to its application scope variables and methods. However, when accessing the plugin directly, the Mura Scope itself will not be defined. So, using the information we learned from the Custom Instance of the Mura Scope section, we can easily create a variable to reference the Mura Scope using the code shown below to place in our config.cfm file.
// ./plugin/config.cfm

    // Mura Scope
    if ( !IsDefined('m') ) {
        siteid = session.keyExists('siteid') ? session.siteid : 'default';
        m = application.serviceFactory.getBean('m').init(siteid);
    }
The pluginConfig Variable
Now that we have a reference to the Mura Scope, as a Mura plugin developer, we'll also want access to the pluginConfig. By having access to the pluginConfig, the following methods are available to you.
| Method |
Parameters |
Description |
| getDirectory |
none |
Returns the directory name of the plugin. |
| getPackage |
none |
Returns the value from the config.xml.cfm <package> node. |
| getName |
none |
Returns the Name (Alias) data entered when the plugin was installed and deployed. |
| getApplication |
none |
Plugins have access to their own, exclusive application scope. Useful for creating and setting custom application variables associated only with your plugin. For example:
myPluginApplication = pluginConfig.getApplication();
myPluginAppication.set('colors', ['Red','White','Blue']);
pluginColors = myPluginApplication.get('colors');
If you wish to purge your plugin's application variables, you may use the following syntax:
// 'true' = purge the plugin's application variables
myPluginApplication = pluginConfig.getApplication(true);
|
| getSession |
none |
Plugins have access to their own, exclusive session scope. Useful for creating and setting custom session variables associated only with your plugin. For example:
myPluginSession = pluginConfig.getSession();
myPluginSession.set('fruit', ['Grapes','Oranges']);
pluginFruit = myPluginSession.get('fruit');
If you wish to purge your plugin's session variables, you may use the following syntax:
// 'true' = purge the plugin's session variables
myPluginSession = pluginConfig.getSession(true);
|
| getAssignedSites |
none |
Returns a recordset of of SiteIDs the plugin has been enabled for.
<cfset rsSites = pluginConfig.getAssignedSites()>

<ul>
  <cfloop query="rsSites">
    <li>#siteid#</li>
  </cfloop>
</ul>
|
| getSettings |
none |
Returns a struct of any plugin settings collected via the config.xml.cfm <settings> elements. |
| getSetting |
property |
Provides a way to obtain a specific plugin setting collected via the config.xml.cfm <settings> elements. Returns the value for the property parameter which was passed in. |
Let's add some code to our config.cfm file to give us access to a variable named pluginConfig.
// ./plugin/config.cfm

    // Mura Scope
    if ( !IsDefined('m') ) {
        siteid = session.keyExists('siteid') ? session.siteid : 'default';
        m = application.serviceFactory.getBean('m').init(siteid);
    }

    // Plugin Config
    if ( !IsDefined('pluginConfig') ) {
        pluginConfig = m.getBean('pluginManager').getConfig('{YourPluginPackagNameGoesHere}');
    }
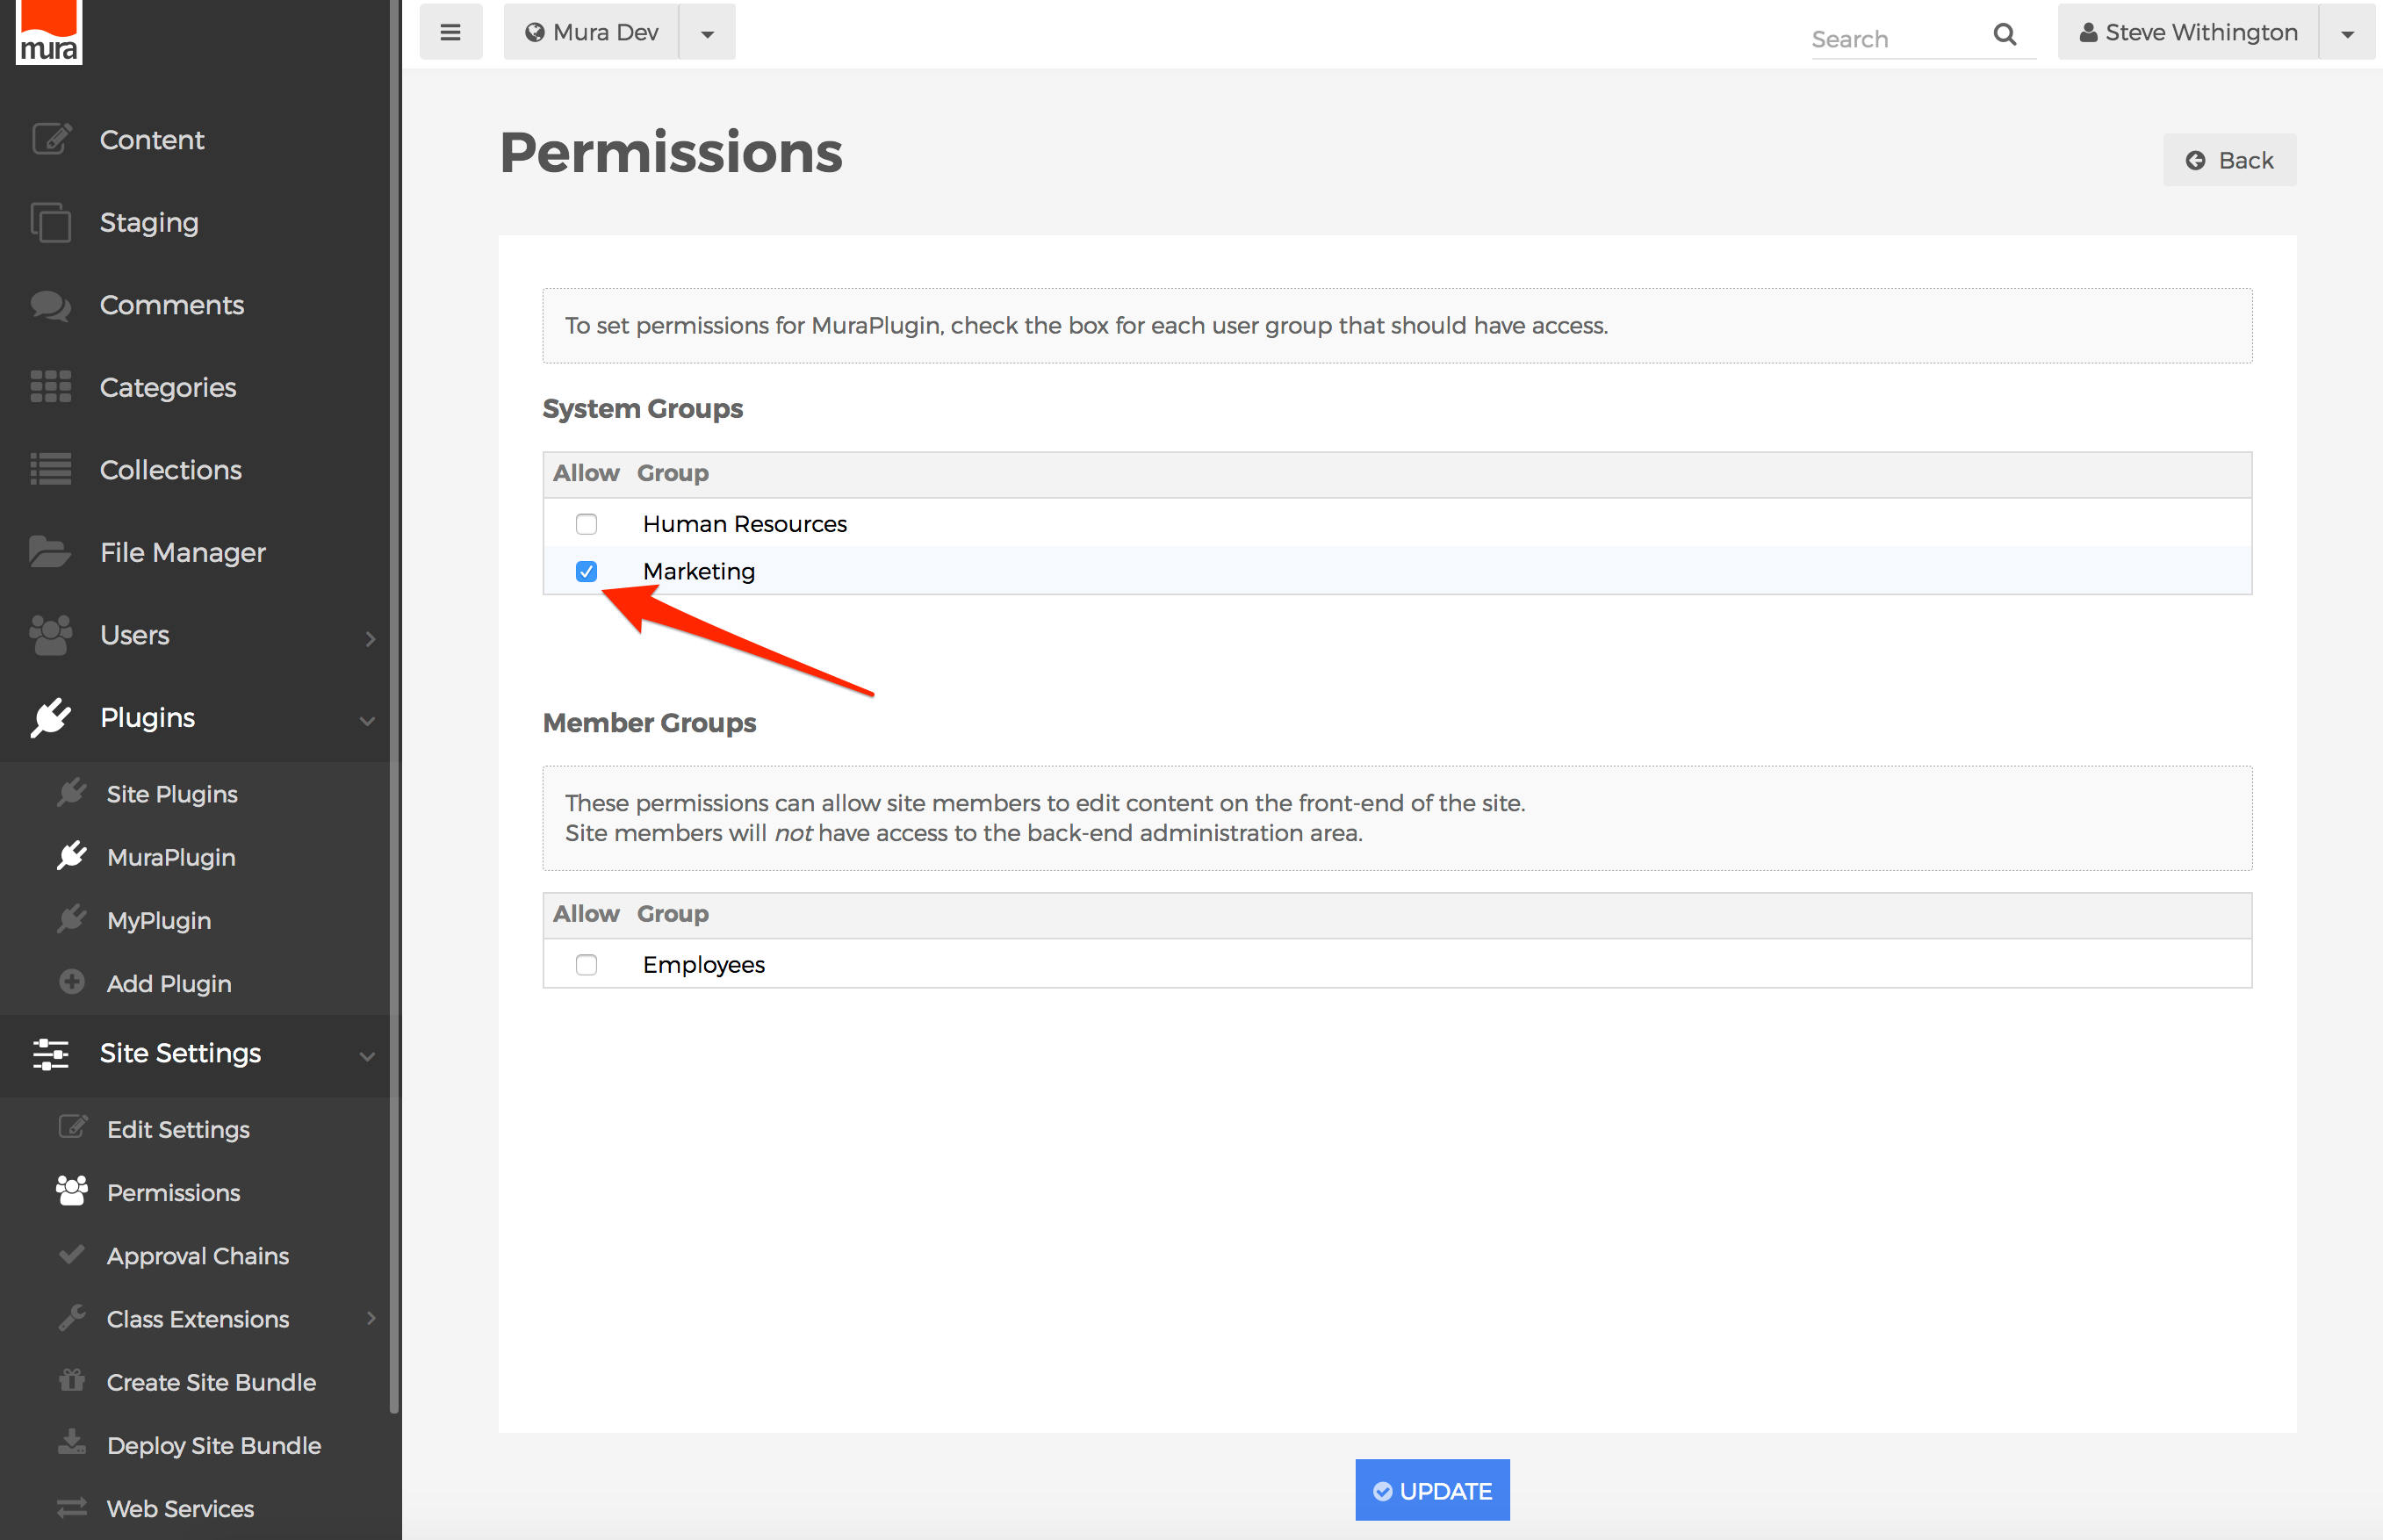
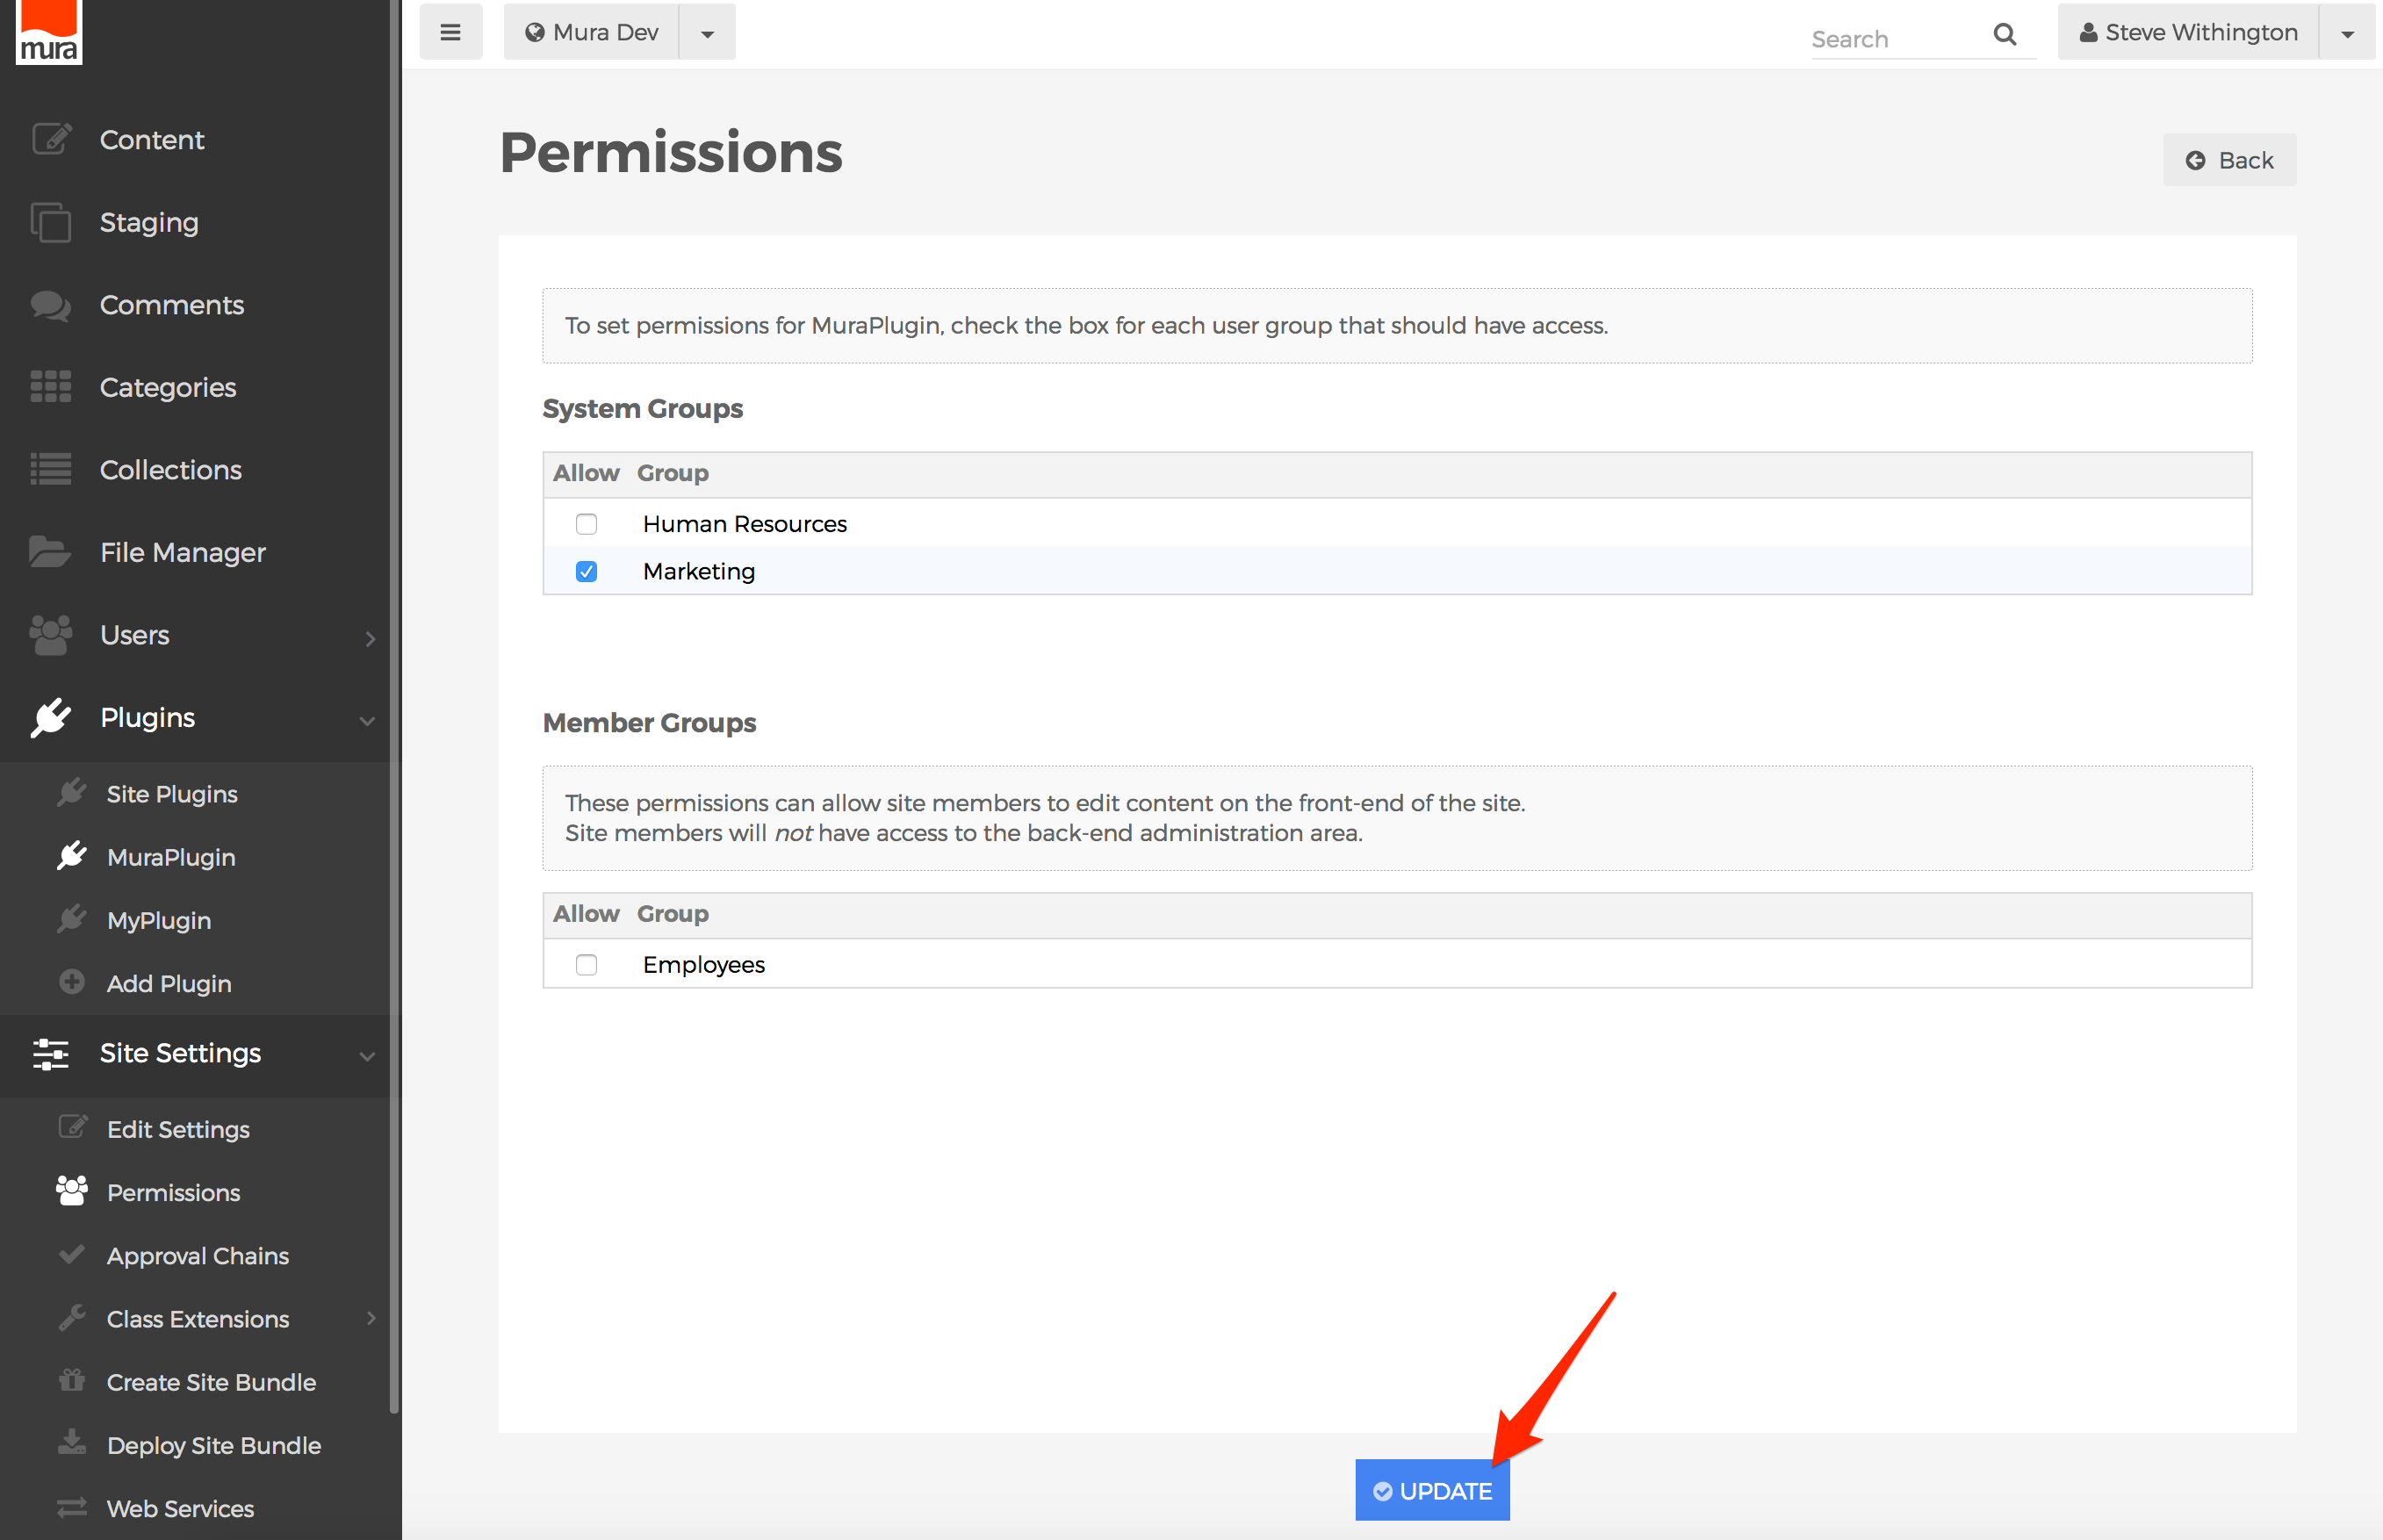
Restricting Access
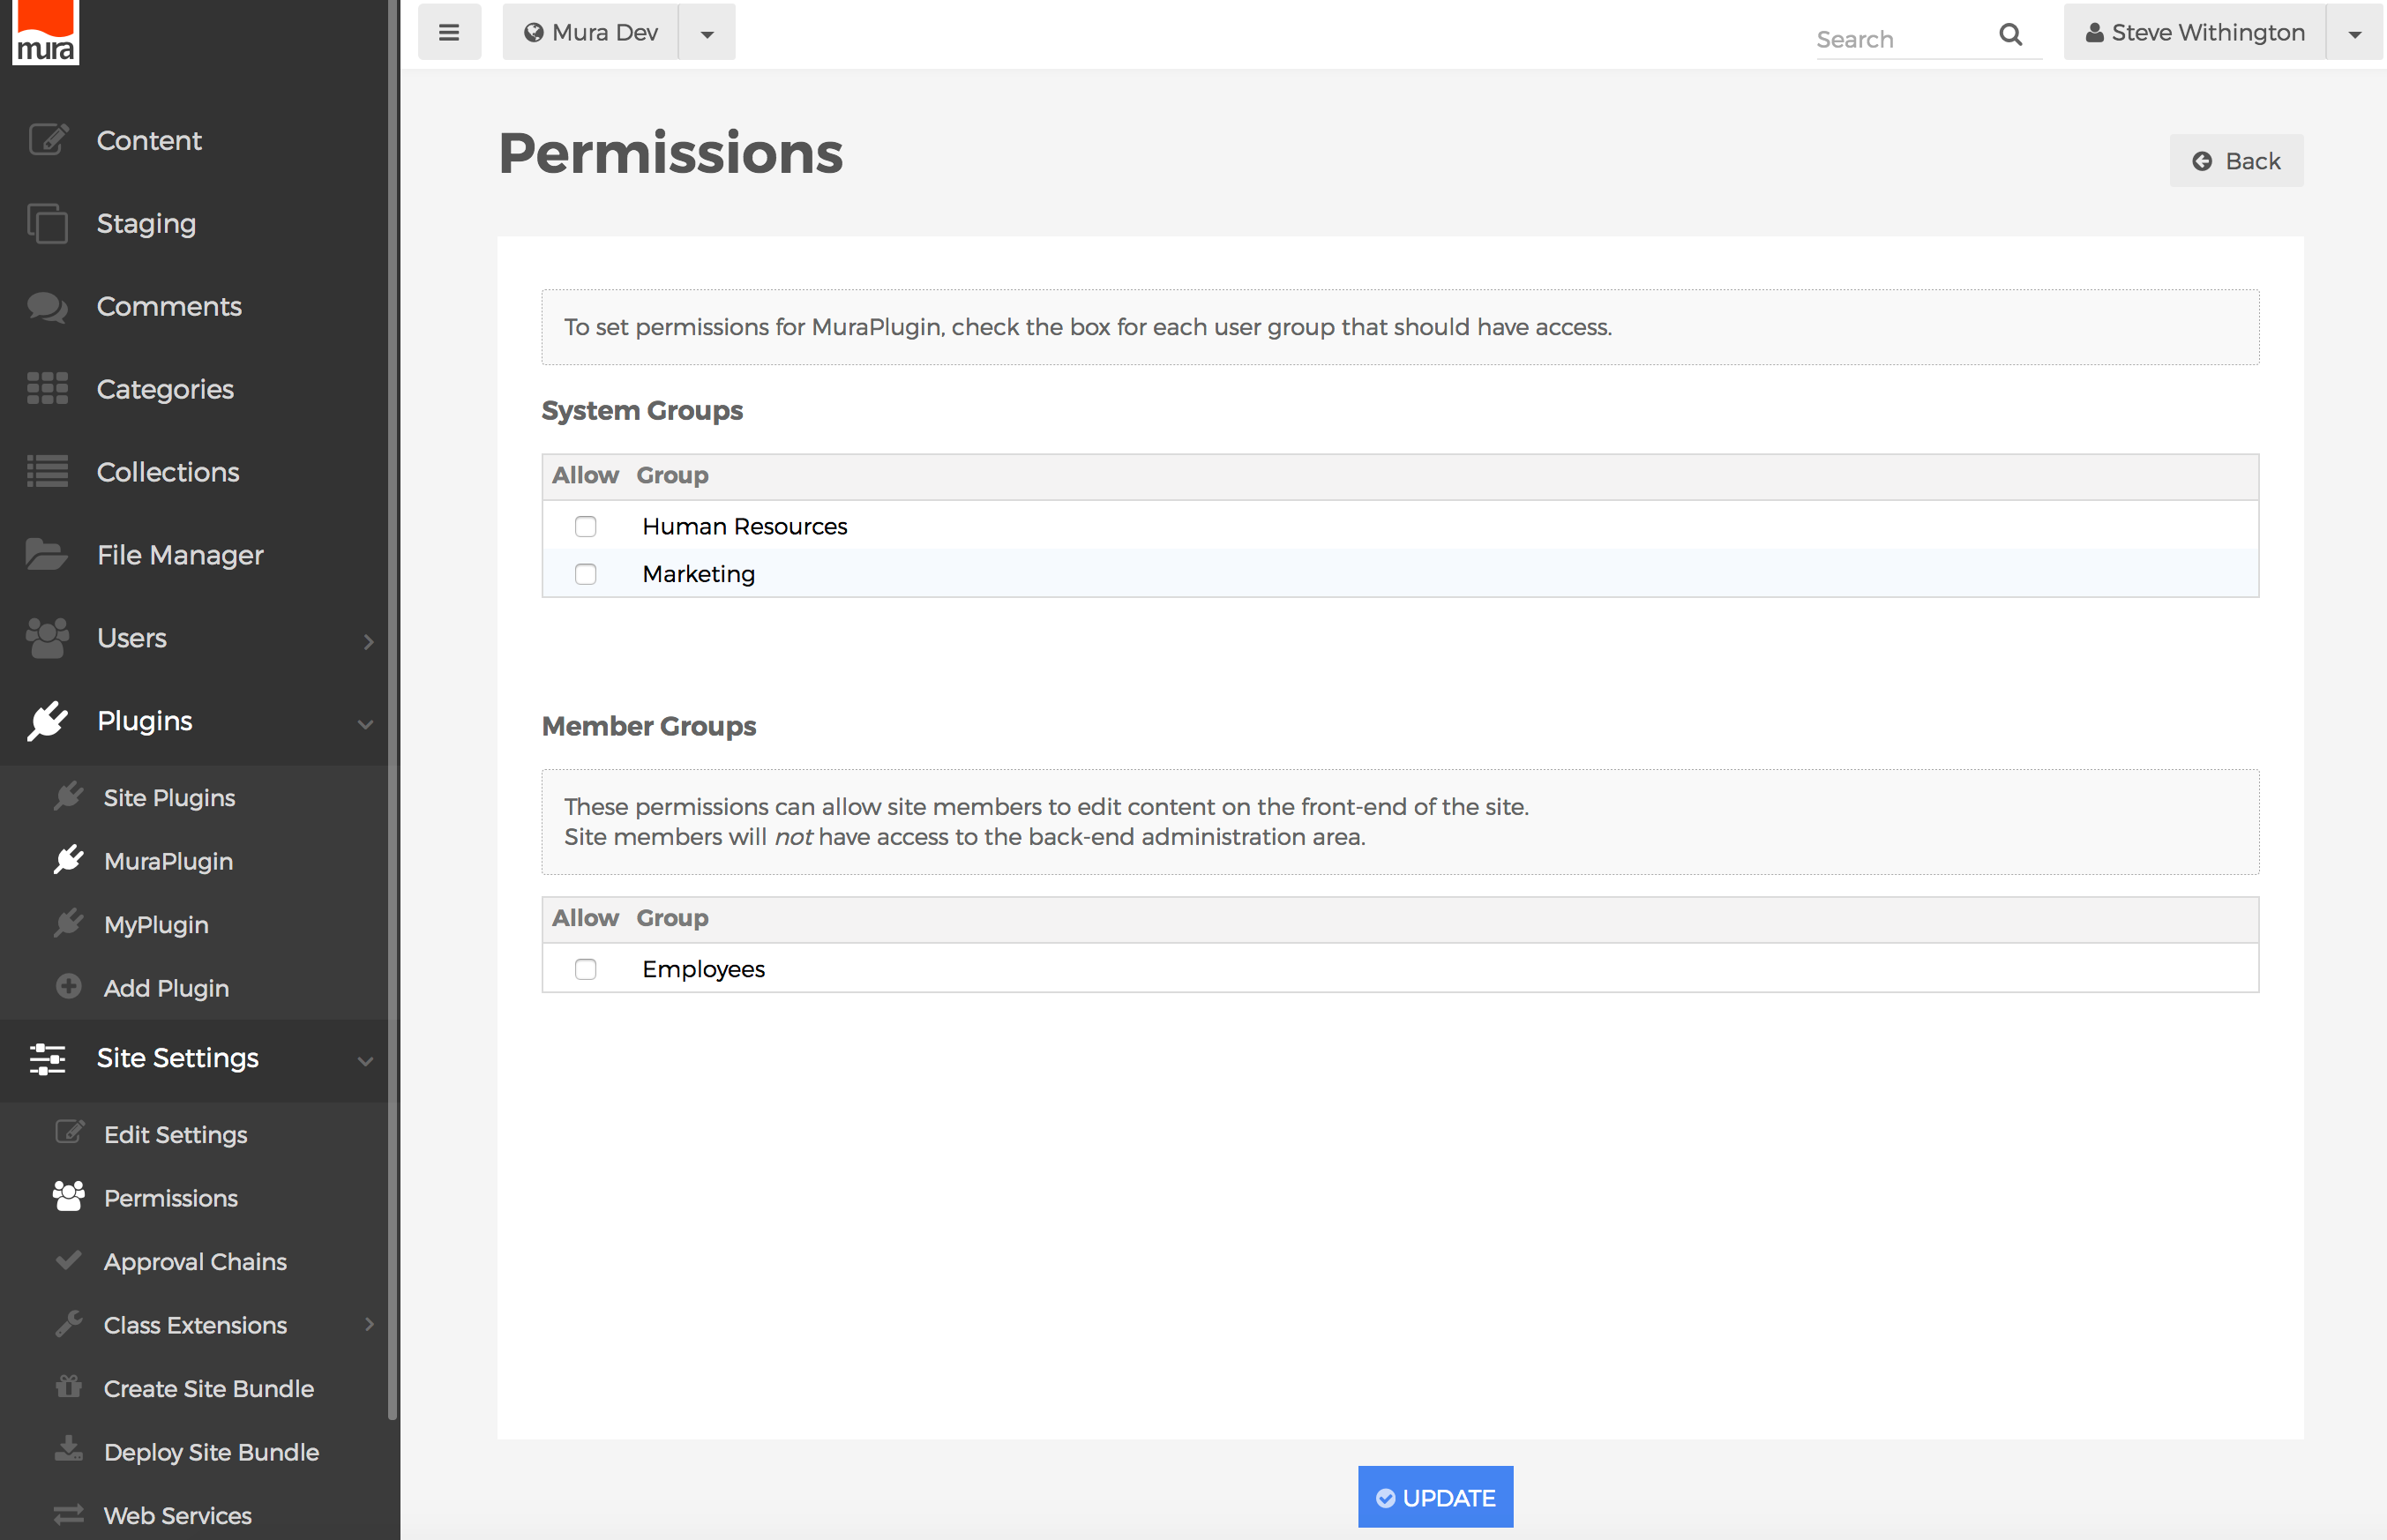
Finally, in most cases, you'll want to make sure that groups which do not have access to the plugin's administrator area will not be able to access it. The pluginConfig variable has a special method labeled currentUserAccess, which checks the currently logged in user to see if any of the groups they belong to have been granted access or not. If it returns true, then they have been granted access. If false, then they have not been granted permissions to the plugin itself.
Using this method, we can easily add one more line of code to our config.cfm file, and redirect unauthorized users to the login screen. As a developer, you can probably come up with other options as well.
// ./plugin/config.cfm

    // Mura Scope
    if ( !IsDefined('m') ) {
        siteid = session.keyExists('siteid') ? session.siteid : 'default';
        m = application.serviceFactory.getBean('m').init(siteid);
    }

    // Plugin Config
    if ( !IsDefined('pluginConfig') ) {
        pluginConfig = m.getBean('pluginManager').getConfig('{YourPluginPackagNameGoesHere}');
    }

    // Check User Access ~ Redirect if Not Authorized
    if ( !pluginconfig.currentUserAccess() ) {
        location(
          url=m.globalConfig('context') & '/admin/index.cfm?muraAction=clogin.main'
          , addtoken=false
        );
    }
Summary
If you have a fairly simple plugin, the config.cfm file is a pretty easy way to include common variables and logic throughout your plugin's administrative pages. For more complex plugins, you may wish to use an Application.cfc file instead. An example may be found at https://github.com/stevewithington/MuraPlugin/blob/develop/Application.cfc. If you would like to use a front-end controller framework, be sure to check out MuraFW1, which is a base Mura CMS plugin using Framework One (FW/1) as its application framework.
The "index.cfm" File
While technically optional, it is highly recommend to include the "index.cfm" file in the root of your plugin. The primary reason behind this is because when an administrator navigates to your plugin via the back-end administration area, this is the file that will be rendered. So, if it doesn't exist, administrators will be presented with an error.
Also, the "index.cfm" file is the primary view for your plugin in general, not just for administrators. For example, if your plugin is installed under {context}/plugins/yourplugin/, when a user navigates directly to your plugin's directory, such as http://www.yourdomain.com/plugins/yourplugin/, the "index.cfm" file will be presented to the user.
In other words, you may essentially put whatever you want in this file. For example:
<!DOCTYPE html>
<html>
    <head>
        <meta charset="utf-8">
        <title>YourPlugin</title>
    </head>
    <body>
        <h1>Hello from YourPlugin!</h1>
    </body>
</html>
In some rare cases, this may be exactly what you want to happen. Maybe you merely want to host your application alongside Mura on the same server, and if it's a completely separate and independent site, then this might be as far as you take it. However, this is not the typical scenario.
Your Application Entry Point
Often, developers will want to use the plugin's "index.cfm" as the entry page to their application, while also being able to work with Mura CMS functionality, or extending its capabilities.
You may also use the "index.cfm" file as part of your front-end controller application. For example, maybe you're using a CFML framework such as Framework One (FW/1). If you're interested in doing this, please check out MuraFW1, a base Mura CMS plugin using FW/1 as its application framework.
While you can easily add display objects and custom content types, you may also want to register a custom event handler, and then register a custom "model" directory. To do this, please see The "config.xml.cfm" File section.
Administration Area Layout Template
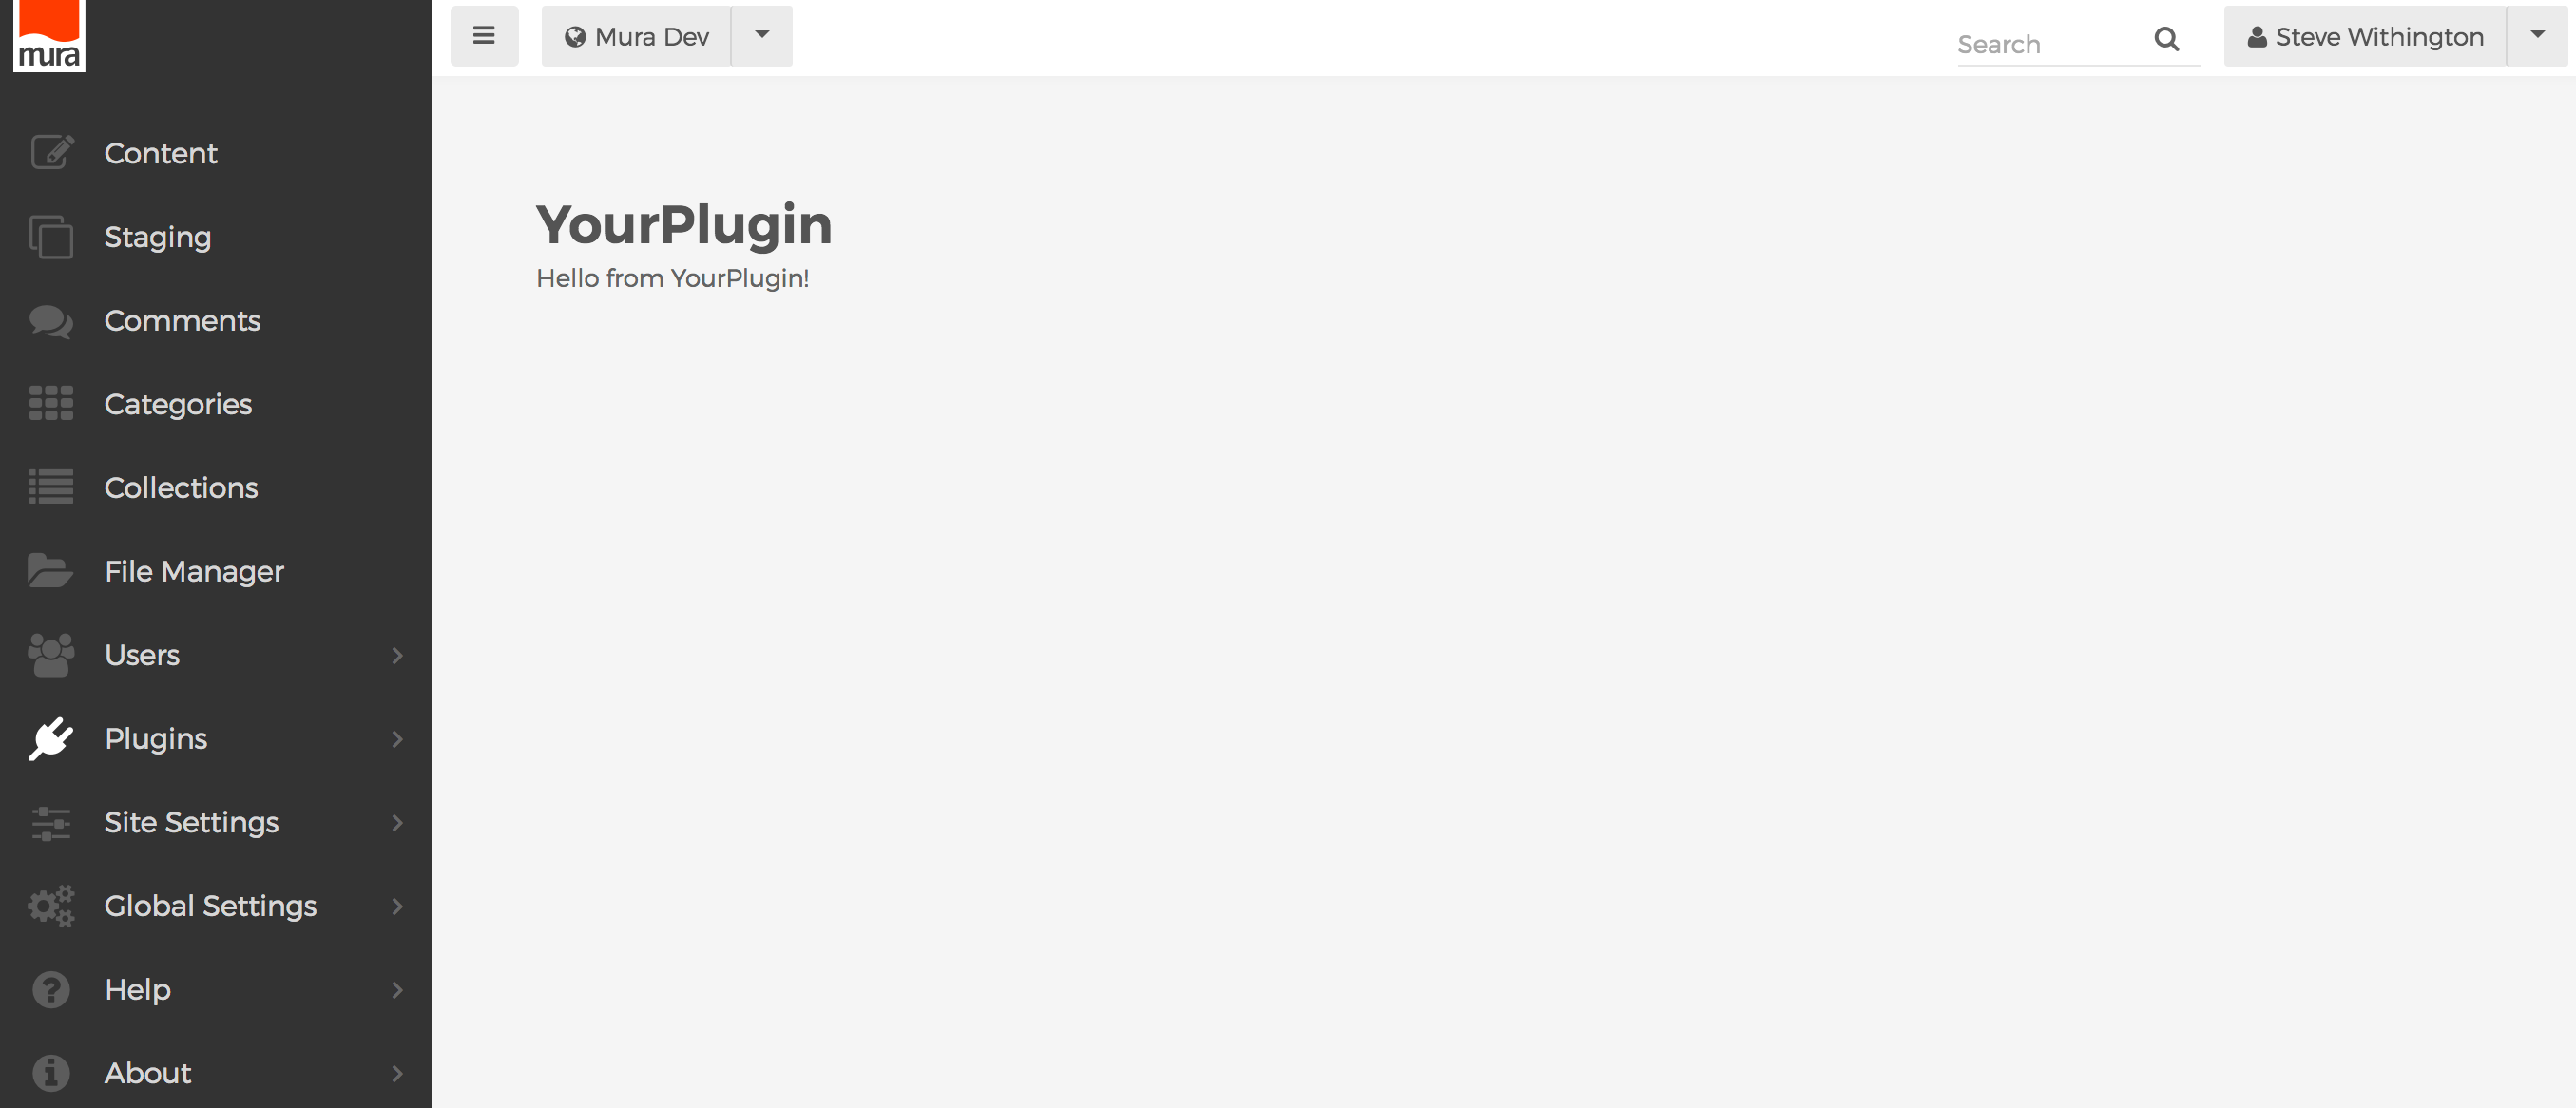
If you would like your plugin's administration area to have the same look and feel of Mura's back-end administration area, you can do that fairly easily using the pluginManager bean's helper method labeled "renderAdminTemplate".
The example below illustrates how to use renderAdminTemplate in your "index.cfm" file. See The "config.cfm" File section for information about the first line of code.
<cfinclude template="plugin/config.cfm" />

<cfsavecontent variable="pluginBody">
    <cfoutput>
        <h1>#esapiEncode('html', pluginConfig.getName())#</h1>
        <p>Hello from YourPlugin!</p>
    </cfoutput>
</cfsavecontent>

<cfoutput>
    #m.getBean('pluginManager').renderAdminTemplate(pluginBody)#
</cfoutput>
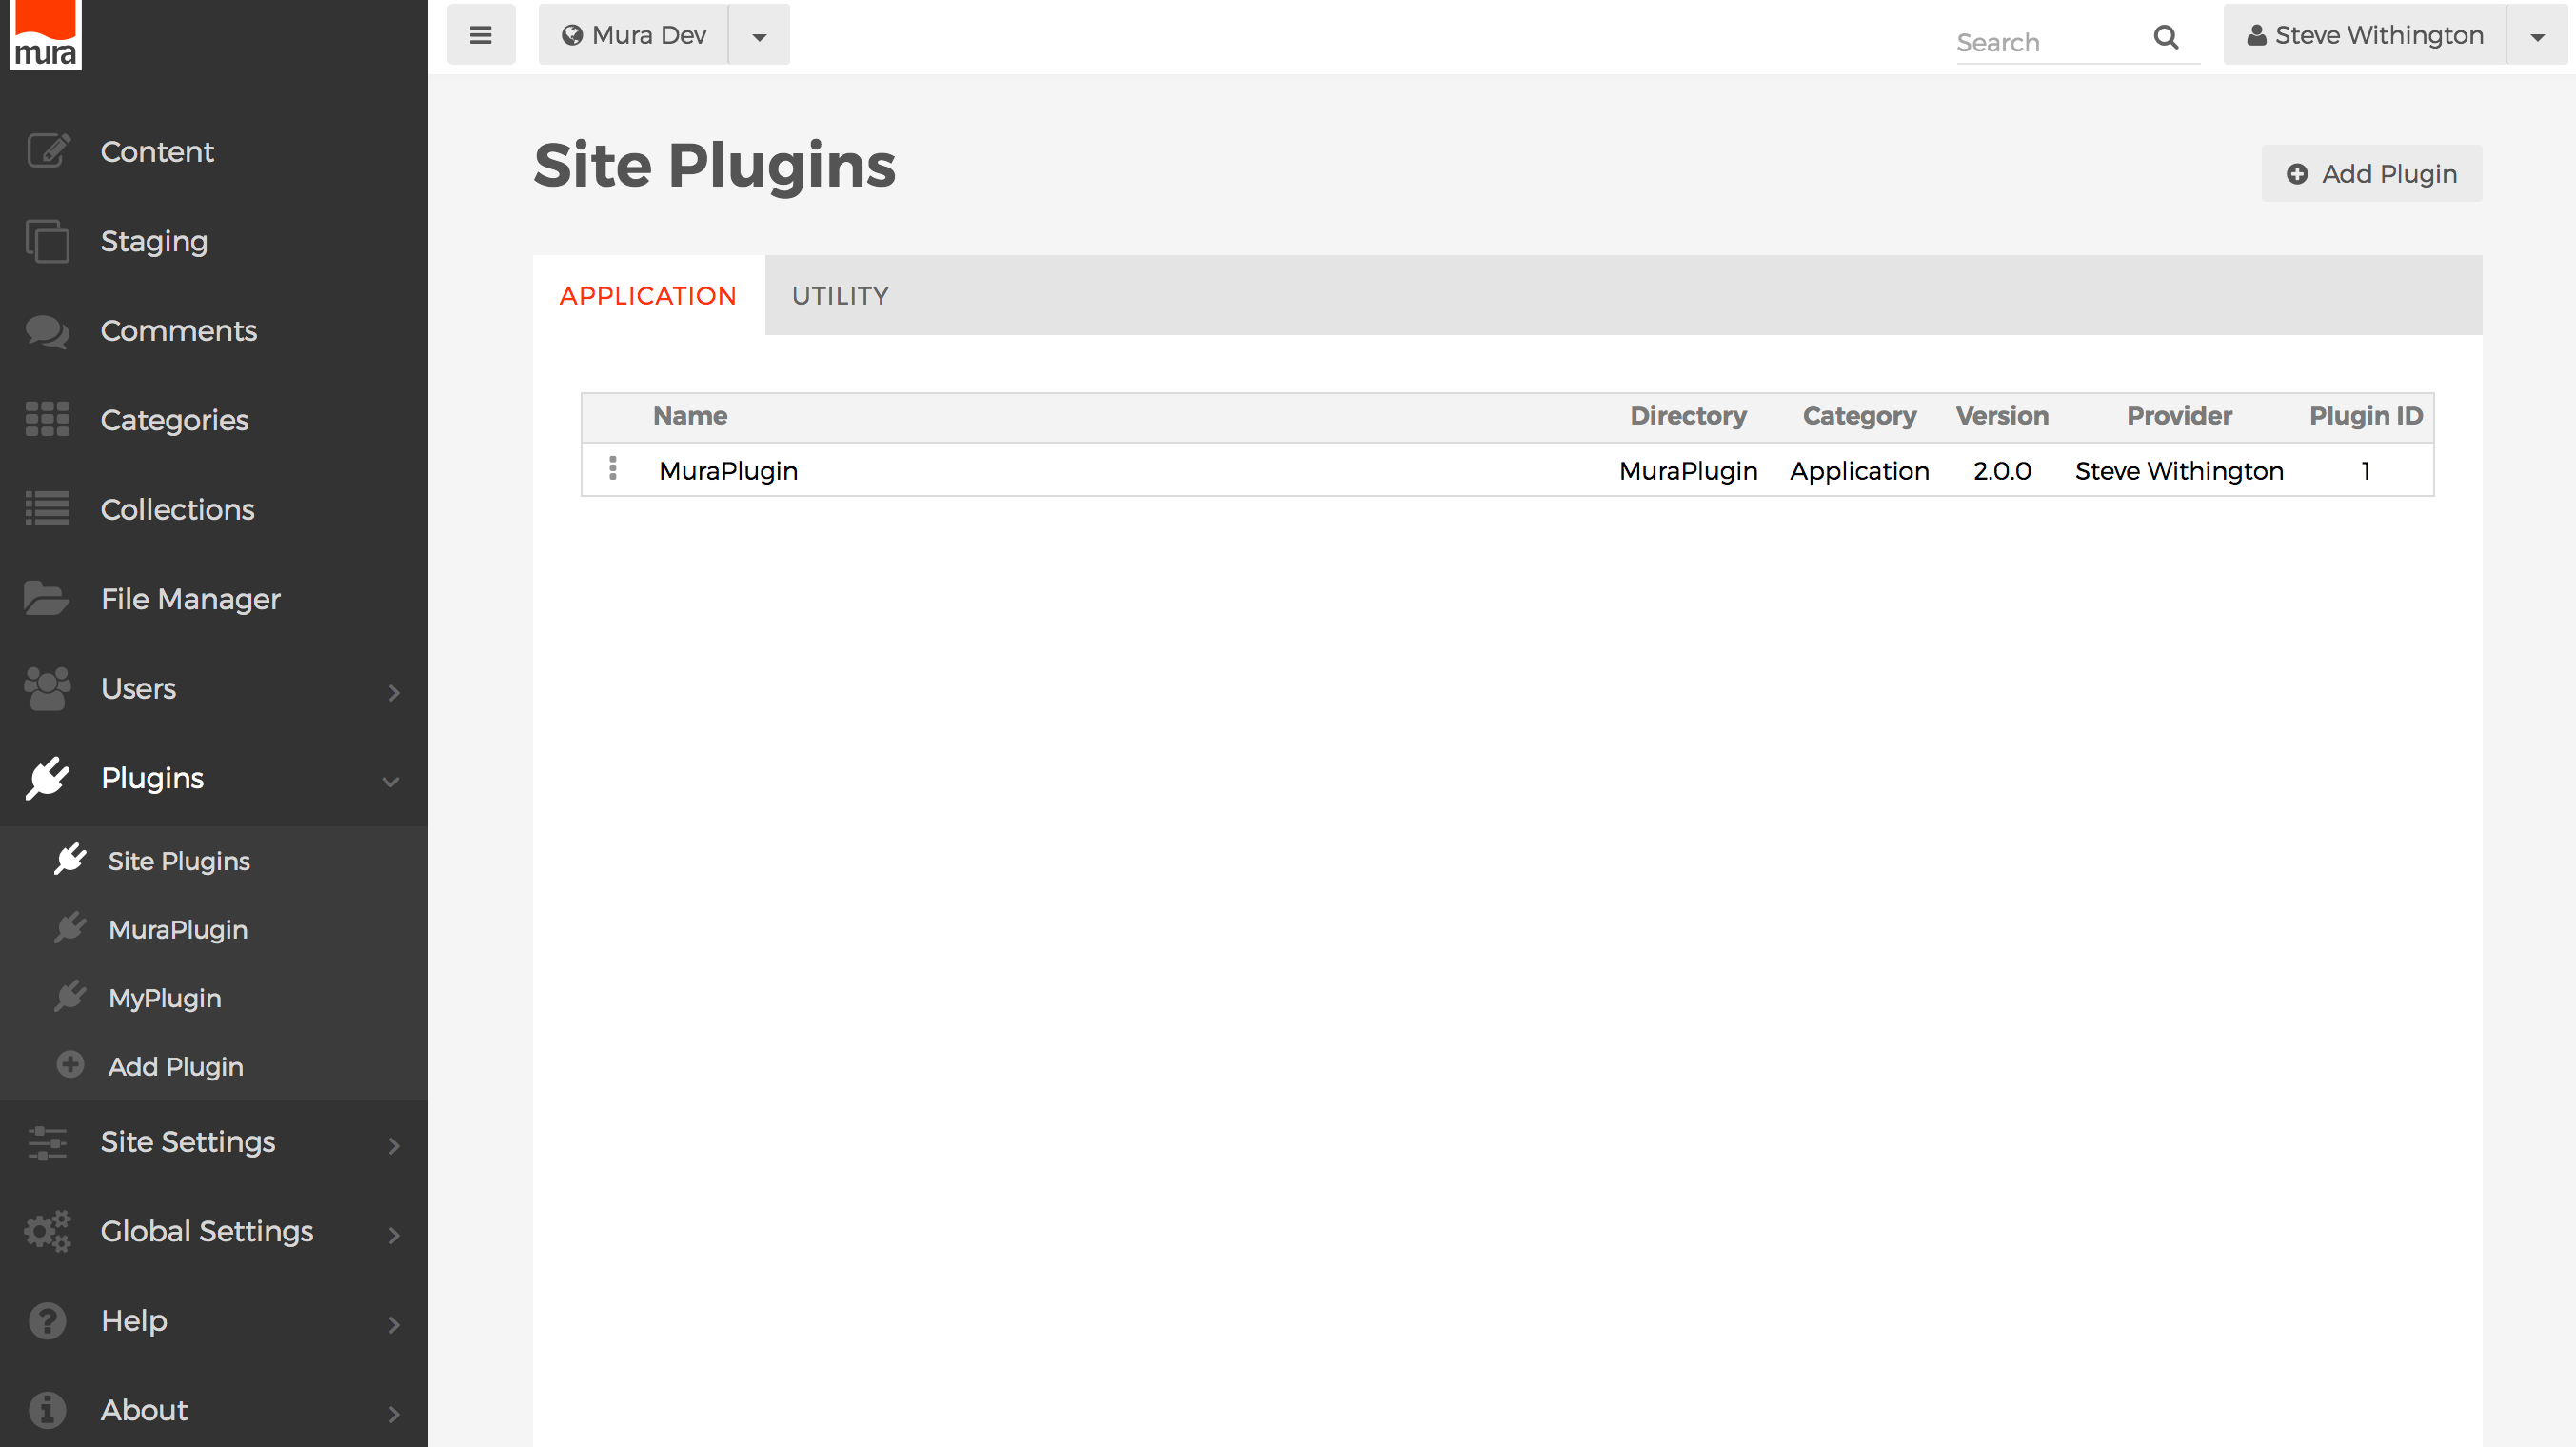
Using the above code, if an administrator views your plugin, they would see something similar to the following image.
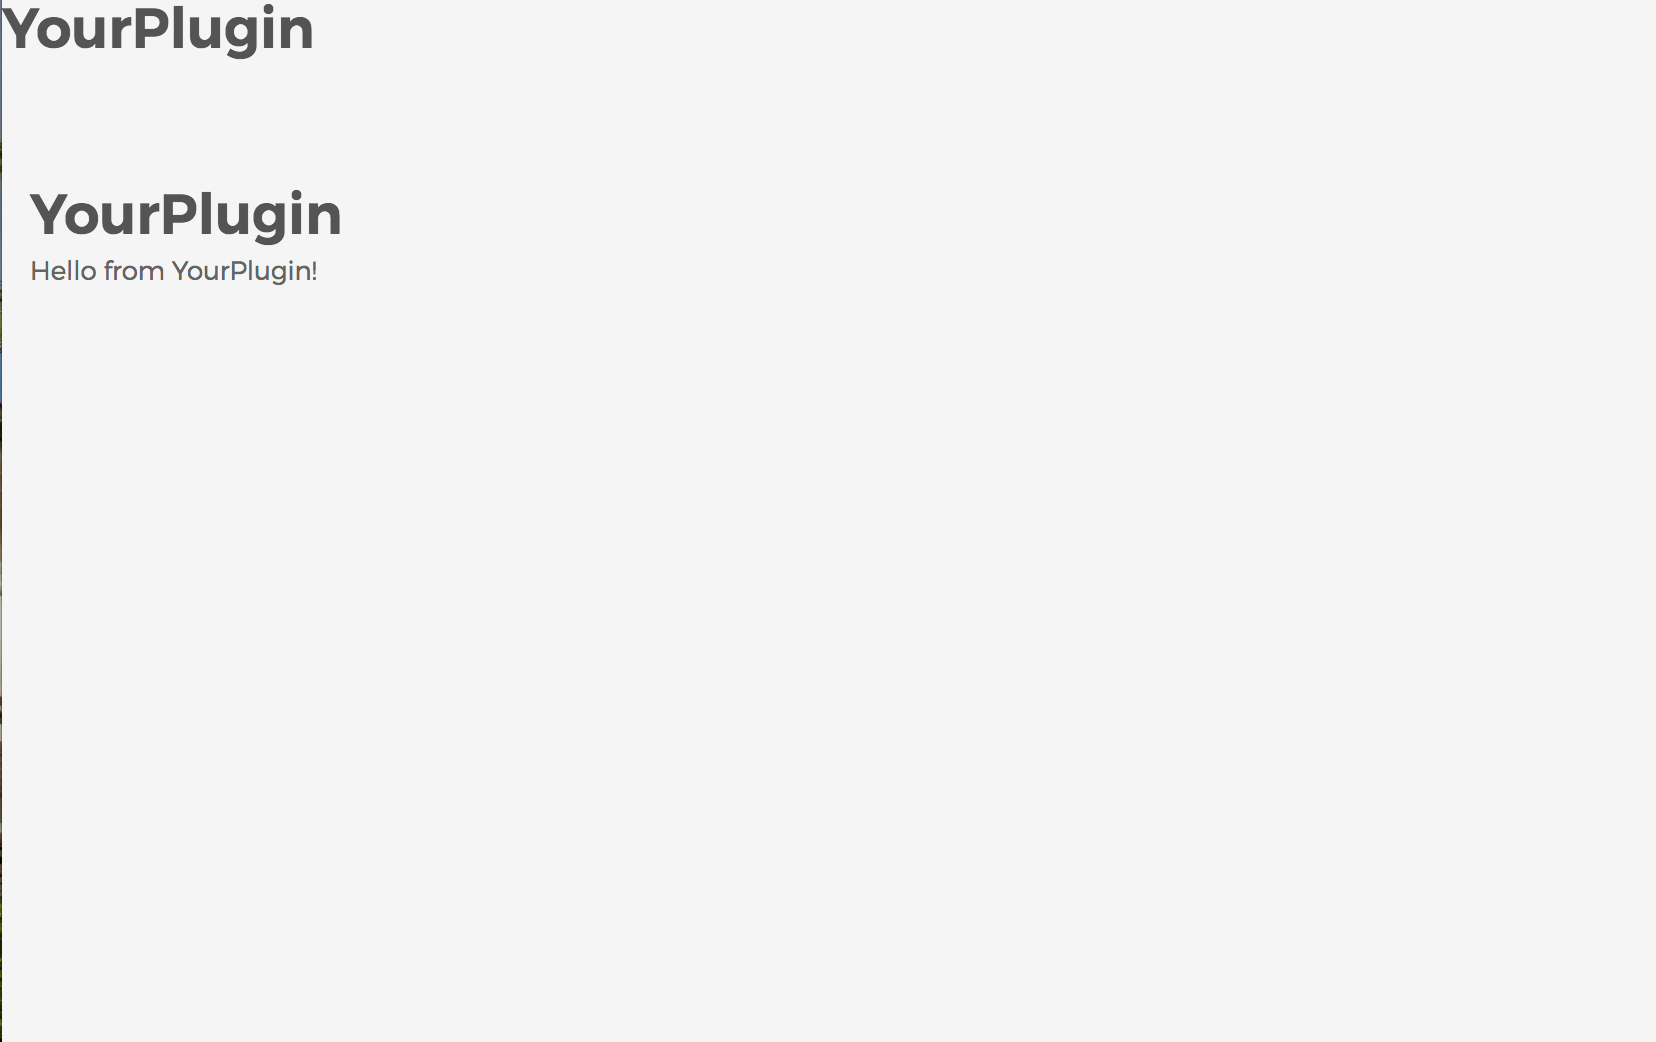
However, using the renderAdminTemplate method does not "protect" your plugin from being accessed by people who are not authorized to do so. In other words, your plugin is still publicly accessible. In fact, if you're attempting to follow along, and wish to test it out, log out of the administration area, then navigate to your plugin's URL. For example, http://www.yourdmain.com/plugins/yourplugin/. You should see something similar to the following image.
Restricting Access to Your Plugin
If you wish to restrict access to your plugin's entry page, you'll want to include a custom Application.cfc file, and then include your desired logic. A sample Application.cfc with example code may be found at https://github.com/stevewithington/MuraPlugin/blob/develop/Application.cfc. In the example file, you'll note how some of Mura's application methods have been included into the standard CFML lifecycle events, as briefly mentioned in The "appcfc" Directory section.
In the end, as a Mura plugin developer, it's your responsibility to come up with a solution to restrict access to the plugin.
The "license.txt" File
If this file exists in the root of the plugin, or under {context}/plugins/{YourPlugin}/plugin/license.txt, the content of the text file will be used as an End-User License Agreement (EULA) or software license agreement. When an administrator deploys the plugin, they will be presented with the EULA, and have to "accept" the terms before continuing to install and deploy the plugin.