The Mura contentRenderer.cfc
The majority of Mura's rendering behavior occurs in a special file labeled the "contentRenderer.cfc". Mura's primary, or "Core" contentRenderer is located under:
{context}/core/mura/content/contentRenderer.cfc
As covered in the Theme Developer's Guide, the "Core" contentRenderer also contains a plethora of helper methods, as well as settings used by Mura's display objects, all of which are frequently used by Mura developers.
Since the "Core" contentRenderer is a "core" file, it shouldn't be modified directly. Instead, if you wish you to override any of the default settings or methods found in the "core" contentRenderer, Mura will first check the theme, and then the site for a contentRenderer.cfc. If the matching setting or method is found, it will use the custom setting or method in lieu of Mura's default "core" setting or method. You only need to define the setting(s) or method(s) you wish to override in your "Site" or "Theme" contentRenderer.
Custom Rendering Methods
In addition to overriding any of the default settings and methods found in the "Core" contentRenderer, any custom rendering methods defined in the "Site" or "Theme" contentRenderer are available via the Mura Scope. For example, if you have the following method defined in your "Site" or "Theme" contentRenderer:
public string function dspHello() {
  return "<p>Hello from dspHello!</p>";
}
You may invoke the method by simply using the following syntax:
<cfoutput>
  #m.dspHello()#
</cfoutput>
The above code would output:
<p>Hello from dspHello!</p>
Lookup Hierarchy
Mura uses the following lookup hierarchy for settings or methods found in a contentRenderer.cfc. If the setting or method is defined in the first file, Mura will use it and ignore any other identically named methods found in the remaining files.
- "Theme" contentRenderer
../themes/{ThemeName}/contentRenderer.cfc
- "Site" contentRenderer
{context}/sites/{SiteID}/includes/contentRenderer.cfc
- "Core" contentRenderer
{context}/core/mura/content/contentRenderer.cfc
contentRenderer Settings
The vast majority of the contentRenderer settings allow developers to apply custom classes to Mura's modules. This allows developers to use CSS to control the style and display of Mura's modules, without having to override the rendering methods or modules themselves to achieve the desired result.
Mura allows you to override its default contentRenderer settings on a site-by-site basis. To override a setting, simply place a reference to the setting and your desired value in your "Site" or "Theme" contentRenderer.cfc.
Example
this.validateCSRFTokens = true;
this.navOffset = 0;
this.navDepthLimit = 1000;
this.navWrapperClass = 'sidebar-nav well';
Reference
A reference for Mura's "Core" contentRenderer.cfc settings is outlined below. Keep in mind the vast majority of the contentRenderer settings are specific to Mura's modules, and as such, most of these settings are merely the CSS classes that will be applied to them.
Note: The settings listed below are the "default" settings, and many of them may be overwritten in Mura's default theme. Please refer to the theme's contentRenderer.cfc file to review the theme's settings.
| Setting |
Type |
Default |
Description |
| validateCSRFTokens |
boolean |
false |
If true, Mura will check for cross-site request forgery (CSRF) tokens to help prevent CSRF attacks. |
| navOffset |
int |
0 |
This allows you to start standard navigation behavior at lower navigation levels. For example, this would be useful if you have a section of your site that should have its own primary navigation, such as a Member's only area with a custom layout template. |
| navDepthLimit |
int |
1000 |
This sets the maximum depth that standard navigation will follow. |
| navParentIdx |
int |
2 |
|
| navGrandParentIdx |
int |
3 |
|
| navDepthAdjust |
int |
0 |
|
| navSelfIdx |
int |
1 |
|
| deferMuraJS |
boolean |
false |
If true, Mura will add a "defer" attribute to the script reference for mura.min.js so that the script will be executed when the page has finished parsing. |
| jsLib |
string |
jquery |
This determines what JavaScript library Mura should use with its built-in display objects. Valid options are:
|
| jsLibLoaded |
boolean |
false |
This allows developers to not rely on Mura to load the default JavaScript framework and simply add it to their theme's HTML head area. |
| suppressWhitespace |
boolean |
true |
If true, Mura will remove excess whitespace characters from CFML generated content. |
| longDateFormat |
string |
long |
This is the default long date format for the site. |
| shortDateFormat |
string |
short |
This is the default short date format for the site. |
| showMetaList |
list |
jpg,jpeg,png,gif,svg |
This is a list of file extensions that will not directly download, but instead, will render in a Mura CMS page with the "Summary" being displayed in the body area. |
| imageInList |
list |
jpg,jpeg,png,gif,svg |
This is a list of what image extensions should be shown in built in content listing display objects. |
| directImages |
boolean |
true |
This tells Mura whether to serve images indirectly through fileManager.renderImage() or create direct links. |
| personalization |
string |
user |
This allow developers to choose whether site personalizations such as ratings and favorites are attached to simple cookies or an actual Mura user. Users do not need to login in order to save cookie-based personalizations. Valid options:
|
| hasEditableObjects |
boolean |
false |
If true, enables editable objects (Version 6.x only) |
| asyncObjects |
boolean |
true |
If true, Mura will load display objects asynchronously. |
| asyncRender |
boolean |
false |
|
| queueObjects |
boolean |
true |
|
| layoutManager |
boolean |
false |
If true, will allow administrators to edit display objects via the front-end of the site. (Version 7.x) |
| legacyObjects |
boolean |
true |
If false, Mura will enable the inline edit features of Mura (Version 7.x) |
| siteIDInURLs |
boolean |
|
If a boolean value exists, it will override the settings.ini.cfm value |
| indexFileInURLs |
boolean |
|
If a boolean value exists, it will override the settings.ini.cfm value |
| hashURLs |
boolean |
|
If a boolean value exists, it will override the settings.ini.cfm value |
| enableMuraTag |
boolean |
|
If a boolean value exists, it will override the settings.ini.cfm value |
| showAdminToolbar |
boolean |
|
If true, the front end toolbar will be rendered for administrative users. |
| showMemberToolbar |
boolean |
|
If true, the front end toolbar will be rendered for site members |
| showEditableObjects |
boolean |
|
If true, editable display objects like components and content collections will be rendered. (Version 6.x) |
| showInlineEditor |
boolean |
|
If true, will display the Inline Edit button on the front end toolbar for administrative users. (Version 7.x) |
| renderHTMLQueues |
boolean |
true |
If true, Mura will render the request's HTMLHeadQueue and HTMLFootQueue. |
| preloaderMarkup |
string |
empty string |
Allows developers to include a custom preloader. |
| bodyMetaImageSizeArgs |
struct |
{size="medium"} |
|
| bodyMetaImageClass |
string |
thumbnail |
A CSS class applied to the primary associated image. |
| navsize |
int |
50 |
An integer value to control the maximum number of navigational items to output for Mura generated navigation. |
| imageClass |
string |
img-thumbnail |
A CSS class applied to the primary associated image when displayed in a list such as a collection. |
| categoriesNestCheckboxClass |
string |
checkbox |
A CSS class applied to category checkboxes. |
| generalWrapperClass |
string |
well |
A CSS class applied to general wrapper HTML elements. |
Heading Markup Settings
When Mura outputs headings, the following settings may be used. The following settings are also used to control the heading tags used for the HTML Editor's "Format" select menu options. The defaults listed below are based on the concept that <h1> tags are reserved for the "Site Name" or logo area of the layout templates, and page titles begin with <h2> tags.
| Setting |
Type |
Default |
| headline |
string |
h2 |
| subHead1 |
string |
h3 |
| subHead2 |
string |
h4 |
| subHead3 |
string |
h5 |
| subHead4 |
string |
h6 |
| subHead5 |
string |
h6 |
Alert Markup Settings
When Mura outputs an alert, the following settings may be used.
| Setting |
Type |
Default |
| alertSuccessClass |
string |
alert alert-success |
| alertInfoClass |
string |
alert alert-info |
| alertWarningClass |
string |
alert |
| alertDangerClass |
string |
alert alert-error |
Table Markup Settings
When Mura outputs a table, the following settings may be used.
| Setting |
Type |
Default |
| tableClass |
string |
table table-bordered table-striped |
| tableHeadClass |
string |
empty string |
| tableHeaderClass |
string |
empty string |
| tableBodyClass |
string |
empty string |
| tableRowClass |
string |
empty string |
| tableCellClass |
string |
empty string |
| tableFooterClass |
string |
empty string |
Module (Display Object) Settings
The vast majority of contentRenderer settings are used to control the CSS classes for HTML markup of Mura's baked-in modules. Mura's modules and their associated settings are described below.
Navigation
The markup for the various types of navigational modules can be found in the files located under:
{context}/core/modules/v1/nav/
| Setting |
Type |
Default |
| navWrapperClass |
string |
sidebar-nav well |
| navLIClass |
string |
empty string |
| liHasKidsClass |
string |
empty string |
| liHasKidsAttributes |
string |
empty string |
| liCurrentClass |
string |
current |
| liCurrentAttributes |
string |
empty string |
| liHasKidsNestedClass |
string |
empty string |
| aHasKidsClass |
string |
empty string |
| aHasKidsAttributes |
string |
empty string |
| aCurrentClass |
string |
current |
| aCurrentAttributes |
string |
empty string |
| ulNestedClass |
string |
empty string |
| ulNestedAttributes |
string |
empty string |
| ulTopClass |
string |
navSecondary |
| ulPaginationClass |
string |
navSequential |
| ulPaginationWrapperClass |
string |
pagination |
| aNotCurrentClass |
string |
empty string |
| navCalendarWrapperClass |
string |
svCalendar |
| navCalendarTableClass |
string |
table table-bordered |
| navSequentialWrapperClass |
string |
pagination |
| navSequentialULClass |
string |
empty string |
| tagCloudWrapperClass |
string |
svTagCloud |
| navArchiveWrapperClass |
string |
empty string |
| navArchiveListClass |
string |
empty string |
| navBreadcrumbULClass |
string |
breadcrumb |
Form
The Form module markup can be found in the files located under:
{context}/core/modules/v1/form/
| Setting |
Type |
Default |
| formWrapperClass |
string |
well |
| formFieldWrapperClass |
string |
control-group |
| formFieldLabelClass |
string |
control-label |
| formInputWrapperClass |
string |
input-addon |
| formInputClass |
string |
form-control |
| formCheckboxClass |
string |
empty string |
| formButtonWrapperClass |
string |
btn-group |
| formButtonInnerClass |
string |
empty string |
| formButtonClass |
string |
btn btn-default |
| formRequiredWrapperClass |
string |
empty string |
Form Builder
The Form Builder module markup can be found in the files located under:
{context}/core/modules/v1/formbuilder/
| Setting |
Type |
Default |
| formBuilderFieldWrapperClass |
string |
empty string |
| formBuilderButtonWrapperClass |
string |
form-actions |
| formBuilderSubmitClass |
string |
btn btn-default |
| formBuilderFormFieldsClass |
string |
control-group |
| formBuilderTabHeaderClass |
string |
dropdown |
| formBuilderDisabledInputClass |
string |
disabled |
| formBuilderCheckboxClass |
string |
checkbox |
Calendar
The Calendar module markup can be found in the files located under:
{context}/core/modules/v1/calendar/
| Setting |
Type |
Default |
| calendarWrapperClass |
string |
svCalendar |
| calendarTableClass |
string |
table table-bordered |
| calendarTableHeaderClass |
string |
empty string |
| calendarTitleInDesc |
boolean |
true |
| calendarListWrapperClass |
string |
svCalendar |
| calendarcolors |
array of structs |
[
{background='##3a87ad', text='white'},
{background='blue', text='white'}
] |
Comments
The Comments module markup can be found in the files located under:
{context}/core/modules/v1/comments/
| Setting |
Type |
Default |
| commentsWrapperClass |
string |
empty string |
| commentSortContainerClass |
string |
empty string |
| commentSortWrapperClass |
string |
empty string |
| commentSortSelectClass |
string |
empty string |
| commentFormWrapperClass |
string |
empty string |
| commentFormClass |
string |
well |
| commentNewClass |
string |
btn |
| commentFieldWrapperClass |
string |
empty string |
| commentFieldLabelClass |
string |
empty string |
| commentInputWrapperClass |
string |
empty string |
| commentInputClass |
string |
empty string |
| commentCheckboxClass |
string |
checkbox |
| commentPrefsInputWrapperClass |
string |
empty string |
| commentSubmitButtonWrapperClass |
string |
empty string |
| commentSubmitButtonClass |
string |
btn |
| commentMoreCommentsUpClass |
string |
btn btn-default icon-arrow-up |
| commentMoreCommentsDownClass |
string |
btn btn-default icon-arrow-down |
| commentRequiredWrapperClass |
string |
empty string |
| commentAdminButtonWrapperClass |
string |
empty string |
| commentUserEmailClass |
string |
btn |
| commentDeleteButtonClass |
string |
btn |
| commentEditButtonClass |
string |
btn |
| commentApproveButtonClass |
string |
btn |
| commentThumbClass |
string |
img-polaroid |
| commentSpamClass |
string |
btn |
| commentSpamLinkClass |
string |
btn |
| commentClass |
string |
empty string |
| commentDateTimeClass |
string |
empty string |
| commentReplyClass |
string |
empty string |
| commentAwaitingApproval |
string |
empty string |
| commentAdminButtonWrapperClass |
string |
btn-group pull-right |
| commentUserEmailClass |
string |
btn btn-default btn-sm |
| commentDeleteButtonClass |
string |
btn btn-default btn-sm |
| commentEditButtonClass |
string |
btn btn-default btn-sm |
| commentApproveButtonClass |
string |
btn btn-default btn-sm |
| commentMoreCommentsContainer |
string |
well |
| emailLinkClass |
string |
btn |
| commentsLinkClass |
string |
btn |
| approveCommentLinkClass |
string |
btn |
| deleteCommentLinkClass |
string |
btn |
Collections, Folders, and List/Grid Output
Collections & List/Grid module markup can be found in the files located under:
{context}/core/modules/v1/collection/
| Setting |
Type |
Default |
| contentListImageStyles |
boolean |
true |
| contentListImagePadding |
int |
20 |
| contentListPropertyMap |
struct |
{
containerEl={tag="div"},
itemEl={tag="dl",class="clearfix"},
labelEl={tag="span"},
title={tag="dt"},
date={tag="dt"},
credits={tag="dd",showLabel=true,rbkey="list.by"},
tags={tag="dd",showLabel=true,labelDelim=":",rbkey="tagcloud.tags"},
rating={tag="dd",showLabel=true,labelDelim=":",rbkey="list.rating"},
default={tag="dd"}
} |
| contentGridStyleMap |
struct |
{
'1 Column'='mura-grid-one',
'2 Column'='mura-grid-two',
'3 Column'='mura-grid-three',
'4 Column'='mura-grid-four',
'5 Column'='mura-grid-five',
'6 Column'='mura-grid-six',
'7 Column'='mura-grid-seven',
'8 Column'='mura-grid-eight',
'9 Column'='mura-grid-nine'
} |
| contentGridPropertyMap |
struct |
{
itemEl={tag="div",class="mura-item-meta"},
labelEl={tag="span"},
title={tag="div"},
date={tag="div"},
credits={tag="div",showLabel=true,labelDelim=":",rbkey="list.by"},
tags={tag="div",showLabel=true,labelDelim=":",rbkey="tagcloud.tags"},
rating={tag="div",showLabel=true,labelDelim=":",rbkey="list.rating"},
'default'={tag="div"}
} |
| contentListWrapperDivClass |
string |
empty string |
| contentListItemImageLinkClass |
string |
thumbnail |
| folderWrapperClass |
string |
svIndex |
| nextNWrapperClass |
string |
empty string |
Edit Profile
The Edit Profile module markup can be found in the files located under:
{context}/core/modules/v1/editprofile/
| Setting |
Type |
Default |
| editProfileWrapperClass |
string |
empty string |
| editProfileFormClass |
string |
form-horizontal |
| editProfileFormGroupWrapperClass |
string |
control-group |
| editProfileFieldLabelClass |
string |
control-label |
| editProfileFormFieldsWrapperClass |
string |
empty string |
| editProfileFormFieldsClass |
string |
empty string |
| editProfileHelpBlockClass |
string |
help-block |
| editProfileExtAttributeFileWrapperClass |
string |
empty string |
| editProfileExtAttributeFileCheckboxClass |
string |
checkbox |
| editProfileExtAttributeDownloadClass |
string |
empty string |
| editProfileExtAttributeDownloadButtonClass |
string |
btn btn-default |
| editProfileSubmitButtonWrapperClass |
string |
empty string |
| editProfileSubmitButtonClass |
string |
btn btn-primary |
| editProfileSuccessMessageClass |
string |
alert alert-success |
Event Reminder Form
The Event Reminder Form module markup can be found in the files located under:
{context}/core/modules/v1/event_reminder_form/
| Setting |
Type |
Default |
| eventReminderFormWrapperClass |
string |
empty string |
| eventReminderFormClass |
string |
well |
| eventReminderFieldWrapperClass |
string |
control-group |
| eventReminderFormLabelsClass |
string |
control-label |
| eventReminderSubmitClass |
string |
btn btn-default |
Feed
The Feed module markup can be found in the files located under:
{context}/core/modules/v1/feed/
You should also review the Collections, Folders, and List/Grid Output settings above for markup information specific to the feed output itself. These settings are merely "wrapper" classes.
| Setting |
Type |
Default |
| localIndexWrapperClass |
string |
svSyndLocal svFeed svIndex clearfix |
| remoteFeedWrapperClass |
string |
svSyndRemote svIndex svFeed clearfix |
Login Form
The Login Form module markup can be found in the files located under:
{context}/core/modules/v1/login/
| Setting |
Type |
Default |
| loginWrapperClass |
string |
container |
| loginWrapperInnerClass |
string |
row |
| loginFormClass |
string |
form-horizontal |
| forgotPasswordFormClass |
string |
form-horizontal |
| loginFormGroupWrapperClass |
string |
empty string |
| loginFormFieldLabelClass |
string |
control-label |
| loginFormFieldWrapperClass |
string |
empty string |
| loginFormFieldClass |
string |
empty string |
| loginFormPrefsClass |
string |
empty string |
| loginFormCheckboxClass |
string |
checkbox |
| loginFormSubmitWrapperClass |
string |
empty string |
| loginFormSubmitClass |
string |
btn btn-default |
| notRegisteredLinkClass |
string |
btn btn-primary |
Search Form & Search Results
The Search Form module markup can be found in the files located under:
{context}/core/modules/v1/search/
| Setting |
Type |
Default |
| searchFormClass |
string |
empty string |
| searchFormInputWrapperClass |
string |
empty string |
| searchFormInputClass |
string |
empty string |
| searchFormSubmitWrapperClass |
string |
empty string |
| searchFormSubmitClass |
string |
btn btn-default |
| searchShowNumbers |
int |
1 |
| searchResultWrapperClass |
string |
container |
| searchResultInnerClass |
string |
row |
| searchResultsRowClass |
string |
row |
| searchResultsMoreResultsRowClass |
string |
row |
| searchResultsListClass |
string |
svIndex |
| searchResultsPagerClass |
string |
pager |
| searchAgainRowClass |
string |
row |
| searchAgainInnerClass |
string |
empty string |
| searchAgainFormClass |
string |
empty string |
| searchAgainInputWrapperClass |
string |
empty string |
| searchAgainFormInputClass |
string |
empty string |
| searchAgainButtonWrapperClass |
string |
empty string |
| searchAgainSubmitClass |
string |
btn btn-default |
User Tools
The User Tools module markup can be found in the files located under:
{context}/core/modules/v1/user_tools/
| Setting |
Type |
Default |
| userToolsLoginWrapperClass |
string |
well clearfix |
| userToolsLoginFormClass |
string |
form-horizontal |
| userToolsFormGroupWrapperClass |
string |
empty string |
| userToolsLoginFormLabelClass |
string |
control-label |
| userToolsLoginFormInputWrapperClass |
string |
empty string |
| userToolsLoginFormInputClass |
string |
empty string |
| userToolsLoginFormFieldInnerClass |
string |
empty string |
| userToolsLoginFormCheckboxClass |
string |
checkbox |
| userToolsLoginFormSubmitClass |
string |
btn btn-default |
| userToolsNotRegisteredLinkClass |
string |
btn btn-primary |
| userToolsWrapperClass |
string |
clearfix |
| userToolsEditProfileLinkClass |
string |
btn btn-default |
| userToolsLogoutLinkClass |
string |
btn btn-default |
Content Rater
The Content Rater module markup can be found in the files located under:
{context}/core/modules/v1/rater/
| Setting |
Type |
Default |
| raterObjectWrapperClass |
string |
row clearfix |
| raterWrapperClass |
string |
empty string |
| avgRatingWrapperClass |
string |
empty string |
The Mura [m] Tag
As covered in the Theme Developer's course, you may use "Mura Tags" when you want to output dynamic code within the HTML Editor.
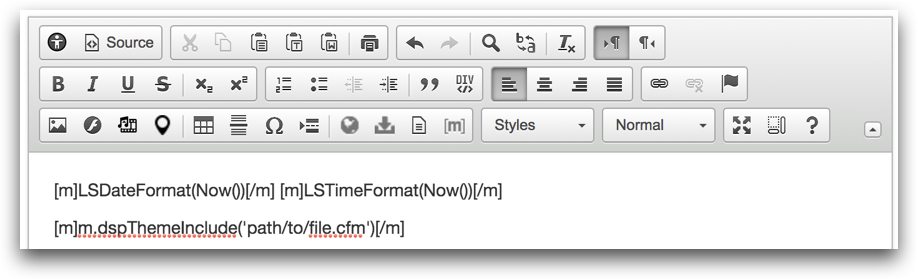
Developers need to use Mura Tags because hash tags (#) are ignored when entered as text in the HTML Editor. Hence, you can only render a CFML variable, or function call.
Globally Enable/Disable the Mura Tag
To globally enable or disable the Mura Tag, open the file located under {context}/config/settings.ini.cfm. Locate the enablemuratag key, and set the value to true to enable the Mura Tag, or false to disable the Mura Tag.
If enablemuratag is set to false, the Mura tag button will not appear on any HTML Editors. In addition, the Mura Tags will not be parsed as CFML, and will only display as a string of text, as it was entered into the HTML Editor.
Enable/Disable the Mura Tag on a Site-by-Site Basis
If you wish to enable or disable the Mura Tag on a site-by-site basis, you may edit the Site or Theme contentRenderer.cfc file located under:
- Site contentRenderer.cfc
{context}/sites/{SiteID}/contentRenderer.cfc
- Theme contentRenderer.cfc
../themes/{ThemeName}/contentRenderer.cfc
Then, add this.enablemuratag=true to enable, or this.enablemuratag=false to disable. This setting overrides the global setting described above.
Rendering Mura Tags
When you expect Mura Tags in the output, you'll want to use the m.SetDynamicContent(string) function. This function is covered under the setDynamicContent section of the Theme Developer's Guide.
Mura Modules & Display Objects
Mura's baked-in modules are managed via the front-end user interface. Modules are sometimes referred to as "display objects" because often times, that's how the module itself is used. However, a Mura module does not have to contain a "display" of any kind. Modules can be complete applications, or simply contain some custom logic that is triggered based on a desired event.
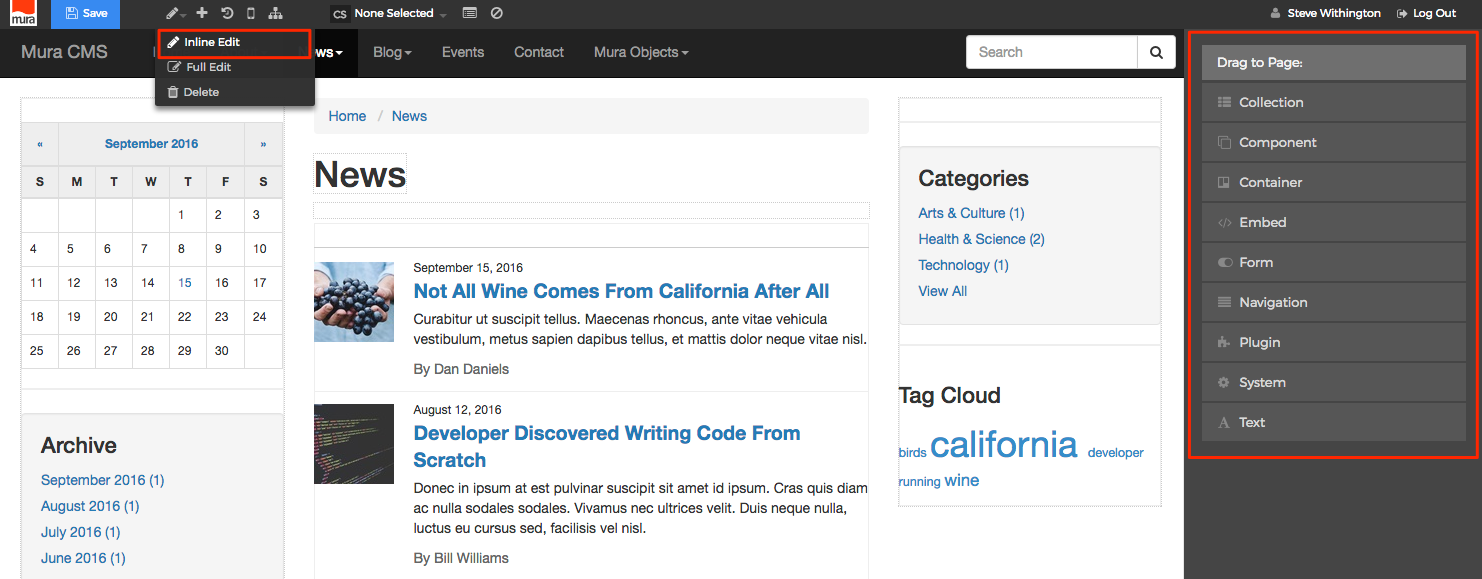
Note: If you aren't familiar with Mura's default modules (display objects), you should review the Inline Edit Display Objects section of the Content Manager's guide, before continuing in this section.
Mura includes a variety of baked-in modules (display objects) by default while offering content managers the ability to quickly and easily add modules such as Collections, Components, Containers, Forms, Navigation, and many more.
Each of Mura's modules contain some server-side logic, basic markup, styling, and sometimes include JavaScript. In this section, you'll learn how to safely modify this logic, markup, styling, and/or JavaScript, and do so without worrying about your changes getting overwritten whenever Mura's files are updated. In addition, you'll learn how to create your own, custom modules too.
Modifying Mura's Modules
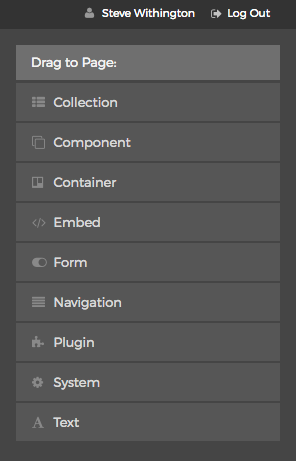
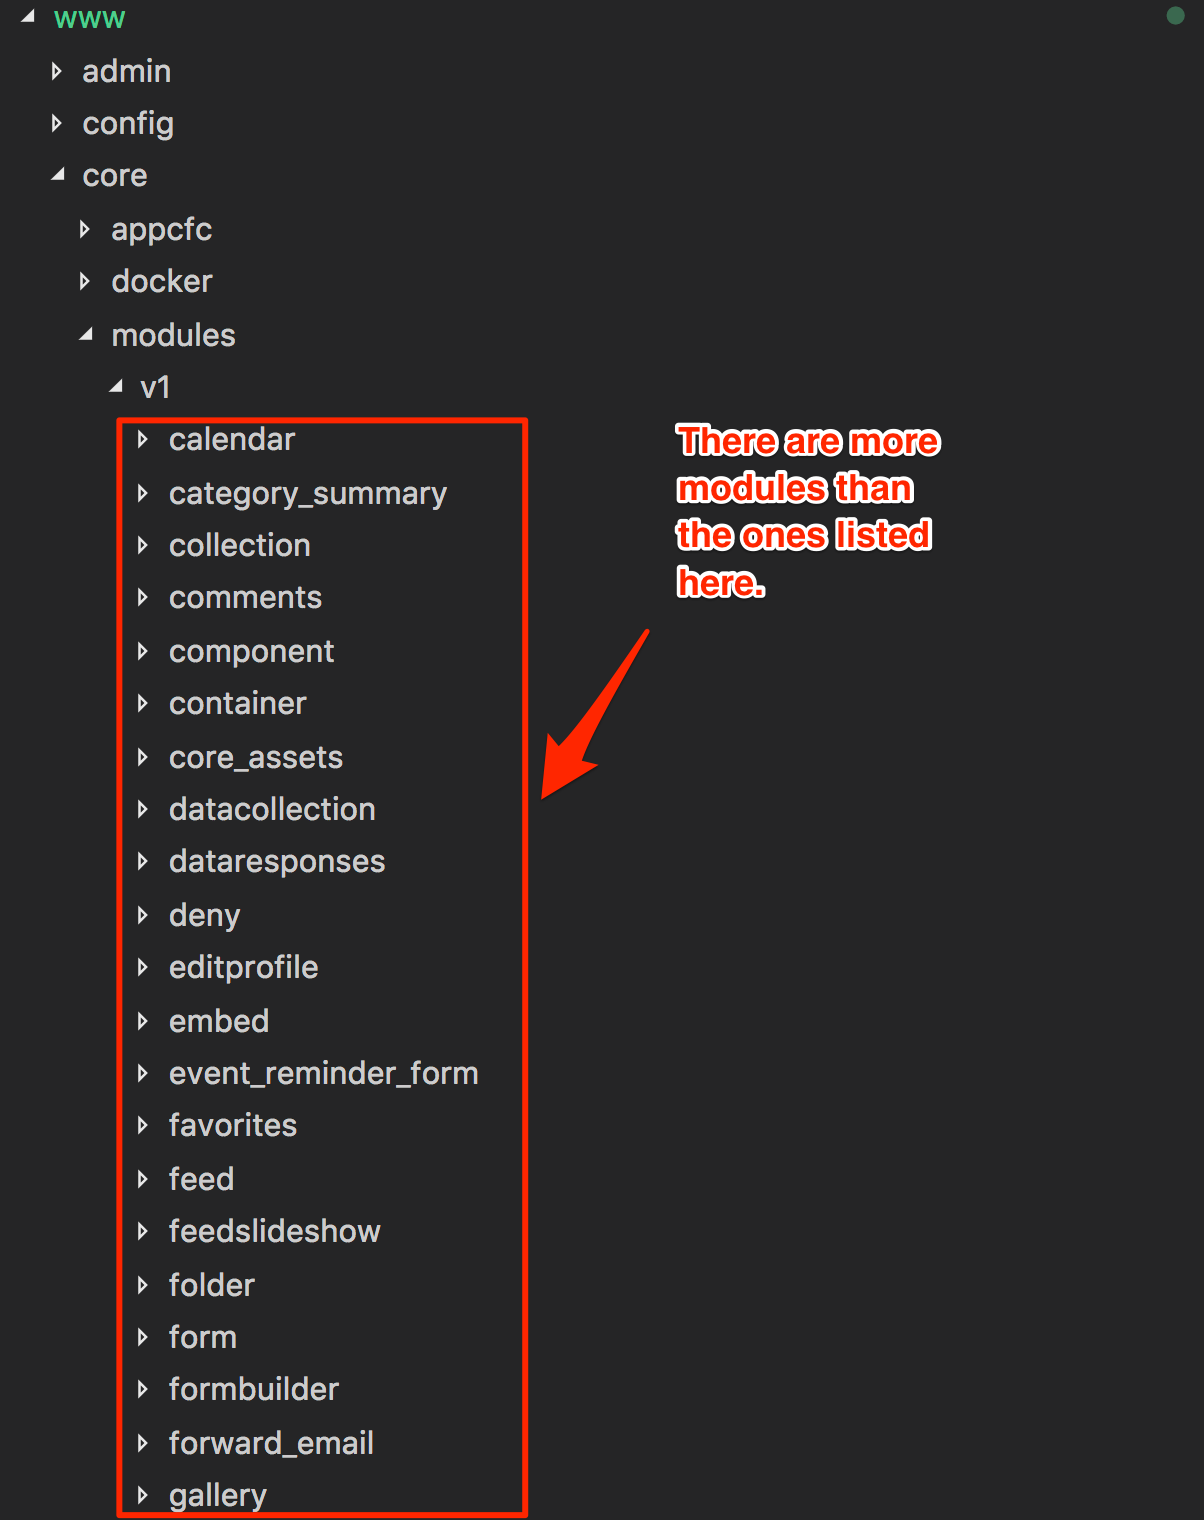
Mura's base modules (display objects) are located under the following directory:
{context}/core/modules/v1/
As illustrated in the image below, there are more modules than the ones listed.
You shouldn't modify any of the files in these directories directly. If you choose to do so, you run the risk of your changes being overwritten whenever Mura is updated to the latest version.
Instead, copy the desired directory and all of its files, then paste it under one of the locations listed in the "Lookup Hierarchy" section below. Then, you can safely make your modifications without fear of losing any of your changes the next time Mura is updated.
Registering a Custom "modules" Directory
While Mura automatically scans for modules in the directories specified in the "Lookup Hierarchy" section below, you may register a custom "modules" directory using the code example below.
m.siteConfig().registerModuleDir(
  dir='/path/to/your/modules/'
);
The directory path should be a logical path to a CFML directory, and is usually registered in the onApplicationLoad() event.
Lookup Hierarchy
As mentioned under "The 'Modules' Directory" section, Mura uses the following lookup hierarchy when searching for modules, and aborts the lookup process once the target module has been located:
- Registered Module Directory
{RegisteredModuleDirectory}/- A pre-registered module directory path. See "Registering a Custom 'Modules' Directory" section above.
- Module
../{module}/modules/- A nested "modules" directory nested within a known module.
- Theme
../themes/{ThemeName}/modules/- Theme modules are only used when the specified theme is actively assigned to a site. Keep in mind themes may be located under either the global themes directory (
{context}/themes/{ThemeName}), or under a site ({context}/sites/{SiteName}/themes/{ThemeName}).
- Site
{context}/sites/{SiteName}/modules/- Site modules are shared across all themes within the specific site.
- Global
{context}/modules/- Global modules are shared across all sites under a single Mura instance.
- Core
{context}/core/modules/v1/core_assets/modules/- These are the "core" modules or display objects which may be copied and placed into any of the directories above to be safely modified.
Note: You should not edit the "core" modules directly. If you do, you run the risk of losing your edits or changes whenever you update Mura to the latest version.
Anatomy of a Module
In addition to understanding how Mura's modules are constructed, Mura developers may use the information below to create their own, custom modules.
Directory Structure
First, create a directory under a known or registered "modules" directory. For example, ../modules/mymodule/. Within the {module} directory, you may have the following files and/or directories:
| File or Directory |
Req/Opt |
Description |
| index.cfm |
Optional |
If your module will be used as a "display object", this file will contain the body or view used by Mura for display file itself. See example "index.cfm" file section below. |
| config.xml.cfm |
Optional |
This is the configuration file for the module itself. This file also allows you to include custom image sizes, class extensions, and more. See example "config.xml.cfm" file section below. Also visit the Elements Of The "config.xml.cfm" File section for information about available elements and attributes. |
| configurator.cfm |
Optional |
This file allows developers to include a form with configuration options which appear on the module configuration panel when using the Inline Edit feature. See example "configurator.cfm" file section below. |
| /model/ |
Optional |
If you wish to leverage Mura ORM, the module could have its own "model" directory, which in turn could also include a "beans" and/or "handlers" directory too. See Mura ORM Configuration section for more information about the "model" directory. |
| /content_types/ |
Optional |
You may also include custom content types. This is useful for keeping content types directly related to specific module(s) together, in a unified directory structure. See Content Types section for more information. |
| /modules/ |
Optional |
You may also nest custom modules. This is useful for keeping related modules together, under one, unified module itself. One caveat is that if you choose to display the nested object on the parent object, content managers will not be able to access the nested object's configurator, if it has one. Because of this, you may wish to either omit the "contenttypes" attribute from your config.xml.cfm's <mura ...> node, or explicitly add contenttypes="" so that the nested object will not appear in the module panel's UI. If you need configurable options for the nested object, you should include the options on the parent object's configurator. To include the nested object in the view of the parent object, use the following syntax: #m.dspObject(object='{objectName}', objectparams=objectparams)#. |
Example "index.cfm" File
The example below illustrates what an "index.cfm" file could contain. However, you may include your own custom markup, code, and more.
<cfparam name="objectparams.mytext" default="" />

<cfoutput>
  <h2>My Object</h2>

  <cfif Len(objectparams.mytext)>
    <p>
      This object has a configurator, and the value of "objectparams.mytext" is:<br>
      <strong>#esapiEncode('html', objectparams.mytext)#</strong>
    </p>
  <cfelse>
    <!--- No value entered for "objectparams.mytext" --->
  </cfif>
</cfoutput>
If you wish to add any CSS or JavaScript to the browser for your module, you'll need to use MuraJS to help you. The example below leverages the loader() method to load both CSS and JavaScript. Simply add this code to your "index.cfm" file. You may have to change the path(s) to match your specific directory structure, and needs.
<!--- Add the following to your "index.cfm" file --->
<script>
  Mura(function(m) {
    m.loader()
      .loadcss(m.themepath + '/modules/myobject/my.css')
      .loadjs(
        m.themepath + '/modules/myobject/my.js',
        m.themepath + '/modules/myobject/other.js',
        function() {
          // Do something with the loaded JS, if desired
        }
      );
  });
</script>
Visit the MuraJS section to learn more about Mura.loader() capabilities.
Rendering Via JavaScript
If your module will be rendered using only JavaScript, your index.cfm file should only contain the following code:
<cfset objectparams.render="client">
Choosing this option means you'll have to load your JavaScript by using a custom event handler method, as shown below.
// ../yourmodule/model/handlers/yourhandler.cfc

component extends='mura.cfobject' {

  function onRenderStart(m) {
    // if script should be included in the <head>
    arguments.m.addToHTMLHeadQueue('<script src="/path/to/script.js"></script>');

    // OR

    // if script should be included before closing </body> tag
    arguments.m.addToHTMLFootQueue('<script src="/path/to/script.js"></script>');
  }

}
Please also see the Modules and Display Objects With Mura.js section, for more information on rendering modules via JavaScript.
Example "config.xml.cfm" File
The example below illustrates a simple example of the "config.xml.cfm" file. Visit the Elements Of The "config.xml.cfm" File section for more details on available elements and attributes.
<?xml version="1.0" encoding="UTF-8"?>
  <mura name="My Module" contenttypes="*" iconclass="mi-rebel">
    <!-- May also include other elements here -->
  </mura>
Example "configurator.cfm" File
The example below illustrates an example "configurator.cfm" file.
<cfparam name="objectparams.mytext" default="" />

<cfoutput>
    <div class="mura-control-group">
        <label class="mura-control-label">My Text</label>
        <input  type="text"
                name="mytext"
                class="objectParam"
                value="#esapiEncode('html_attr', objectparams.mytext)#" />
    </div>
</cfoutput>
Visit the Custom Module Configurators section for information on proper markup conventions.
More Information & Examples
For more information, check out the Super Fast Application Development with Mura 7 on-demand webinar. The presentation slides and code samples can be found at https://github.com/stevewithington/cfsummit-2016.
You may also be interested in checking out the Intro to Mura 7 Display Objects session from MuraCon 2017.
Mura Content Types
In addition to using some of Mura's content-related event hooks, developers can control the rendering of the body area by targeting a content's Type and Subtype. This feature also applies to any custom Class Extensions. For example, "Folder/Contacts", "Page/Contact", etc.
Mura automatically scans the following directories for custom content types:
{context}/themes/{ThemeName}/content_types/{context}/sites/{SiteID}/themes/{ThemeName}/content_types/{context}/sites/{SiteID}/content_types/../content_types/{type}/content_types/../content_types/{type}_{subtype}/content_types/
Or, you can register any directory you want by using the following syntax:
m.siteConfig().registerContentTypeDir(
  '/path/to/your/content_types/'
);

// Path is a logical path to a CFML directory
// Usually registered in onApplicationLoad();
Note: This feature only works if the layout template is using m.dspBody() to render the body area.
Control Body By Type/Subtype
You target the body's Type/Subtype by a conventional directory structure.
For example, you could target content by only its Type:
../content_types/{type}/

// If you wish to target 'Page'
../content_types/page/index.cfm
Or, you can target by both the Type, and its Subtype:
../content_types/{type}_{subtype}/

// If you wish to target 'Page/Contact'
../content_types/page_contact/index.cfm
Anatomy of a {type}_{subtype} Directory
As previously mentioned, you create a directory under a known or registered "content_types" directory by using {type}_{subtype} (e.g., ../content_types/page_contact/ or ../.content_types/component_default/, etc.). Within the {type}_{subtype} directory, you may have the following files and/or directories:
| File or Directory |
Req/Opt |
Description |
| index.cfm |
Required |
This is the body or view used by Mura for display file itself. At a minimum, this file should contain <cfoutput>#m.renderEditableAttribute(attribute="body",type="htmlEditor")#</cfoutput>, if you wish to see any text entered into the "Content" area. See example "index.cfm" file below. |
| config.xml.cfm |
Optional |
This is the configuration file. This allows you to include custom image sizes, class extensions, and more. See Elements Of the "config.xml.cfm" File section for more information. |
| /model/ |
Optional |
If you wish to leverage Mura ORM, the content type could have its own "model" directory, which in turn could also include a "beans" and/or "handlers" directory too. See Mura ORM Configuration section for more information about the "model" directory. |
| /modules/ |
Optional |
You may also include custom modules. This is useful for keeping modules and/or display objects directly related to specific content types together, in a unified directory structure. See Modules section for more information. See below for information on how to output modules in your layout template. |
| /content_types/ |
Optional |
You may include a nested "content_types" directory. This is a great way to keep related code items together. |
Example "index.cfm" File
The example below illustrates what an "index.cfm" file could contain. However, you may include your own custom markup, code, and more.
<cfoutput>
  <article class="article">
    <!--- Page Title --->
    <h2 class="article__title">#m.renderEditableAttribute(attribute='title')#</h2>

    <!--- Primary Image --->
    <cfif m.content().hasImage(usePlaceholder=false)>
      <figure class="article__image">
        <img src="#m.getURLForImage(fileid=m.content('fileid'), size='medium')#"
             alt="#esapiEncode('html_attr', m.content('title'))#" />
      </figure>
    </cfif>

    <!--- Content --->
    <div class="article__body">
      #m.renderEditableAttribute(attribute='body', type='htmlEditor')#
    </div>
  </article>
</cfoutput>
How To Output Modules
To output a module (display object) in your custom body layout, use the following syntax:
<cfoutput>
  #m.dspObject(object='{objectName}')#
</cfoutput>
When hardcoding a module in your layout, the "Delete" button will not appear for content managers when using the "Inline Edit" mode.
Including Configurable Modules
The first thing to understand about including configurable modules in your custom body layout is there can only be one (1) module that is configurable. Whichever module you wish to be configurable should include a "objectparams" parameter, and include the "objectparams" as the value, as shown below:
<cfoutput>
  #m.dspObject(object='{objectName}', objectparams=objectparams)#
</cfoutput>
If you attempt to include multiple configurable modules using the code example above, the first module will be configurable, and all others will not. This means, when you select "Inline Edit" mode, only the first configurable module will include the pencil icon and actually be configurable.
To include additional modules, you may pass in any "objectparams" parameters as an object, as show in the example below:
<cfoutput>
  #m.dspObject(
    object='object1',
    objectparams={param1=objectparams.param1, param2=objectparams.param2}
  )#

  #m.dspObject(object='object2', objectparams=objectparams)#
</cfoutput>
In the example above, "object2" will be the only configurable module.
JSON API
Introduction
The JSON API allows Mura CMS to be the main content creation hub within an organization, and allows developers to build their front-ends as pure JavaScript clients.
Base URL
The base URL for the API endpoints is:
https://yourDomain.com/{context}/index.cfm/_api/json/v1/
API Endpoint Reference
Response Format
On success, the HTTP status code in the response header is 200 OK and the response body contains a data object in JSON format. On error, the header status code is an error code and the response body contains an error object.
Example Response
{
	"data": {
		"key": "value"
	}
}
Response Status Codes
The JSON API uses the following response status codes:
| Status Code |
Description |
| 200 |
OK - The request has succeeded. The client can read the result of the request in the body and the headers of the response. |
| 400 |
Bad Request - The request could not be understood by the server due to malformed syntax. The message body will contain more information; see Error Handling, below. |
| 401 |
Unauthorized - The request requires user authentication or, if the request included authoriation credentials, authorization has been refused for those credentials. Also, the JSON API feature may not be enabled for the site; see How To Enable, above. |
| 403 |
Forbidden - The server understood the request, but is refusing to fulfill it. For example, requestor does not have permission to a requested method. |
| 404 |
Not Found - The requested resource could not be found. This error can be due to a temporary or permanent condition. |
Error Handling
When an error occurs, the response data attribute will not exist. The response will instead contan an error attribute.
Example Error Response
{
	"error": {
		"message": "Insufficient Account Permissions"
	}
}
Example Response Handler
$.getJSON('/index.cfm/json/v1/default/content/').then(
	function( resp ) {
		if ( 'error' in resp ) {
			//handle error
		} else {
			//do stuff
		}
	}
});
History
Feature added in version 6.2.
FindOne
Find an entity.
Endpoint
GET https://yourdomain.com/{context}/index.cfm/_api/json/v1/{siteid}/{entityname}/{id}
OR
GET https://yourdomain.com/{context}/index.cfm/_api/json/v1/?method=findone&site={siteid}&entityname={entityName}&id={id}
Request & Query Parameters
| Parameter |
Value |
| context |
The path to where Mura CMS resides within the webroot (typically, an empty string). |
| siteid |
The SiteID of the site being searched. |
| entityname |
The entityname being searched. For example: "content", "user", "feed", etc. |
| id |
The object ID of the entity being searched for. |
Example Response
The data object will contain the entity's keys and corresponding values.
{
  "data": {
    "targetparams":"",
    "path":"00000000000000000000000000000000001,2C91A3B0-E375-9383-0B05636E6926868D",
    "menutitle":"Testing",
    "releaseDate":"",
    "fileid":"",
    "responsesendto":"",
    "id":"2C91A3B0-E375-9383-0B05636E6926868D",
    "type":"Page",
    "lastupdatebyid":"AD771D5C-BE0A-D43D-47F4E201B378BD7A",
    "forceSSL":0,
    "responsemessage":"",
    "subtype":"Default",
    "remoteurl":"",
    "contenttype":"",
    "childtemplate":"",
    "keypoints":"",
    "moduleid":"00000000000000000000000000000000000",
    "inheritobjects":"Inherit",
    "searchExclude":0,
    "featureStop":"",
    "newfile":"",
    "remotesourceurl":"",
    "displayStop":"",
    "remotesource":"",
    "remotePubDate":"",
    "tags":"",
    "majorVersion":0,
    "extendautocomplete":true,
    "contentsubtype":"",
    "url":"/index.cfm/testing/",
    "sortby":"orderno",
    "displayTitle":0,
    "approvalstatus":"",
    "credits":"",
    "oldfilename":"",
    "featureStart":"",
    "siteid":"default",
    "doCache":1,
    "imagesize":"small",
    "imagewidth":"AUTO",
    "target":"_self",
    "minorVersion":0,
    "approvalgroupid":"",
    "assocfilename":"",
    "lastUpdate":"2015-01-29T15:45:51",
    "summary":"",
    "images":{},
    "template":"",
    "moduleassign":"",
    "displayStart":"",
    "isFeature":0,
    "filesize":"",
    "approvingchainrequest":false,
    "categoryid":"",
    "tcontent_id":"0",
    "isLocked":0,
    "isNav":1,
    "newstags":"",
    "orderno":1,
    "htmltitle":"Testing",
    "urltitle":"testing",
    "approvalchainoverride":false,
    "body":"",
    "requestid":"",
    "restrictgroups":"",
    "active":1,
    "metadesc":"",
    "audience":"",
    "links":{
      "site":"http://docs.getmura.com:8080/index.cfm/_api/json/v1/default?method=findOne&entityName=site&siteid=default",
      "categoryassignments":"http://cf11:8080/index.cfm/_api/json/v1/default?method=findQuery&siteid=default&entityName=contentCategoryAssign&contenthistid=2C92F953-E042-CBF6-42F66BD74A4BEC0B",
      "parent":"http://docs.getmura.com:8080/index.cfm/_api/json/v1/default?method=findOne&siteid=default&entityName=content&id=00000000000000000000000000000000001",
      "stats":"http://docs.getmura.com:8080/index.cfm/_api/json/v1/default?method=findOne&siteid=default&entityName=stats&id=2C91A3B0-E375-9383-0B05636E6926868D",
      "crumbs":"http://docs.getmura.com:8080/index.cfm/_api/json/v1/default?method=findCrumbArray&siteid=default&entityName=content&id=2C91A3B0-E375-9383-0B05636E6926868D",
      "comments":"http://docs.getmura.com:8080/index.cfm/_api/json/v1/default?method=findQuery&siteid=default&entityName=comment&contentid=2C91A3B0-E375-9383-0B05636E6926868D",
      "relatedcontent":"http://docs.getmura.com:8080/index.cfm/_api/json/v1/default?method=findRelatedContent&siteid=default&id=2C91A3B0-E375-9383-0B05636E6926868D",
      "renderered":"http://docs.getmura.com:8080/index.cfm/_api/json/v1/default/_path/testing",
      "kids":"http://cf11:8080/index.cfm/_api/json/v1/default?method=findQuery&siteid=default&entityName=content&parentid=2C91A3B0-E375-9383-0B05636E6926868D"
    },
    "restricted":0,
    "metakeywords":"",
    "nextN":10,
    "fileext":"",
    "notes":"",
    "display":1,
    "created":"2015-01-29T15:45:51",
    "contenthistid":"2C92F953-E042-CBF6-42F66BD74A4BEC0B",
    "responsedisplayfields":"",
    "expires":"",
    "imageheight":"AUTO",
    "filename":"testing",
    "relatedcontentsetdata":"",
    "sortdirection":"asc",
    "contentid":"2C91A3B0-E375-9383-0B05636E6926868D",
    "changesetid":"",
    "displayinterval":"Daily",
    "sourceiterator":"",
    "mobileExclude":0,
    "extendsetid":"",
    "remoteid":"",
    "parentid":"00000000000000000000000000000000001",
    "preserveid":"2C92F953-E042-CBF6-42F66BD74A4BEC0B",
    "title":"Testing",
    "lastupdateby":"Steve Withington",
    "approved":1,
    "extenddata":"",
    "blogtags":"",
    "responseChart":0
  }
}
History
Added in version 6.2
FindMany
Get multiple entities.
Endpoint
GET https://yourdomain.com/{context}/index.cfm/_api/json/v1/{siteid}/{entityname}/{ids}
OR
GET https://yourdomain.com/{context}/index.cfm/_api/json/v1/?method=findmany&siteid={siteid}&entityname={entityname}&ids={ids}
Request & Query Parameters
| Parameter |
Value |
| context |
The path to where Mura CMS resides within the webroot (typically, an empty string). |
| siteid |
The SiteID of where the entity will be stored. |
| entityname |
The entity's name. |
| ids |
A comma-delimited list of entity IDs. |
Example Response
If multiple entities are found, an items array will be present in the data object.
{
	"data": {
		"items": [
			{
				"id": "2C91A3B0-E375-9383-0B05636E6926868D",
				"name": "Example",
				"links": {
					"relatedentitylink1": "http://...",
					"relatedentitylink2": "http://..."
				}
			},
			{
				"id": "6C92F953-E042-CBF6-42F66BD74A4BEC0B",
				"name": "Another Example",
				"links": {
					"relatedentitylink1": "http://...",
					"relatedentitylink2": "http://..."
				}
			},

		]
	}
}
If only one entity is found, the data object will contain the entity's keys and corresponding values.
{
	"data": {
		"id": "2C91A3B0-E375-9383-0B05636E6926868D",
		"name": "Example",
		"links": {
			"relatedentitylink1": "http://...",
			"relatedentitylink2": "http://..."
		}
	}
}
History
Added in version 6.2
FindNew
Gets a new entity.
Endpoint
GET https://yourdomain.com/{context}/index.cfm/_api/json/v1/{siteid}/{entityname}/new
OR
GET https://yourdomain.com/{context}/index.cfm/_api/json/v1/?method=findnew&siteid={siteid}&entityname={entityname}
Request & Query Parameters
| Parameter |
Value |
| context |
The path to where Mura CMS resides within the webroot (typically, an empty string). |
| siteid |
The SiteID of where the entity will be stored. |
| entityname |
The entity's name. |
Example Response
{
	"data": {
		"id": "2C91A3B0-E375-9383-0B05636E6926868D",
		"name": "Example",
		"links": {
			"relatedentitylink1": "http://...",
			"relatedentitylink2": "http://..."
		}
	}
}
History
Added in version 6.2
FindQuery
Get an array of entity items.
Endpoint
GET https://yourdomain.com/{context}/index.cfm/_api/json/v1/{siteid}/{entityname}/?
OR
GET https://yourdomain.com/{context}/index.cfm/_api/json/v1/?method=findquery&siteid={siteid}&entityname={entityname}/?
Request & Query Parameters
| Parameter |
Value |
| context |
The path to where Mura CMS resides within the webroot (typically, an empty string). |
| siteid |
The SiteID of where the entity will be stored. |
| entityname |
The entity's name. For example: ?entityname=content |
| fields |
Optional. A comma-separated listed of fields to return. For example: ?fields=title,summary,contentid |
| maxitems |
Optional. Limit the number of records to return. For example: ?maxitems=10 |
| itemsperpage |
Optional. Sets the desired number of items to return for each page. For example: ?itemsperpage=3 |
| pageindex |
Optional. Sets the desired page for pagination. For example: ?pageindex=2 |
| sort |
Optional. Control the sort order and direction of entities by specific attributes/fields. To sort decending, prefix the attribute/field with a minus sign (-). You may explicitly use the plus sign (+) to indicate the default setting of ascending. For example, to sort by "credits" ascending, and "title" decending: ?sort=credits,-title |
| cachedwithin |
Optional. Sets the desired cache timespan in seconds. For example: ?cachedwithin=120 |
Custom Query Parameters
Filter results by passing an attribute name of your entity, and the value to search for. Use the star (*) to denote wildcard.
The following example assumes the entity has an attribute named title:
GET https://yourdomain.com/{context}/index.cfm/_api/json/v1/?method=findquery&siteid={siteid}&entityname={entityname}&title=about*
This should return any entities with a title attribute that starts with about, such as "about, About, About Us, About Time."
Example Response
If one or more entities are found, an items array will be present in the data object.
{
	"data": {
		"endindex": 1,
		"startindex": 1,
		"totalpages": 1,
		"totalitems": 1,
		"links": {
			"self": "http://domain/index.cfm/_api/json/v1/default/?&sort=title&entityname=content&siteid=default&fields=title,summary,contentid&itemsperpage=10&maxitems=50&method=undefined&pageIndex=1"
		},
		"itemsperpage": 10,
		"items": [
			{
				"entityname": "content",
				"images": {},
				"contentid": "00000000000000000000000000000000001",
				"siteid": "default",
				"url": "/",
				"links": {
					"renderered": "http://domain/index.cfm/_api/json/v1/default/_path/",
					"categoryassignments": "http://domain/index.cfm/_api/json/v1/default?method=findQuery&siteid=default&entityName=contentCategoryAssign&contenthistid=14CA1DCF-41A8-4D04-861AFE9D4162CD7C",
					"relatedcontent": "http://domain/index.cfm/_api/json/v1/default?method=findRelatedContent&siteid=default&entityName=content&id=00000000000000000000000000000000001",
					"crumbs": "http://domain/index.cfm/_api/json/v1/default?method=findCrumbArray&siteid=default&entityName=content&id=00000000000000000000000000000000001",
					"stats": "http://domain/index.cfm/_api/json/v1/default?method=findOne&siteid=default&entityName=stats&id=00000000000000000000000000000000001",
					"self": "http://domain/index.cfm/_api/json/v1/default/_path/",
					"comments": "http://domain/index.cfm/_api/json/v1/default?method=findQuery&siteid=default&entityName=comment&contentid=00000000000000000000000000000000001",
					"site": "http://domain/index.cfm/_api/json/v1/default?method=findOne&entityName=site&siteid=default",
					"parent": "http://domain/index.cfm/_api/json/v1/default?method=findOne&siteid=default&entityName=content&id=00000000000000000000000000000000END",
					"kids": "http://domain/index.cfm/_api/json/v1/default?method=findQuery&siteid=default&entityName=content&parentid=00000000000000000000000000000000001"
				},
				"id": "00000000000000000000000000000000001",
				"title": "Home",
				"summary": ""
			}
		],
		"pageindex": 1
	},
	"params": {
		"sort": "title",
		"entityname": "content",
		"siteid": "default",
		"fields": "title,summary,contentid",
		"itemsperpage": 10,
		"maxItems": 50,
		"pageindex": 1
	},
	"method": "findQuery",
	"apiversion": "v1"
}
History
Added in version 6.2
FindRelatedEntity
Gets a related entity.
Endpoint
GET https://yourdomain.com/{context}/index.cfm/_api/json/v1/{siteid}/{entityname}/{id}/{relatedentity}/?
OR
GET https://yourdomain.com/{context}/index.cfm/_api/json/v1/?method=findquery&siteid={siteid}&entityname={relatedentity}&entitynamefk={id}
Request & Query Parameters
| Path parameter |
Value |
| context |
The path to where Mura CMS resides within the webroot (typically, an empty string). |
| siteid |
The SiteID of where the entity will be stored. |
| entityname |
The entity's name. |
| id |
The ID of an entity. |
| relatedentity |
The name of a related entity. |
| entitynamefk |
The ID of an entity. |
Example Response
If multiple entities are found, an items array will be present in the data object.
{
	"data": {
		"items": [
			{
				"id": "2C91A3B0-E375-9383-0B05636E6926868D",
				"name": "Example",
				"links": {
					"relatedentitylink1": "http://...",
					"relatedentitylink2": "http://..."
				}
			},
			{
				"id": "6C92F953-E042-CBF6-42F66BD74A4BEC0B",
				"name": "Another Example",
				"links": {
					"relatedentitylink1": "http://...",
					"relatedentitylink2": "http://..."
				}
			},

		]
	}
}
If only one entity is found, the data object will contain the entity's keys and corresponding values.
{
	"data": {
		"id": "2C91A3B0-E375-9383-0B05636E6926868D",
		"name": "Example",
		"links": {
			"relatedentitylink1": "http://...",
			"relatedentitylink2": "http://..."
		}
	}
}
History
Added in version 6.2
FindCalendarItems
Get calendar content items.
Endpoint
GET https://yourdomain.com/{context}/index.cfm/_api/json/v1/?method=findcalendaritems&siteid={siteid}&calendarid={calendarid}&start={start}&end={end}&format={format}
Request & Query Parameters
| Path parameter |
Value |
| context |
The path to where Mura CMS resides within the webroot (typically, an empty string). |
| siteid |
The SiteID of where the entity will be stored. |
| calendarid |
The contentid of a Mura CMS content item with the "Type" set to Calendar. |
| start |
Optional. The start date to filter by. |
| end |
Optional. The end date to filter by. |
| format |
Optional. Options are default (the default setting) or fullcalendar. This determines how the response is formatted. |
| categoryid |
Optional. Filters results by categoryid. |
| tag |
Optional. Filters results by tag. |
Example "Default" Response
If multiple entities are found, an items array will be present in the data object.
{
	"data": {
    	"items": [
			{
				"contentid": "2C91A3B0-E375-9383-0B05636E6926868D",
				"title": "Event 1",
				...
			},
			{
				"contentid": "6C92F953-E042-CBF6-42F66BD74A4BEC0B",
				"title": "Event 2",
				...
			},
			...
		]
	}
}
If only one entity is found, the data object will contain the entity's keys and corresponding values.
{
	"data": {
		"contentid": "2C91A3B0-E375-9383-0B05636E6926868D",
		"title": "Event 1",
		...
	}
}
Example "FullCalendar" Response
An events array will be returned.
{
	"events": [
		{
			"contentid": "2C91A3B0-E375-9383-0B05636E6926868D",
			"title": "Event 1",
			...
		},
		{
			"contentid": "6C92F953-E042-CBF6-42F66BD74A4BEC0B",
			"title": "Event 2",
			...
		},
		...
	]
}
History
Added in version 6.2
GenerateCSRFTokens
Get a CSRF (Cross-Site Request Forgery) token. The CSRF token is required for special API methods such as delete and save.
Endpoint
GET https://yourdomain.com/{context}/index.cfm/_api/json/v1/?method=generateCSRFTokens&siteid={siteid}&context={entityid}
Request & Query Parameters
| Parameter |
Value |
| context |
The path to where Mura CMS resides within the webroot (typically, an empty string). |
| siteid |
The SiteID of where the entity will be stored. |
| context |
The primary id of the entity currently being processed. |
Example Response
{
	"data": {
		"csrf_token": "469153A8855FFA7ECB5A11BC8EB3F3C4",
		"csrf_token_expires": "42041.6270023"
	}
}
History
Added in version 6.2
Save
Save an entity.
Endpoint
POST https://yourdomain.com/{context}/index.cfm/_api/json/v1/{siteid}/{entityname}/?csrf_token={csrf_token}&csrf_token_expires={csrf_token_expires}
OR
POST https://yourdomain.com/{context}/index.cfm/_api/json/v1/?method=save&siteid={siteid}&entityname={entityname}&csrf_token={csrf_token}&csrf_token_expires={csrf_token_expires}
Request & Query Parameters
| Path parameter |
Value |
| context |
The path to where Mura CMS resides within the webroot (typically, an empty string). |
| siteid |
The SiteID of where the entity will be stored. |
| entityname |
The entity's name. |
| csrf_token |
The csrf_token is generated by the generateCSRFTokens method. |
| csrf_token_expires |
The csrf_token_expires is generated by the generateCSRFTokens method. |
Example Response
The data object will contain the entity's keys and corresponding values.
{
	"data": {
		"id": "2C91A3B0-E375-9383-0B05636E6926868D",
		"name": "Example",
		"links": {
			"relatedentitylink1": "http://...",
			"relatedentitylink2": "http://..."
		}
	}
}
History
Added in version 6.2
Delete
Delete an entity.
Endpoint
DELETE https://yourdomain.com/{context}/index.cfm/_api/json/v1/{siteid}/{entityname}/{id}/?csrf_token={csrf_token}&csrf_token_expires={csrf_token_expires}
OR
DELETE https://yourdomain.com/{context}/index.cfm/_api/json/v1/?method=delete&siteid={siteid}&entityname={entityname}&id={id}&csrf_token={csrf_token}&csrf_token_expires={csrf_token_expires}
Request & Query Parameters
| Path parameter |
Value |
| context |
The path to where Mura CMS resides within the webroot (typically, an empty string). |
| siteid |
The SiteID of where the entity is stored. |
| entityname |
The entity's name. |
| id |
The ID of the entity. |
| csrf_token |
The csrf_token is generated by the generateCSRFTokens method. |
| csrf_token_expires |
The csrf_token_expires is generated by the generateCSRFTokens method. |
Example Response
The data element will be an empty string.
{
  "data": ""
}
History
Added in version 6.2
Login
Login a user.
Endpoint
POST https://yourdomain.com/{context}/index.cfm/_api/json/v1/{siteid}/login/?username={username}&password={password}
OR
POST https://yourdomain.com/{context}/index.cfm/_api/json/v1/?method=login&siteid={siteid}&username={username}&password={password}
Request & Query Parameters
| Parameter |
Value |
| context |
The path to where Mura CMS resides within the webroot (typically, an empty string). |
| siteid |
The SiteID of the site attempting to login to. |
| username |
The User's username. |
| password |
The User's password. |
Example Response
{
  "data": {
	"status": "success"
  }
}
data object
| Key |
Value Type |
Value Description |
| status |
string |
success or failed, depending on the result of the attempt to login. |
History
Added in version 6.2
Logout
Logout the current user.
Endpoint
POST https://yourdomain.com/{context}/index.cfm/_api/json/v1/{siteid}/logout
OR
POST https://yourdomain.com/{context}/index.cfm/_api/json/v1/?method=logout&siteid={siteid}
Request & Query Parameters
| Parameter |
Value |
| context |
The path to where Mura CMS resides within the webroot (typically, an empty string). |
| siteid |
The SiteID of where the entity will be stored. |
Example Response
{
  "data": {
    "status": "succes"
  }
}
data object
| Key |
Value Type |
Value Description |
| status |
string |
success is always returned. |
History
Added in version 6.2
Register Custom API Method
This is an example of how to register a custom JSON API method:
<cfscript>
var APIUtility = getBean('settingsManager').getSite({siteid}).getAPI('json', 'v1');
APIUtility.registerMethod(methodName='applyProperty', method=applyProperty);

public any function applyProperty() {
  // do something
}
</cfscript>
Register Custom API Linking Method
Within the API, all entities contain a "link" attribute that contains HREFs to access related entities. For example, a content entity would have a a value set to access the content children with entity.link.kids. By default, Mura will read through the entity's properties and auto populate its links for you. However, sometimes you will want to add custom link logic.
<cfscript>
var APIUtility=getBean('settingsManager').getSite({siteid}).getApi('json','v1');
APIUtility.registerLinkMethod(method=myCustomLinkMethod);

public any function myCustomLinkMethod(entity,links){
  if ( entity.getEntityName()=='targetEntity' ) {
    arguments.links['runs']='#getEndPoint()#?method=myCustomMethod&siteid=#arguments.entity.getValue('siteid')#';
  }
}
</cfscript>
History
Feature added in version 6.2.
Creating API methods with Module Beans
You can create components within a module's {moduleDir}/model/beans directory that extend eithermura.bean.bean or mura.bean.beanORM. Within these components any method set to remote access with be availabe via the JSON/REST API.
component extends="mura.bean.bean" {

    remote function mymethod(){
        return "Hello!";
    }
}
You can then call the method like this https://www.domain.com/index.cfm/_api/json/v1/{siteid}/{beanName}/{methodName} .
History
Feature added in version 7.1.
Register Custom Mura ORM Entity
This is an example of how to register a custom Mura ORM entity:
<cfscript>
var APIUtility = getBean('settingsManager').getSite({siteid}).getAPI('json', 'v1');
APIUtility.registerEntity(entityName='myCustomEntity', config={});
</cfscript>
Mura ORM Entity Config Options
| Argument |
Type |
Description |
| fields |
string |
A comma-separated list of fields that you would like to return as a default for the JSON objects. |
| allowfieldselect |
boolean |
If false, Mura will not allow custom field selects. |
| moduleid |
string |
The Mura CMS module or plugin that permissions for this entity should be tied to. |
| public |
boolean |
If false, will apply permissions based on the config. |
Example Mura ORM Entity Config
<cfscript>
myConfig = {
  fields = 'domain,siteid',
  allowfieldselect = false
};

var APIUtility = getBean('settingsManager').getSite({siteid}).getAPI('json', 'v1');
APIUtility.registerEntity(entityName='myCustomEntity', config=myConfig);
</cfscript>
History
Feature added in version 6.2.
Creating Mura ORM Entities from within Modules
You can create components within a module's {moduleDir}/model/beans directory that extend mura.bean.beanORM. Then do a manual application reload with the ?applydbupdates url variable.
component
	extends="mura.bean.beanORM"
	entityname="widget"
	displayname="Widget"
	table="widget"
	orderby="name"
	bundleable=false
	scaffold=true
	public=false
	{
		property name="widgetid" fieldtype="id";
		property name="siteid" default="default" required=true datatype="varchar" length="25";
		property name="name" required=true datatype="varchar";
		property name="description" datatype="text";
}
You can then call the it's endpoint like this https://www.domain.com/index.cfm/_api/json/v1/{siteid}/{beanName} . (Learn more about Mura ORM)
History
Feature added in version 7.1.
Mura.js
Mura.js originally began as a lightweight utility to decouple Mura's dependency on jQuery, a popular JavaScript library. Since its inception, Mura.js has also grown into a JavaScript framework for interacting with Mura's JSON API, which allows Mura CMS to be the main content creation hub within an organization, and allows developers to build their applications as pure JavaScript clients.
Mura.js is hosted as a completely separate project on Github as of Mura v7.1. You can view and/or contribute at https://github.com/blueriver/MuraJS.
In addition, Mura.js has been added as a package to the npmjs registry. Instructions and examples on how to work with the npm pacakge can be found at https://www.npmjs.com/package/mura.js.
Familiar Syntax
If you've ever used jQuery, you'll find the syntax quite familiar.
Selecting Elements
The example below illustrates how to use Mura.js to select multiple DOM elements with the same class, and replace the content of each of the selected elements with custom HTML.
<script>
Mura(function(m) {
  m('.target').each(function() {
    m(this).html('Mura found you!');
  });
});
</script>
Ajax Support
Mura.js includes baked-in Ajax (asynchronous JavaScript and XML) support. The example below illustrates how to perform a simple Ajax request.
<script>
Mura.ajax({
  type: 'post',
  url: 'https://domain.com/path/',
  data: { key: value },
  success: function(resp) {
    console.log(resp);
  },
  error: function(resp) {
    console.log(resp);
  }
});
</script>
Promise Support
Mura.js also includes support for JavaScript promises. See the following examples for more details.
Mura.post() With Promises
<script>
Mura.post('https://domain.com/path/', { key: 'value' })
  .then(function(result) {
    // handle success
   })
  .catch(function(err) {
    // handle error
  };
</script>
Mura.get() With Promises
<script>
Mura.get('https://domain.com/path/')
  .then(function(result) {
    // success
    // do something with the result
    Mura('#target').html(result.data.html);
  })
  .catch(function(err) {
    // handle error
    console.log(err);
  });
</script>
Chaining Promises
The following example illustrates how you could handle multiple Ajax requests with Mura.js using JavaScript Promises chaining, and avoid the "pyramid of doom". In other words, avoid nesting your Ajax requests.
<script>
var exampleFunc1 = function() {
    return new Promise(function (resolve, reject) {
        Mura.post('https://domain.com/path/', { apikey: 'value' })
            .then(function(result) {
                if ( result.hasOwnProperty('id') ) {
                    resolve(result);
                } else {
                    reject('result does not contain an id');
                }
            })
            .catch(function(err) {
                reject(err);
            });
    });
};

var exampleFunc2 = function(id) {
    return new Promise(function (resolve, reject) {
        Mura.get('https://domain.com/path/?id=' + id)
            .then(function(result) {
                resolve(result);
            })
            .catch(function(err) {
                reject(err);
            });
    });
};

exampleFunc1()
    .then(function(exampleFunc1Result) {
        return exampleFunc2(exampleFunc1Result.id);
    })
    .then(function(result) {
        console.log(result);
    })
    .catch(function(err) {
        console.log(err);
    });
</script>
DOM Event Handlers
Mura.js allows for registering DOM event handlers, as shown in the example below.
<script>
Mura('#mybutton').on('click', function(e) {
  e.preventDefault();
  console.log(e);
});
</script>
You can also register multiple event handlers using a custom "addEventHandler" method, as shown below.
<script>
Mura('.myclass').addEventHandler({
  click: function(e) {
    e.preventDefault();
    console.log(e);
  }
  , touch: function(e) {
    // do something
    console.log(e);
  }
});
</script>
Mura.DOMSelection Class
The DOM selection methods available via Mura.js is handled by the Mura.DOMSelection class. This wraps your selected targets via the Mura() method.
Mura.js allows you to handle selected DOM elements as a single object, or as a collection.
Single Object Example
Mura('#target')
  .html('Hello world!');
Collection Example
Mura('.target')
  .each(function() {
    Mura(this)
      .html('Hello world!');
  });
Supported DOMSelection methods may be found at https://github.com/blueriver/MuraJS/blob/master/src/core/domselection.js.
Mura ORM With Mura.js
Mura.js enables JavaScript developers to interact with Mura ORM, exposing access to its ORM Feed API, and allows for common CRUD (Create, Read, Update, and Delete) functionality.
Mura.js CRUD Functionality
Outlined below are code examples for performing basic CRUD operations on Mura ORM objects/entities via Mura.js. For developers who are primarily used to working with server-side languages, it may take a little time to adjust to working on the client side, because we need to "wait" until the object/entity is loaded in order to work with it. For this reason, it may be helpful to review how to work with JavaScript Promises.
Loading/Reading Mura ORM Objects/Entities
This example simply illustrates how to load a Mura ORM entity, using Mura.js.
<script>
var personid = 'some-uuid';

Mura.getEntity('person')
    .loadBy('personid', personid)
    .then(function(person) {
        console.log(person);
    })
    .catch(function(err) {
        console.log(err.get('errors'));
    });
</script>
Creating/Updating Mura ORM Objects/Entities
This example drives home how to segregate your Ajax calls using JS Promises, and avoid nesting or stacking your Mura.js methods.
<script>
var getPersonByID = function(personid) {
    return new Promise(function(resolve, reject) {
        Mura.getEntity('person').loadBy('personid', personid)
          .then(function(person) {
            resolve(person);
          })
          .catch(function(err) {
            reject(err);
            console.log(err.get('errors'));
          });
    });
};

var savePerson = function(person) {
    return new Promise(function(resolve, reject) {
        person.save()
            .then(function(result) {
                resolve(result);
            })
            .catch(function(err) {
                reject(err);
            });
    });
}

getPersonByID('some-uuid')
    .then(function(person) {
        person.set('namelast', 'Withington');
        return savePerson(person);
    })
    .then(function(result) {
        console.log(result);
    })
    .catch(function(err) {
        console.log(err);
    });
</script>
Deleting Mura ORM Objects/Entities
This is another example of how to segregate your Ajax calls using JS Promises to avoid nesting your Mura.js methods.
<script>
var getPersonByID = function(personid) {
    return new Promise(function(resolve, reject) {
        Mura.getEntity('person').loadBy('personid', personid)
          .then(function(person) {
            resolve(person);
          })
          .catch(function(err) {
            reject(err);
            console.log(err.get('errors'));
          });
    });
};

var deletePerson = function(person) {
    return new Promise(function(resolve, reject) {
        person.delete()
            .then(function(result) {
                resolve(result);
            })
            .catch(function(err) {
                reject(err);
            });
    });
}

getPersonByID('some-uuid')
    .then(function(person) {
        return deletePerson(person);
    })
    .then(function(result) {
        console.log(result);
    })
    .catch(function(err) {
        console.log(err);
    });
</script>
Mura.js Feed API
The following example illustrates how to obtain a feed of Mura ORM objects/entities, and then loop over the returned recordset. As you'll see, it's quite similar to using Mura's ORM Feed syntax.
var person;

Mura
  .getFeed('person')
  .where() //optional
  .prop('namelast')
  .isEQ('Levine')
  .orProp('namelast')
  .beginsWith('Withing')
  .getQuery()
  .then(function(people) {
    // handle success
    people.each(function(person, idx) {
      result = person.get('namefirst') + ' ' + person.get('namelast');
      console.log(result);
    });
  })
  .catch(function(err) {
    // handle error
    console.log(err);
  });
This example demonstrates how to use the aggregate method introduced in Mura v7.1. The example assumes a custom ORM object named "widget" exists, and has a property of "price".
var widget;

Mura
  .getFeed('widget')
  .aggregate('count', '*')
  .aggregate('sum', 'price')
  .aggregate('min', 'price')
  .aggregate('max', 'price')
  .aggregate('avg', 'price')
  .getQuery()
  .then(function(widgets) {
    // handle success
    console.log(widgets.getAll());
  })
  .catch(function(err) {
    // handle error
    console.log(err);
  });
See the "Key Methods" area of the Feed Bean section, for details on the Mura.js Feed API Methods.
Loading JavaScript and CSS Files With Mura.js
Mura.js allows JavaScript developers to load their JS and CSS files synchronously or asynchronously. This is especially useful for modules rendered via CFML.
Note: This is NOT recommend for modules rendered via JavaScript. See the Anatomy of a Module's Rendering Via JavaScript section for more information.
Mura.loader()
The Mura.loader() method is for JavaScript and CSS parallel loading with dependencies management. Using this method also prevents duplicate JavaScript and/or CSS files from being loaded.
There are two primary methods associated with Mura.loader(), loadjs() and loadcss() described below.
loadjs(url, cb)
| Parameter |
Description |
| url |
If the first parameter is an array, files will be loaded asynchronously. If it's a string, the files will be loaded synchronously. If the file is located under your theme, you may use m.themepath to dynamically generate the path to the theme location. For example: loadjs(m.themepath + '/script.js') |
| cb |
A callback function to execute when all scripts have been loaded. |
loadcss(url, attrs, cb)
| Parameter |
Description |
| url |
The URL for the CSS file. If the file is located under your theme, you may use m.themepath to dynamically generate the path to the theme location. For example: loadcss(m.themepath + '/file.css') |
| attrs |
You may optionally pass in an object to specify the media type attribute for the CSS file. For example: loadcss(m.themepath + '/file/css', {media: "print"})
Valid options include:
- all
- aural
- braille
- embossed
- handheld
- print
- projection
- screen
- tty
- tv
|
| cb |
A callback function which executes immediately. |
Examples
This example illustrates the basic syntax for loading a JavaScript file, with a desired callback function.
<script>
Mura(function(m) {
    m.loader()
        .loadjs(m.themepath + '/js/mylibrary.js', function() {/* callback */});
});
</script>
The example below illustrates loading some scripts in parallel with another batch of scripts being loaded in order. In the example below, the first loadjs() will be executed in parallel of the second loadjs(). However, in the second loadjs(), the myDependentLib.js file won't be loaded until myRequiredLib.js has finished loading. Then, when they've finished loading, the callback function will execute.
<script>
Mura(function(m) {
    m.loader()
        .loadjs(m.themepath + '/myLib.js')
        .loadjs(
          m.themepath + '/myRequiredLib.js',
          m.themepath + '/myDependentLib.js',
          function() {
            // callback
          });
});
</script>
The example below illustrates loading multiple CSS & JavaScript files, and includes a callback function that runs after the script files have all been loaded.
<script>
Mura(function(m) {
    m.loader()
        .loadcss(m.themepath + '/path/to/all.css', { media: 'all' })
        .loadcss(m.themepath + '/path/to/print.css', { media: 'print' })
        .loadjs(
            m.themepath + '/path/to/script1.js',
            m.themepath + '/path/to/script2.js',
            function() {
                // Now do something with the loaded JS
            });
});
</script>
Modules With Mura.js
As introduced in the Anatomy of a Module section, developers may choose to render their modules using purely JavaScript. When doing so, the module's index.cfm file should only contain the following line of code, which informs Mura it has nothing to render via server-side processing, and all rendering will occur via the "client" or browser.
<cfset objectparams.render="client">
Then, in order to load your script(s), you'll need to use a custom event handler, and register the onRenderStart event to dynamically load your script file(s), as illustrated below.
// ../yourmodule/model/handlers/yourhandler.cfc

component extends='mura.cfobject' {

  function onRenderStart(m) {
    // if script should be included in the <head>
    arguments.m.addToHTMLHeadQueue('<script src="/path/to/script.js"></script>');

    // OR

    // if script should be included before closing </body> tag
    arguments.m.addToHTMLFootQueue('<script src="/path/to/script.js"></script>');
  }

}
By using addToHTMLHeadQueue and/or addToHTMLFootQueue, your scripts will only be loaded once, regardless of how many times your module has been applied to the layout.
The Custom JavaScript File
Assuming you've followed the instructions above to get your custom script file included into either the "head" portion of your theme, or before the closing "body" tag, you will most likely want to control when your script(s) are executed. However, you may also simply allow your scripts to run at all times.
Running Scripts on Every Request
If you merely wish for your script(s) to execute, regardless of whether or not your module has been applied to the layout, then you may simply include any JavaScript you wish. In other words, since your script files are being added on every request via your custom event handler's onRenderStart method, your scripts will automatically execute. This is useful for merely adding a utility script, such as a tracking script, etc.
The content of your script file may look as simple as the following example.
// your-script.js
console.log('Hello from your module!');
Running Scripts Only If Your Module Has Been Applied
Unless your scripts are utilities, such as tracking scripts, developers will most often wish their scripts to execute only when the module has been applied to the layout. In addition, when the module includes a configurator, each instance of the module will have access to its own configuration information.
First, it's important to understand that modules rendered via the client, are automatically registered to Mura's namespace under Mura.Module.YourModuleDirectoryName. Also, Mura will automatically invoke a "render" method via Mura.UI, on each request. By defining your own "render" method, you're able to pretty much do whatever you want.
The example below illustrates a skeleton script. You should substitute "yourModuleDirectoryName" with the actual directory name of your display object.
// your-script.js
Mura.Module.YourModuleDirectoryName = Mura.UI.extend({
  render: function() {
    // Your code goes here ...
    return this;
  }
});
this.context
When using JavaScript to render a Mura "Module" via the client, developers are most interested in two (2) primary pieces of information:
- How to target the container element of where the module has been applied to the layout.
- How to access "
objectparams", or the data collected via a configurator.
You can easily access either of these by using "this.context" in your custom script.
this.context.targetEl
- Use this to target the container element of where the module has been applied to the layout. Keep in mind, each instance of the module in the layout will have its own, unique container element.
this.context.{yourObjectParam}
- Use this to access any "
objectparams", or data collected via a configurator. Each instance of the module will have access to its own, unique configuration data.
The example below illustrates how to use the above information, and may be used as a starter file in your own projects.
// your-script.js
Mura.Module.YourModuleDirectoryName = Mura.UI.extend({

  render: function() {
    // reference to the container element
    this.container = Mura(this.context.targetEl);

    // assuming you have an objectparam named 'mytext'
    var txt = this.context.mytext || 'mytext is empty';

    // Having fun by replacing the content of the container
    // Remember, using Mura.js, we can do jQuery-esque DOM manipulation
    this.container.html('<h3>Hello from yourDisplayObject</h3>');
    this.container.append('<h4>' + txt + '</h4>');

    // The rest of your code goes here ...
    return this;
  }

});
If you're interested in seeing what else is available via Mura.UI, feel free to review the code found at https://github.com/blueriver/MuraJS/blob/master/src/core/ui.js.
To see an example of how to use Mura.js along with Mura ORM, Grunt, and Handlebars, visit https://github.com/stevewithington/muracontacts/tree/js.
Forms & Mura.js
Mura forms are loaded asynchronously. So, if you wish to run some scripts, you need to use a special method to "reopen" the form, and then add your scripts. This can be done by leveraging a special Mura.js method: Mura.DisplayObject.Form.reopen({});.
Once the form has been "reopened," simply leverage one or more of the predefined events from the code example below to inject any custom logic.
NOTE: If not using deferred Mura.js then you do not need to reopen the display object classes within a Mura.preInit() method. The option to defer the loading of Mura.js was introduced in Mura 7.1 and is controlled by the this.deferMuraJS theme contentRenderer.cfc value.
Mura.preInit(function(m) {

	Mura.DisplayObject.Form.reopen({
		// triggered after the form has rendered on the browser
		onAfterRender: function() {
			var form_container = this.context.targetEl
				, the_form = m(form_container).find('form');

			console.log('afterRender triggered');

			// This is where you register your custom form listeners,
                        // for example ...
			m('button.form-submit').on('click', function(event) {
				console.log('Form button clicked!')
				console.log(event.target.form);
			});
		}

		// triggered when the form has been submitted,
                // before processing/validation begins
		, onSubmit: function () {
			var the_button = event.target
				, the_form = the_button.form;

			console.log('onSubmit triggered');
			console.log(the_button);
			console.log(the_form);

			// you could run a script here (obviously) ... then,
			// return true if you want to continue,
                        // or false if you wish to stop processing
			return true;
		}

		// triggered after submit, and form has errors
		, onAfterErrorRender: function() {
			var resp = JSON.parse(event.currentTarget.response)
				, errors = resp.data.errors;

			console.log('afterErrorRender triggered');
			console.log(errors);
		}

		// triggered after successful form submit (no errors)
		, onAfterResponseRender: function () {
			var response_container = this.context.targetEl;

			console.log('afterResponseRender triggered');
			console.log(response_container);
		}
	});

});
Internationalization & Localization
Mura utilizes resource bundles to internationalize various areas of the user interface, making the code locale-independent.
Resource bundles are .properties files, located under specified directories in Mura. These .properties files, or resource bundles, are named to indicate the language code, and country code. For example, the language code for English (en) and the country code for United States (US) would be represented as en_US.properties. If Mura cannot find a direct language and region match, it will search for a language match. If a locale's language cannot be found, Mura will fall back to its default of English, or en_US.properties.
The file itself is comprised of key-value pairs. The keys remain the same throughout each of the .properties files, and the value is translated into the file's designated language. If Mura is searching for a specific key-value pair within a translation, and cannot locate it, Mura will fall back to the English translation.
The image below illustrates the en_US.properties file side-by-side with the es_ES.properties file:
Lookup Hierarchy
Mura automatically searches for resource bundles under specific directories, and uses the key-value pair(s) found in the order outlined below. If a resource_bundles directory does not exist in the following locations, you may safely create one, and place your resource bundle files there.
- Module
../{module}/resource_bundles/- Module (aka "Display Object") resource bundles are used for the specific module itself.
- Content Types
../content_types/{type}_{subtype}/resource_bundles/- Content Types resource bundles are used for the specified content type.
- Theme
../{ThemeName}/resource_bundles/- Theme resource bundles are only used when the specified theme is actively assigned to a site.
- Site
{context}/sites/{SiteID}/resource_bundles/- Site resource bundles are shared across all themes within the specified site.
- Global
{context}/resource_bundles/- Global resource bundles are shared across all sites under a single Mura instance.
- Core
{context}/core/modules/v1/core_assets/resource_bundles/- If the requested key-value pair is not defined in any of the locations above, Mura will use the "core" resource bundles located here for Mura's modules.
Note: Admin-area resource bundles are located under {context}/core/mura/resourceBundle/resources/. However, as of v7.1, many key-value pairs are not able to be overwritten using the technique described above at this time. Allowing for this option is under consideration for a future version.
Contribute
If you would like to contribute to the translations project, please visit https://crowdin.com/project/muracms. Your help will be greatly appreciated!
Custom Keys
As previously documented, Mura searches for custom ".properties" files, under the directories listed in the "Lookup Hierarchy" section.
You don't have to include all of the key-value pairs from the original files. You only have to include the key-value pairs you wish to override. In addition, if you have any custom keys you would like to use in your site, you can simply include them in your custom ".properties" files.

Displaying Custom Keys
To output a custom key-value from your ".properties" file, simply use m.rbKey({keyName}).
So, for example, to output a key of "myCustomString", use the following syntax.
<cfoutput>
  #m.rbKey('myCustomString')#
</cfoutput>
Custom Factories
Mura allows you to create your own resource bundle factories, and fall back to Mura's original lookup hierarchy when a requested key-value is not found. This is especially useful when creating plugins, or integrating a custom application.
The code example below demonstrates how you could go about creating a custom resource bundle factory.
customResourceBundleDirectory = ExpandPath('#m.globalConfig('context')#/path/to/your/RBFactory/');

customFactory = new mura.resourceBundle.resourceBundleFactory(
  parentFactory = m.siteConfig('rbFactory')
  , resourceDirectory = customResourceBundleDirectory
  , locale = m.siteConfig('JavaLocale')
);
You could wrap this up into a custom method to obtain a reference to your custom factory using something similar to the following example.
public any function getResourceBundleFactory(required struct m) {
  var resourceDirectory = ExpandPath('#arguments.m.globalConfig('context')#/plugins/MyPlugin/rb/');
  return new mura.resourceBundle.resourceBundleFactory(
    parentFactory = arguments.m.siteConfig('rbFactory')
    , resourceDirectory = resourceDirectory
    , locale = arguments.m.siteConfig('JavaLocale')
  );
}
Once you've created your custom resource bundle factory, simply use {yourCustomFactoryVariableName}.getKey({yourKey}).
So, for example, to output a key of "myCustomString", with a custom factory variable named "customFactory", use the following syntax.
<cfoutput>
  #customFactory.getKey('myCustomString')#
</cfoutput>
Caching
Mura has a built-in caching mechanism that, when enabled, will store data in memory for reuse. The purpose for this is to improve overall site performance, by decreasing the amount of reads to the database. Mura's caching uses a "lazy load" approach, which means data won't be cached until it's called upon the first time.
cf_CacheOMatic Tags
One of the easiest ways to improve the performance of your site, is to use proven caching techniques. In addition to the native caching strategies for CFML, Mura also offers a special, custom tag, <cf_CacheOMatic>, to use for expensive database transaction code, or other time-consuming CFML code that doesn't need to be executed during each request.
Using Mura's <cf_CacheOMatic> tag allows you to add data to Mura's cache. The tag only works when Site Caching is enabled, which is a great reason to use it since you can easily disable it, if necessary.
The custom tag is located under {context}/core/mura/customtags/CacheOMatic.cfm if you would like to inspect the file to see how it works under the hood.
Tag Syntax
<cf_CacheOMatic>
  Code or data to cache.
</cf_CacheOMatic>
Attributes
| Attribute |
Type |
Default |
Description |
| key |
string |
CGI.scriptname & CGI.query_string |
A unique string to associate with the specified data. Used to retrieve the cached data, when Site Caching is enabled. |
| timespan |
datetime |
CreateTimeSpan(0,0,30,0) |
The desired time period the data should be cached for before it expires. (Defaults to 30 minutes). |
| scope |
string |
application |
The desired CFML scope in which to store the data. Valid options are application, session, and server. |
| nocache |
boolean |
false |
If true, Mura will not cache the code/data contained within the tag. Useful for explicitly omitting code from being cached. |
| purgecache |
boolean |
request.purgecache |
If true, Mura will empty its cache. |
| siteid |
string |
request.siteid |
You may choose to specify an alternate SiteID to associate the cache to. |
Usage
Use this custom tag to cache inline content or data within layout templates.
Examples
Using the "key" Attribute
This example uses the ContentID of the content item as the key with prefix of "page-".
<cf_CacheOMatic key="page-#m.content('contentid')#">
  <h2 class="page-title">#esapiEncode('html', m.content('pagetitle'))#</h2>
</cf_CacheOMatic>
Using the "nocache" Attribute
The following example demonstrates how you could use the nocache attribute to see an "un-cached" version of the output by simply appending ?nocache=true to the URL.
<cf_CacheOMatic
     key="example-timestamp1"
     nocache="#m.event('nocache')#">
  <p>The time is now: #LSTimeFormat(Now())#</p>
</cf_CacheOMatic>
Using the "timespan" Attribute
In this example, we're setting the cache to expire in five (5) hours.
<cf_CacheOMatic
     key="example-timestamp2"
     nocache="#m.event('nocache')#"
     timespan="#CreateTimeSpan(0,5,0,0)#">
  <p>The time is now: #LSTimeFormat(Now())#</p>
</cf_CacheOMatic>
Programmatic Caching
As covered in the cf_CacheOMatic Tags section, Mura allows developers to add data to Mura's cache. One thing to keep in mind is your data or code may be either intentionally or even inadvertently wrapped by cf_CacheOMatic tags, subjecting your output to the settings of the tag.
However, as a developer, you may have data or code you wish to either explicitly exclude from being added to Mura's cache. Or, you may wish to set a specific duration of time the data or code may be cached for. Mura also allows developers to achieve this using the code snippets described below.
request.cacheItem
This code snippet controls whether the code or data will be cached if wrapped by cf_CacheOMatic tags. If true, the code or data will be cached according to the settings of the containing cf_CacheOMatic tags. If false, the code or data will not be cached.
Note: A side-effect of setting request.cacheItem to false is none of the code or data within the containing cf_CacheOMatic tags will be cached at all.
Syntax
request.cacheItem = {true || false}
Example
<cfset request.cacheItem = false />
<!--- The following timestamp will NOT be cached --->
<cfoutput>
  <p>The date/time is #Now()#</p>
</cfoutput>
request.cacheItemTimeSpan
This code snippet controls the duration of time the code or data will be cached for.
Syntax
request.cacheItemTimeSpan = {TimeSpan Object}
Example
<cfset request.cacheItemTimeSpan = CreateTimeSpan(0, 0, 5, 0) />
<!--- The following timestamp will be cached for 5 minutes, if wrapped by cf_CacheOMatic tags --->
<cfoutput>
  <p>The date/time is #Now()#.</p>
</cfoutput>