Via Auto-Discovery
Most Mura plugin developers select deploying their plugins via auto-discovery, especially if the plugin is being created by the developer conducting the installation. To deploy your plugin via auto-discovery, follow the steps outlined below.
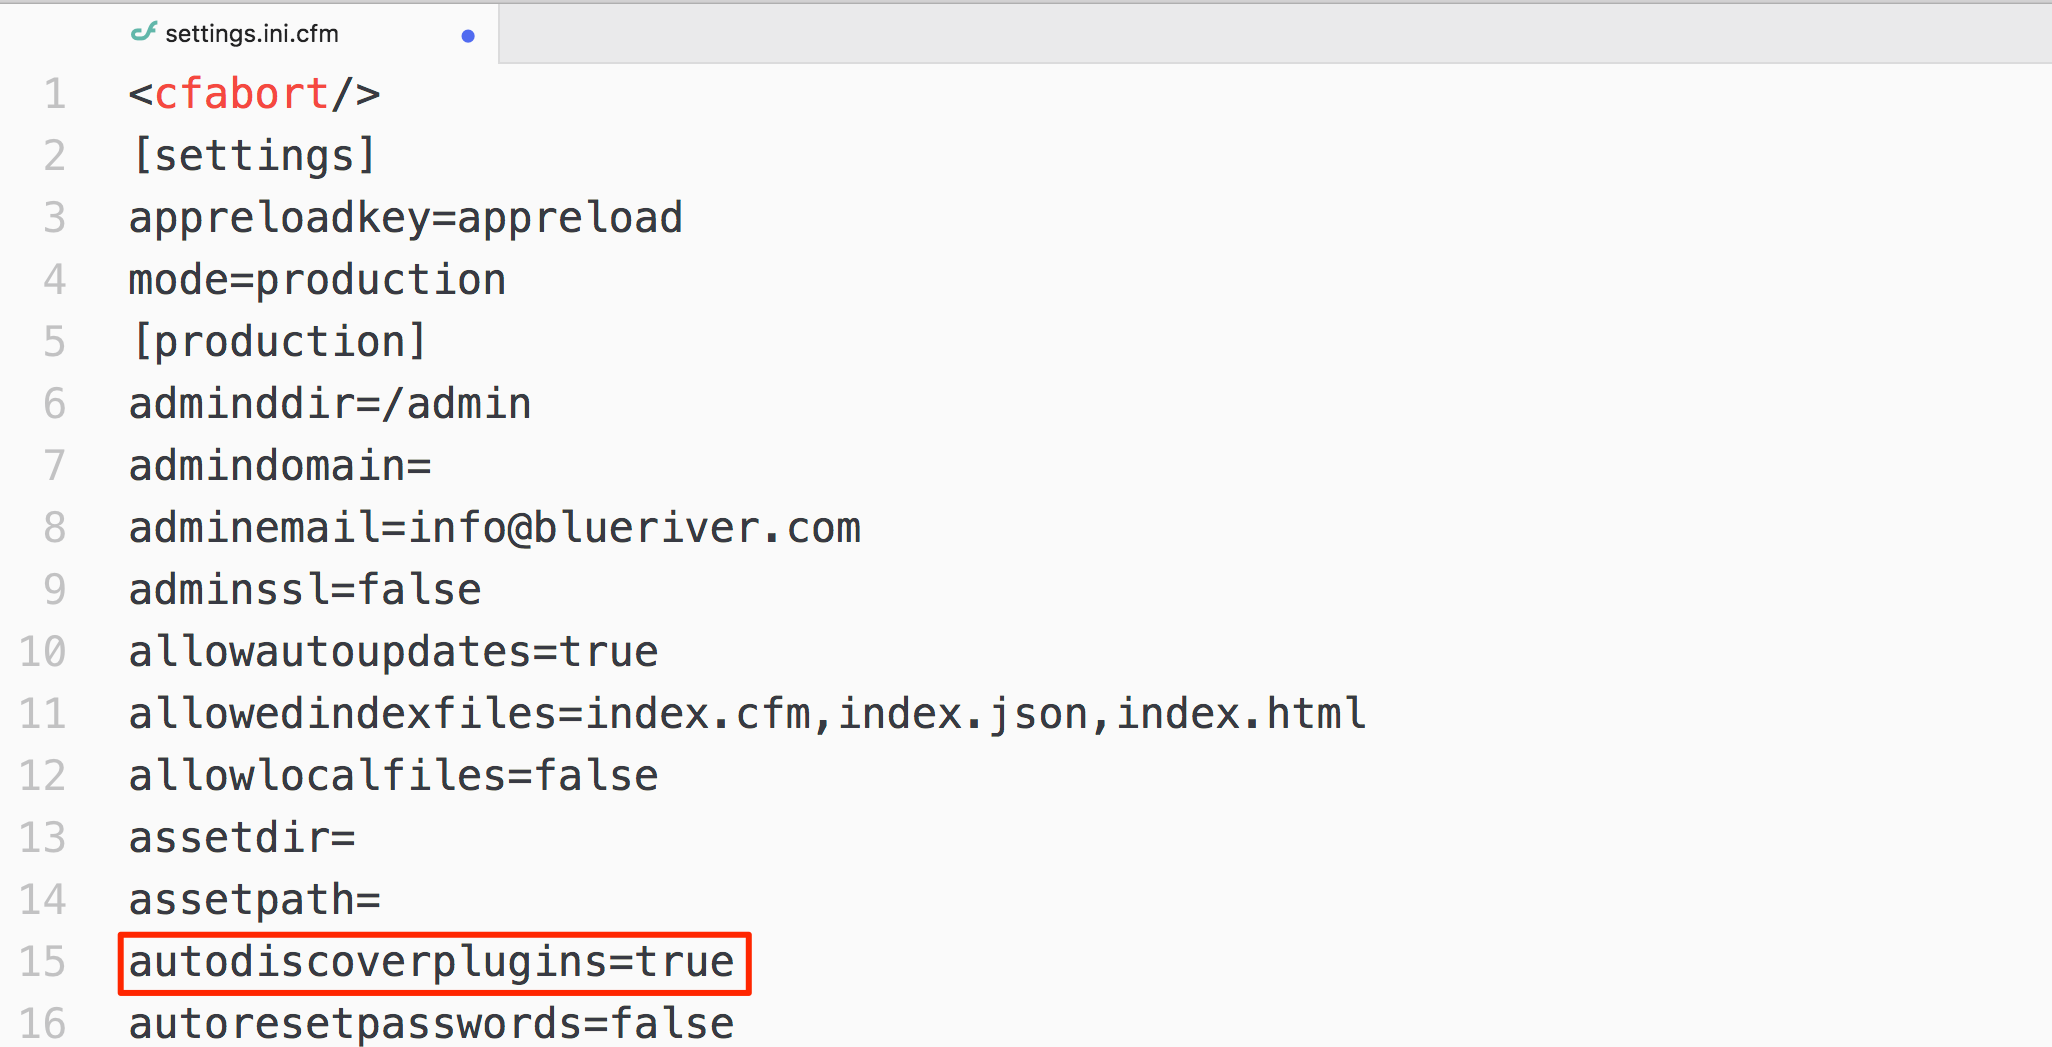
- First, you need to make sure auto-discovery of plugins is enabled for your Mura CMS installation. Open the file located under
{context}/config/settings.ini.cfm. Locate the setting for "autodiscoverplugins" and make sure it is set to "true". If not, set it to "true", then reload Mura.
- The next step in the auto-discovery process is to either create a simple plugin, as described in the Plugin Anatomy section, or download a starter plugin from Github, such as MuraPlugin, or MuraFW1.
- Then, instead of using a "
.zip" file, you would simply place your plugin under the plugins directory. For example:{context}/plugins/yourPlugin/ - Next, reload Mura, and it should now discover your new plugin. Mura then automatically deploys the plugin.
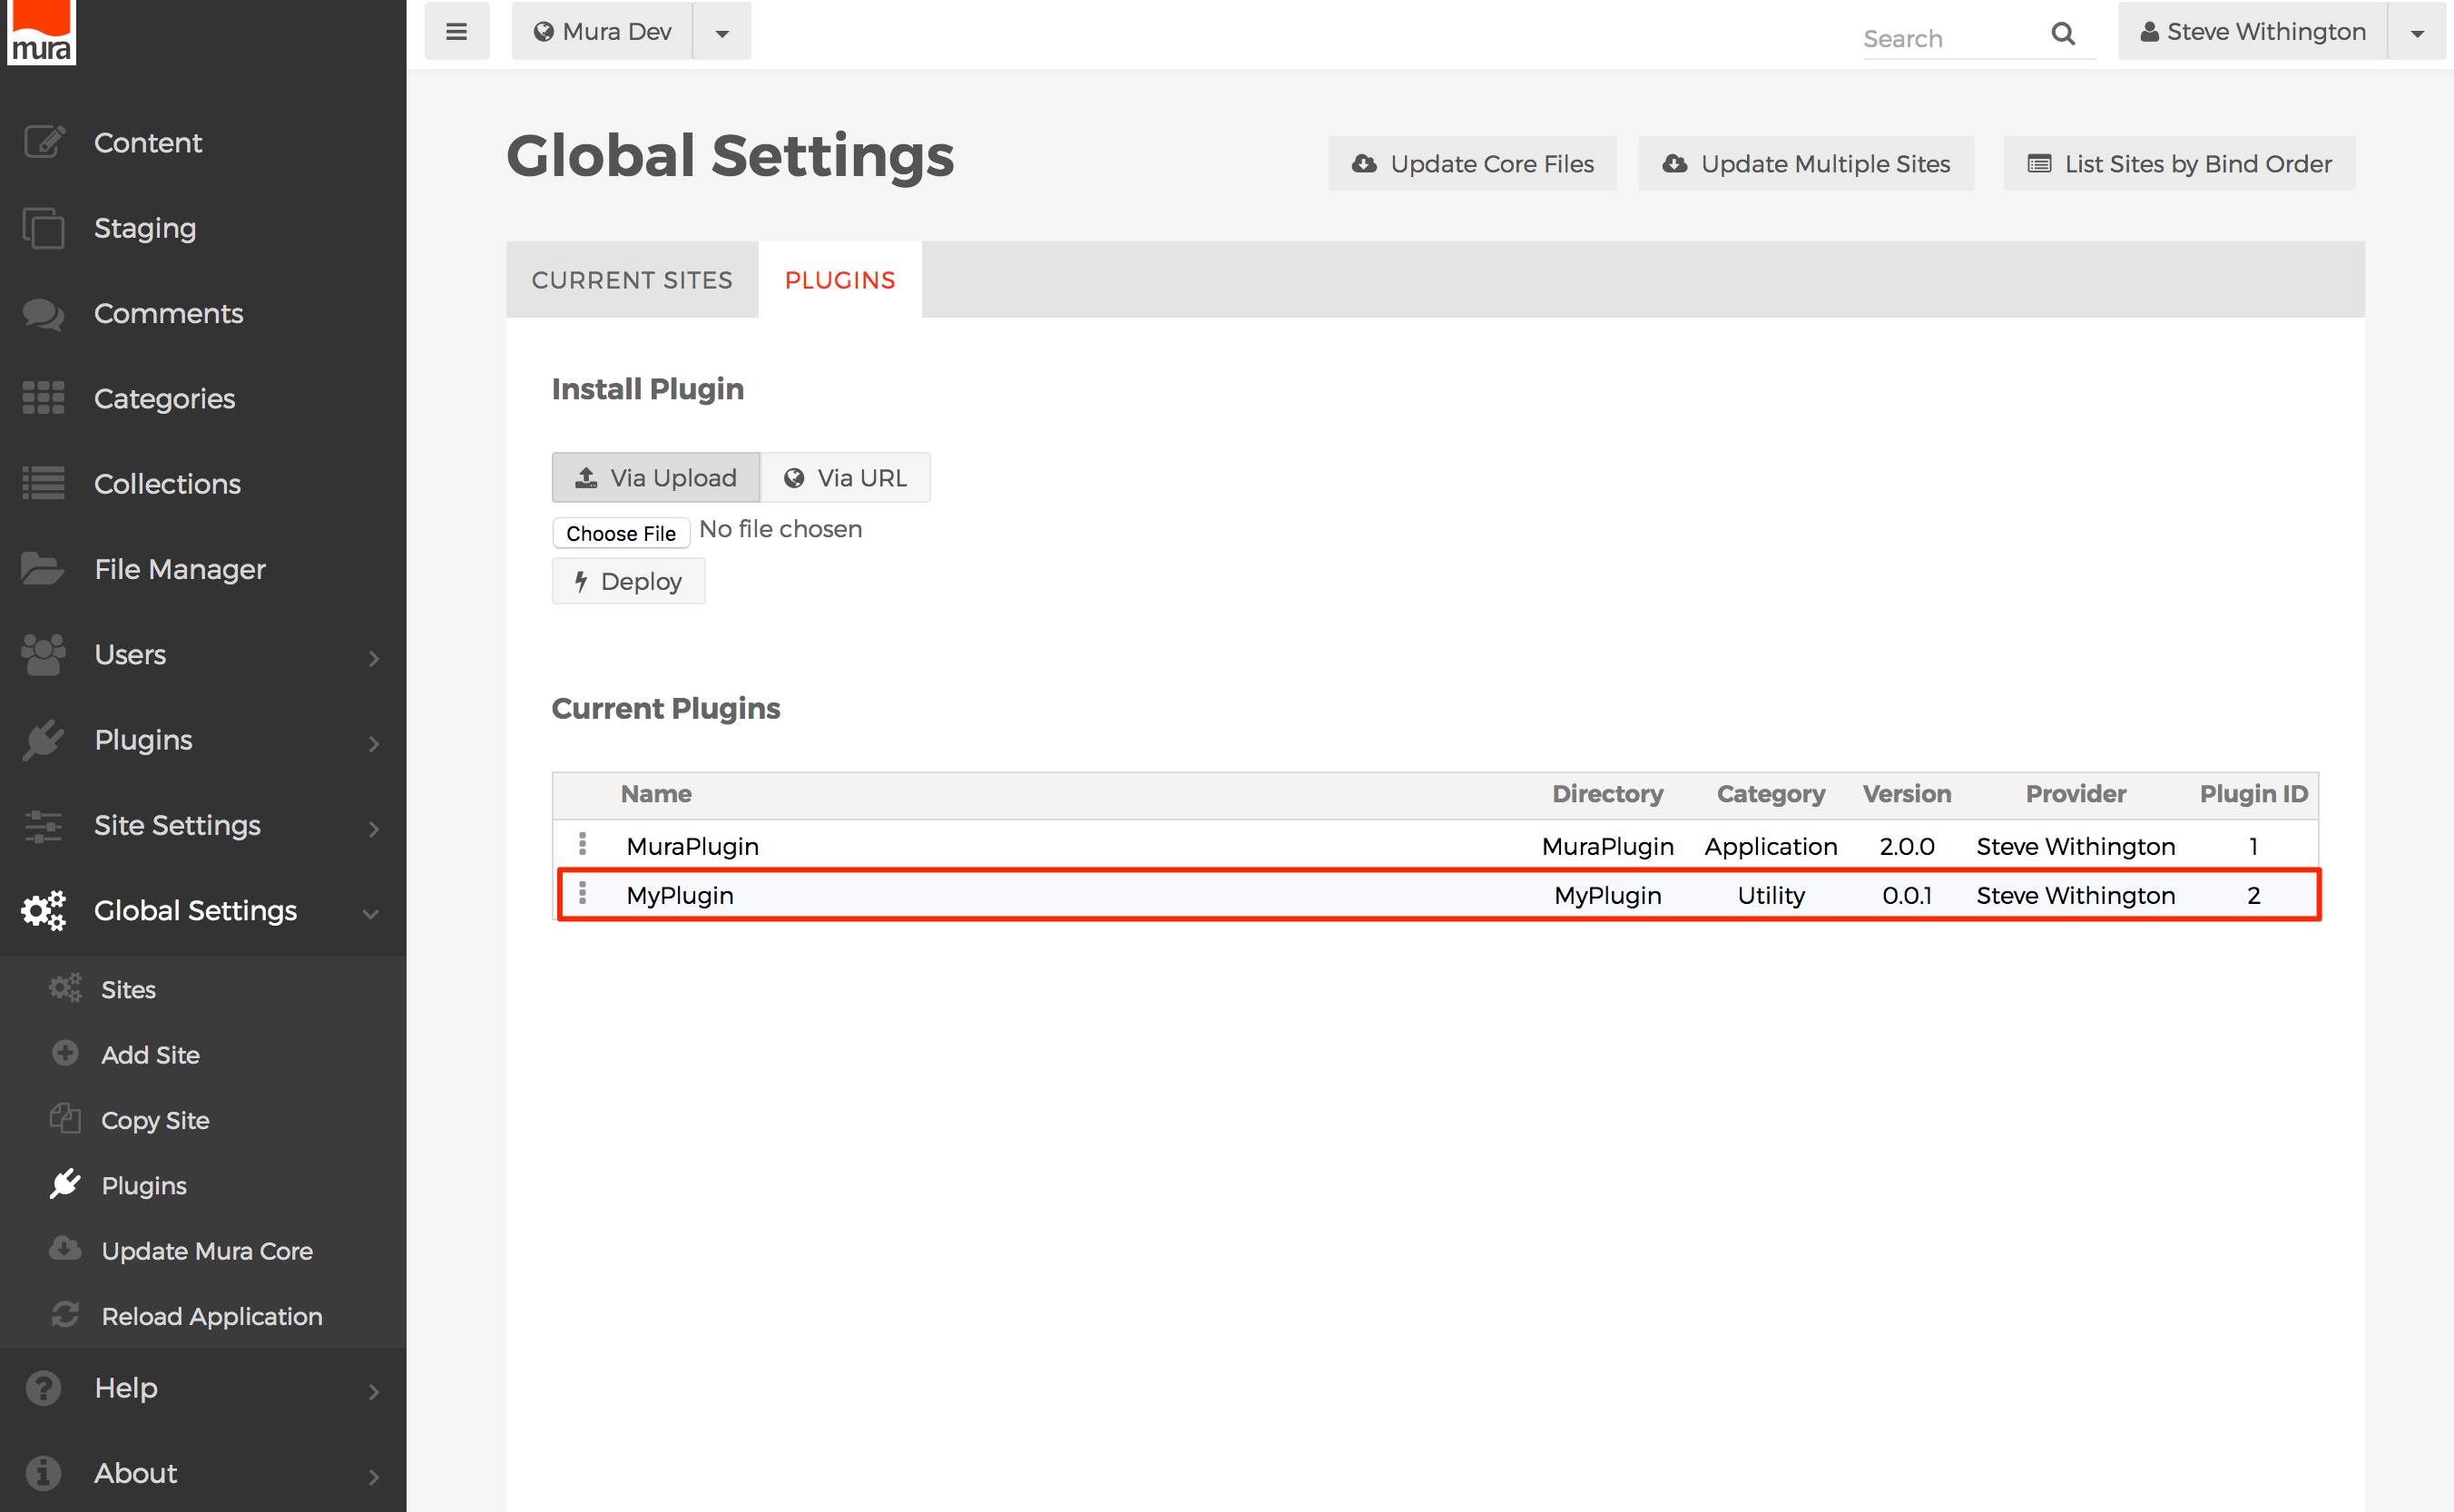
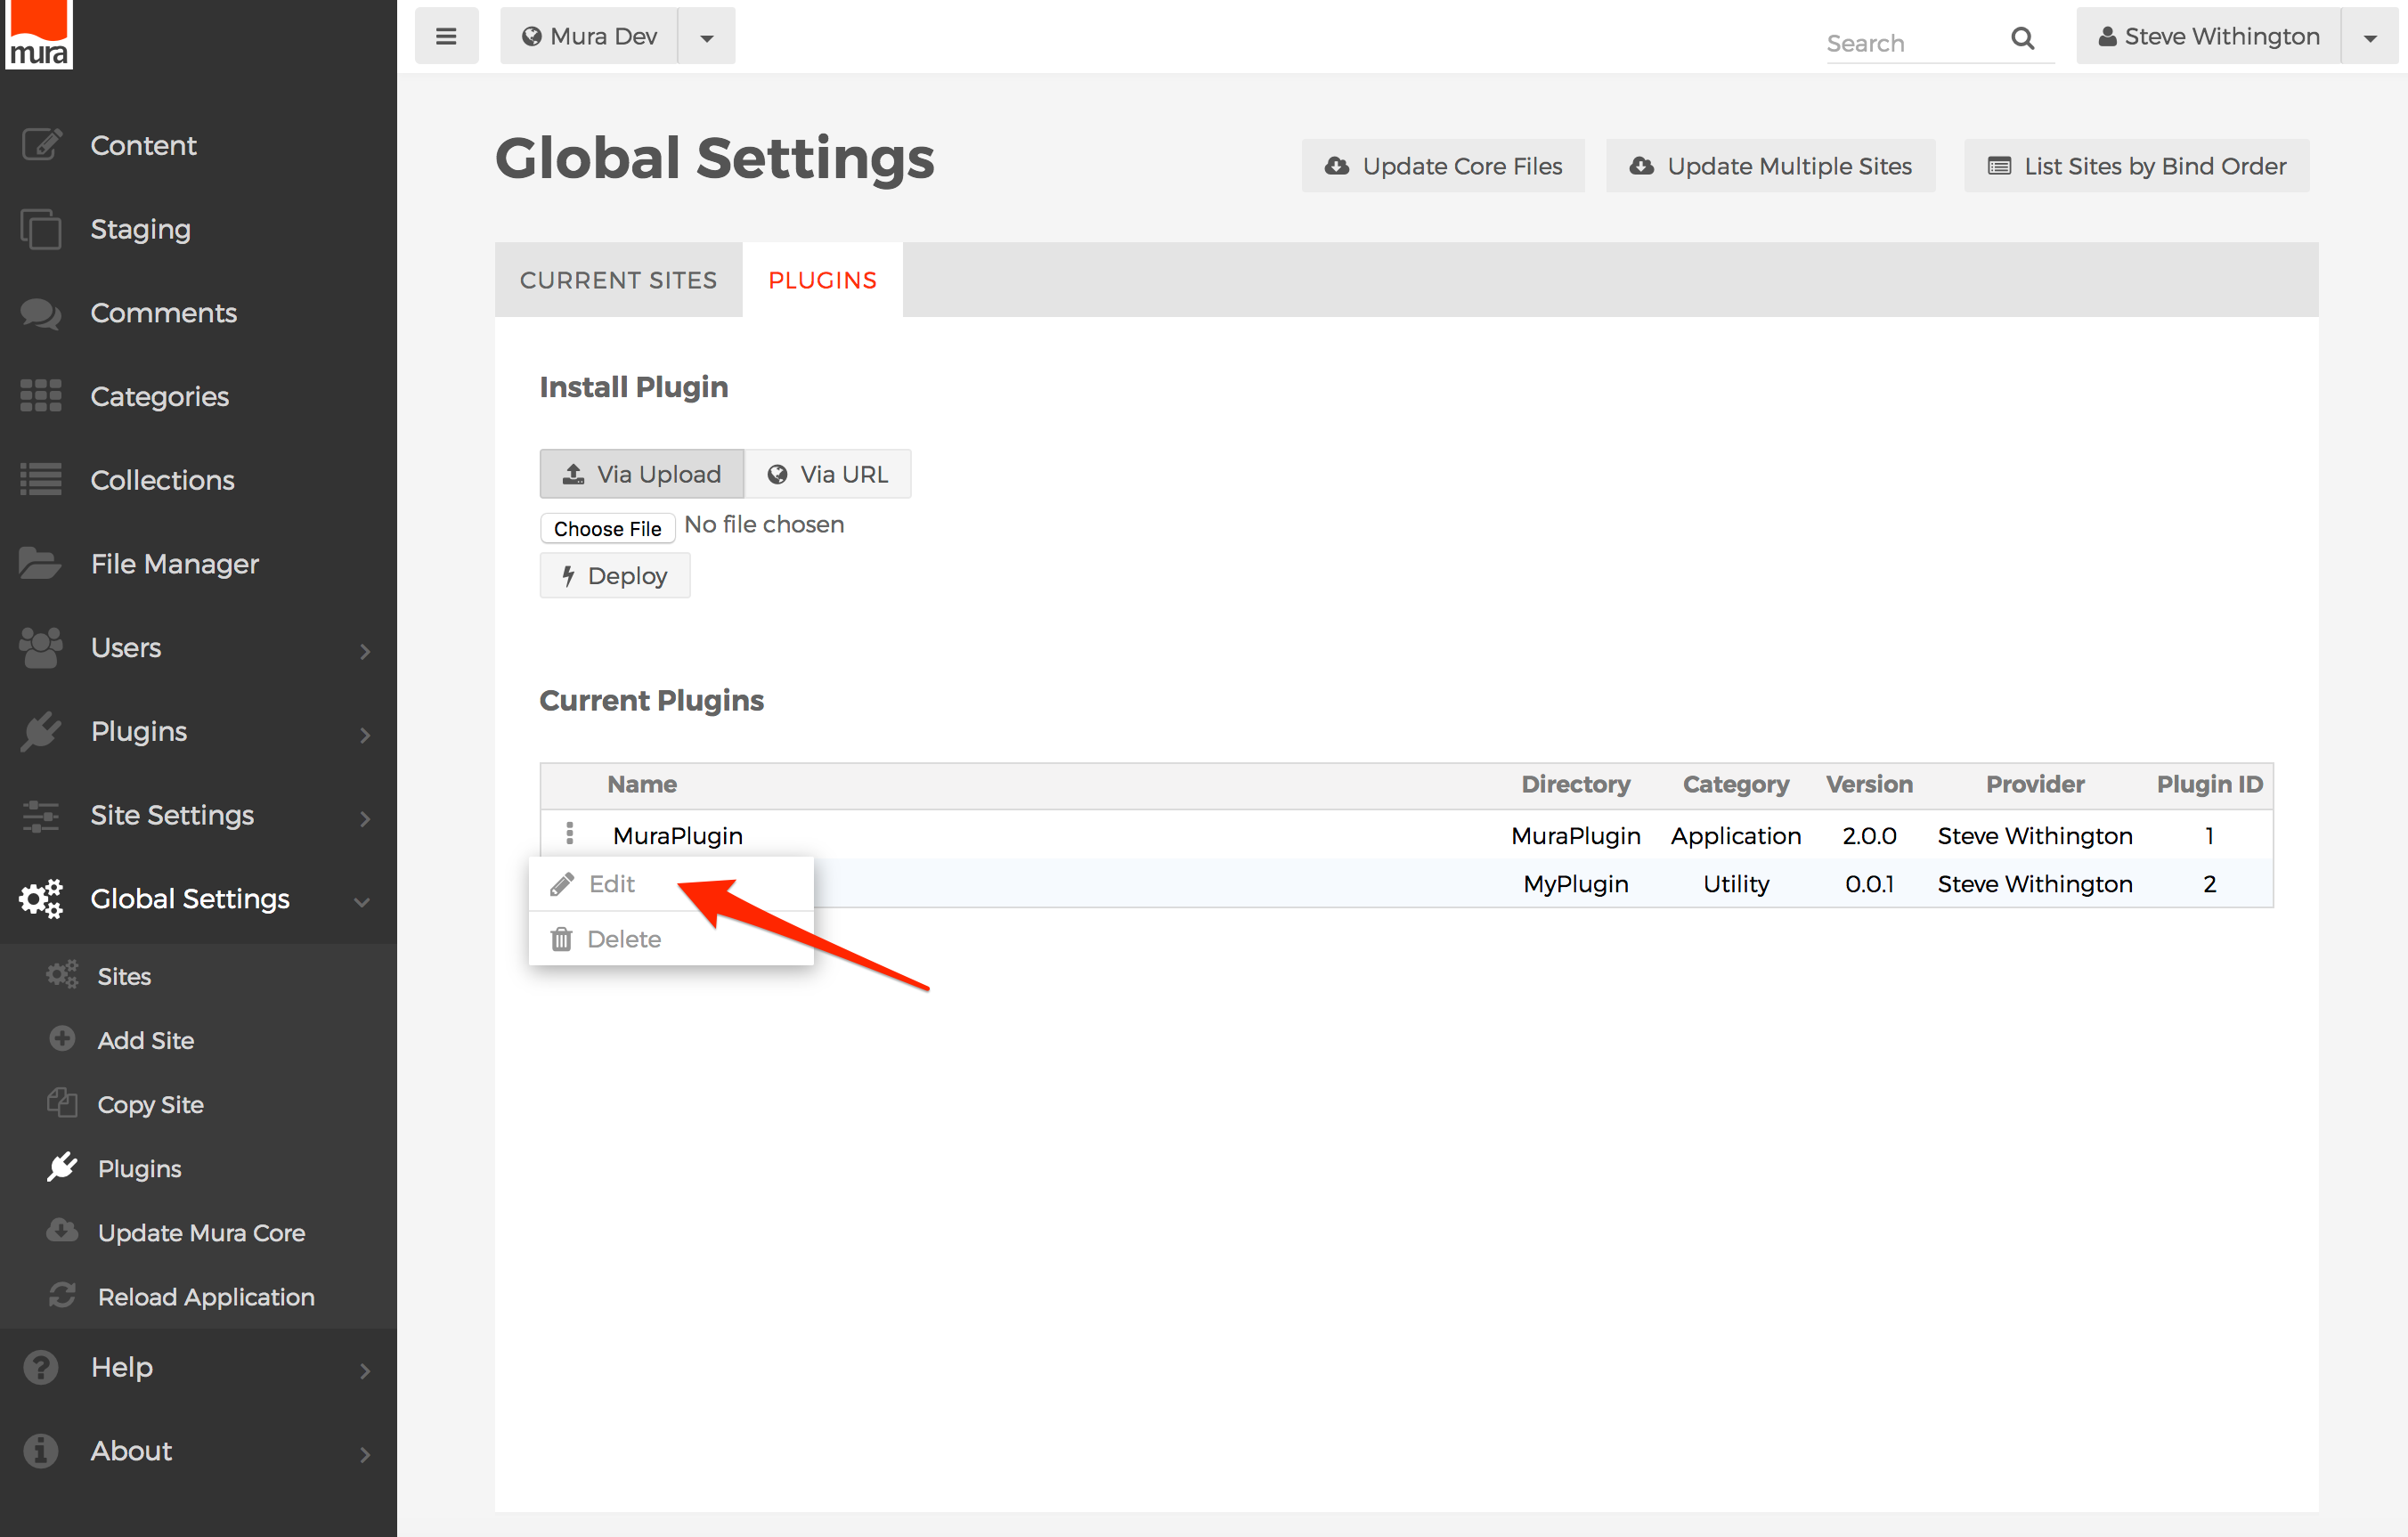
- To continue the installation process, select Global Settings, then click Plugins.

- You should now see your new plugin under the "Current Plugins" listing.
- Select the three-dot menu to the left of the plugin's name.
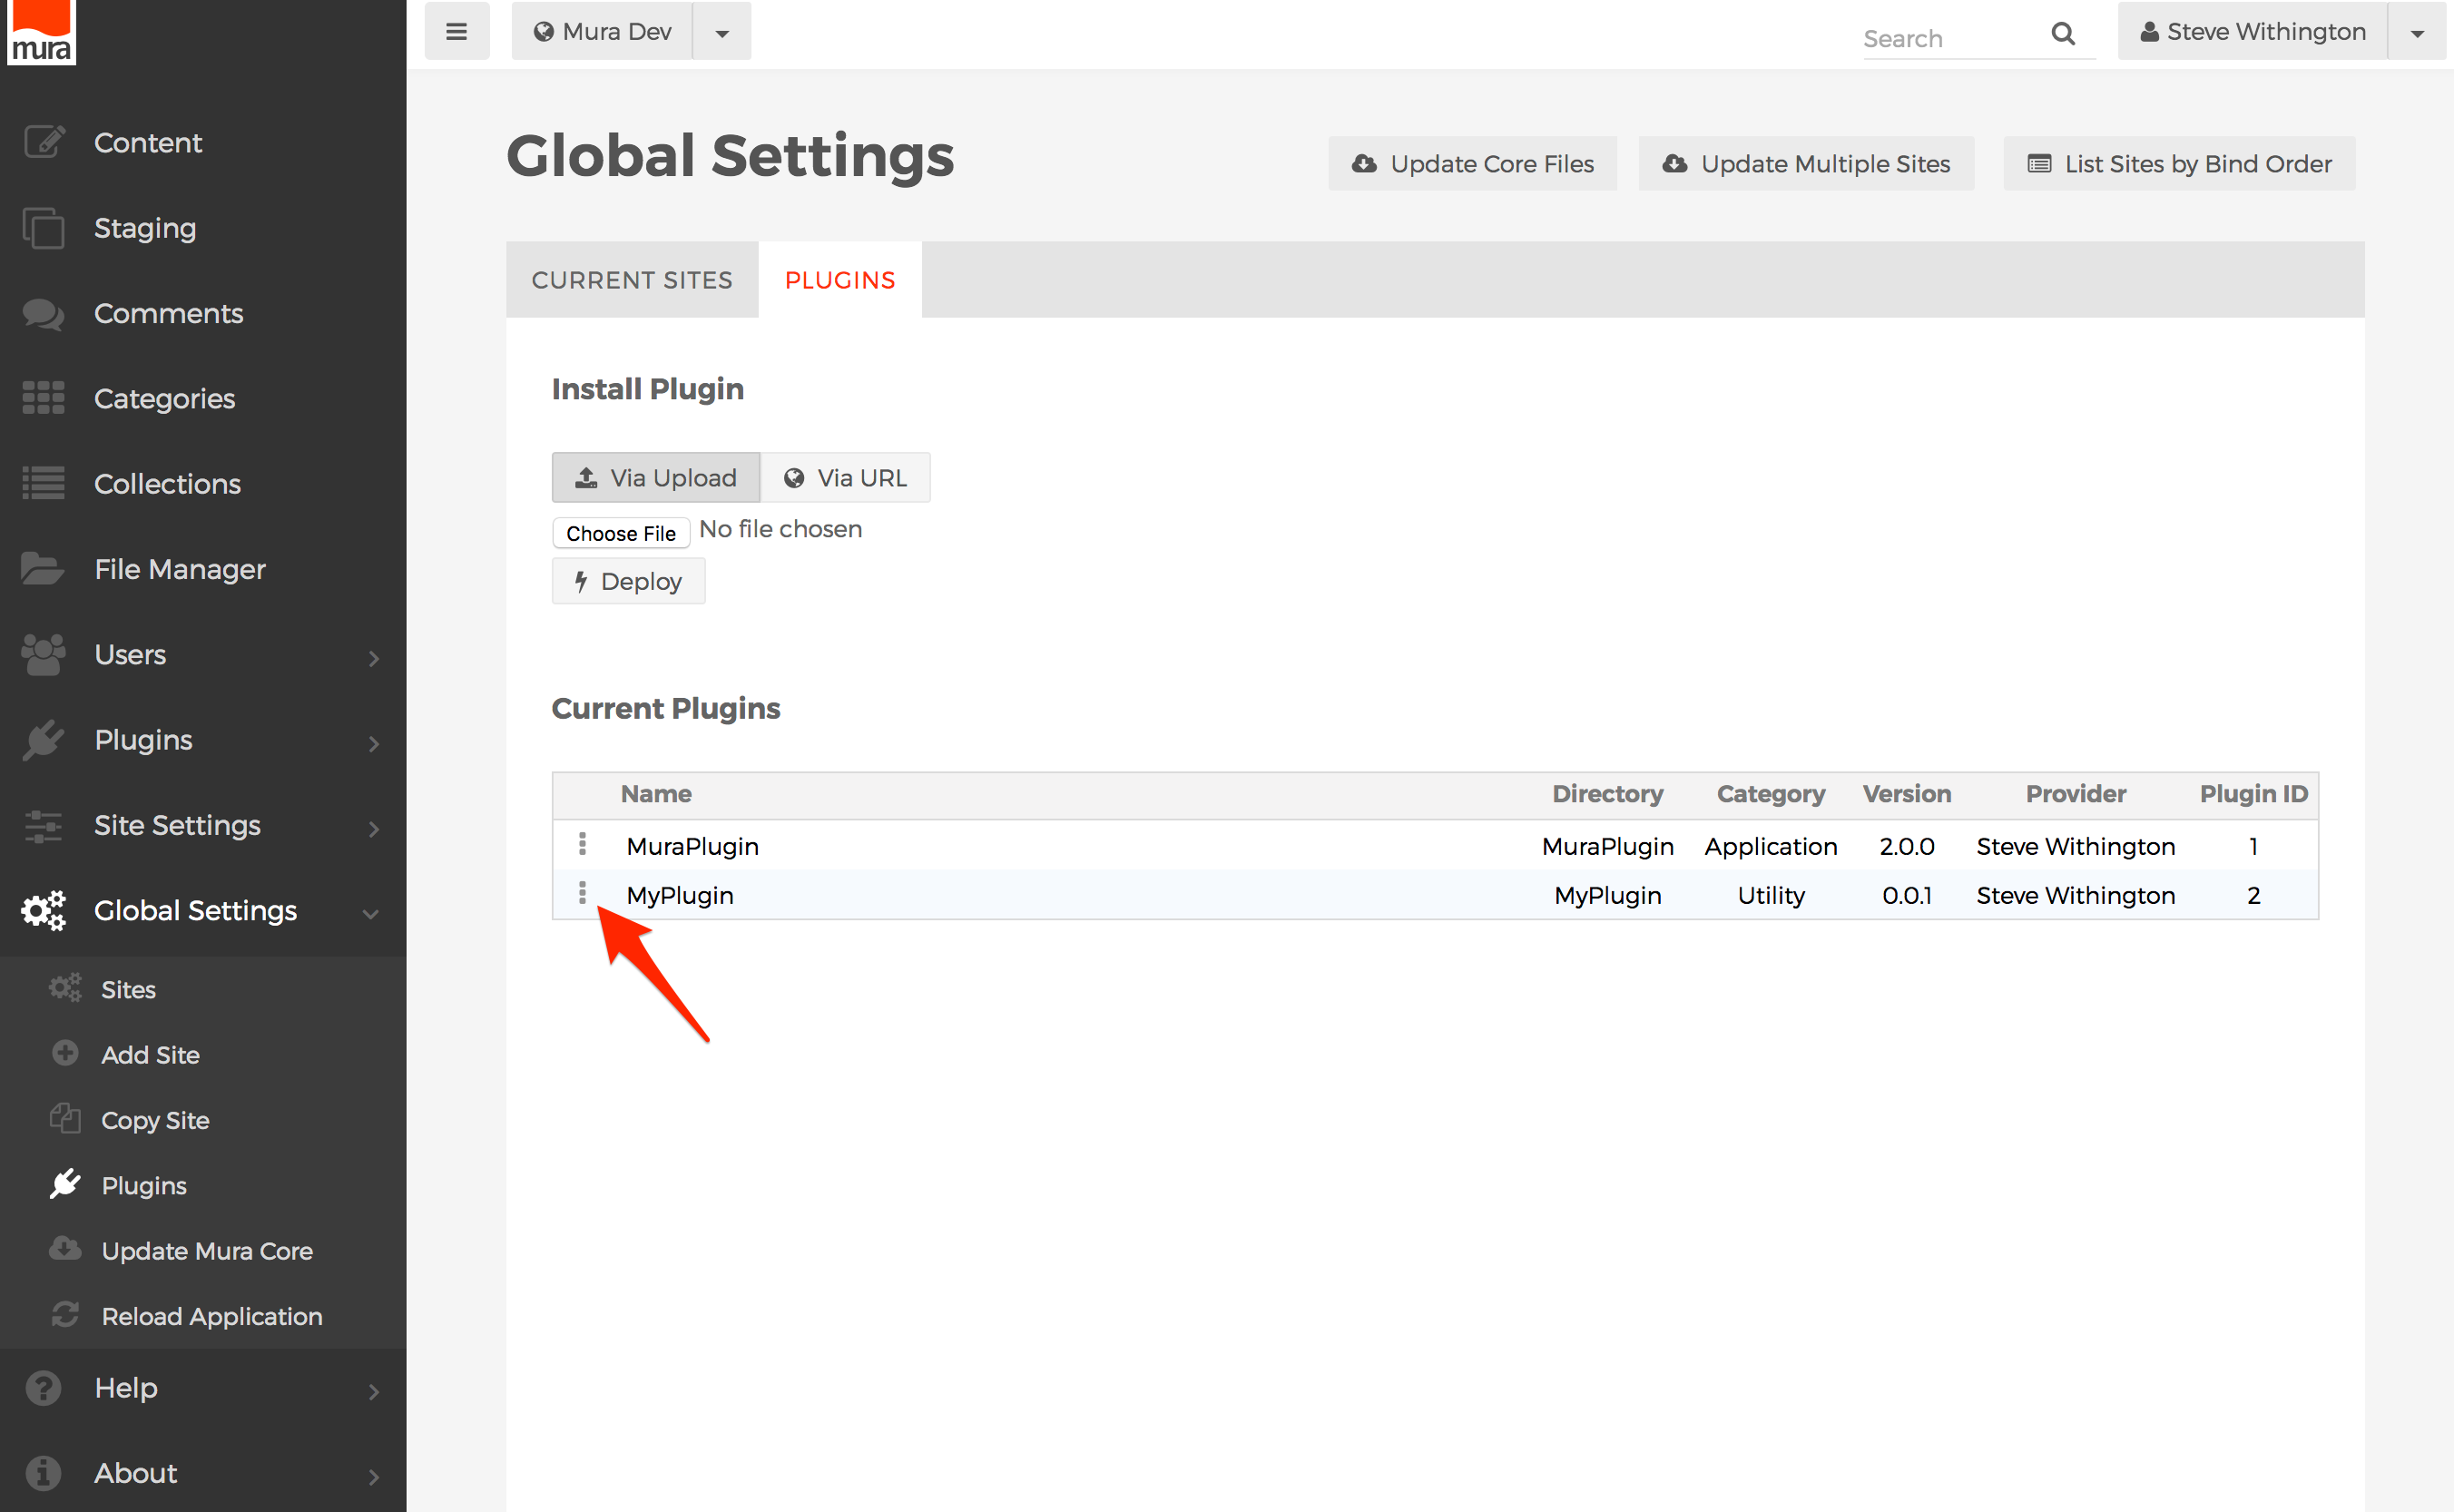
- Then, click "Edit" from the options menu.
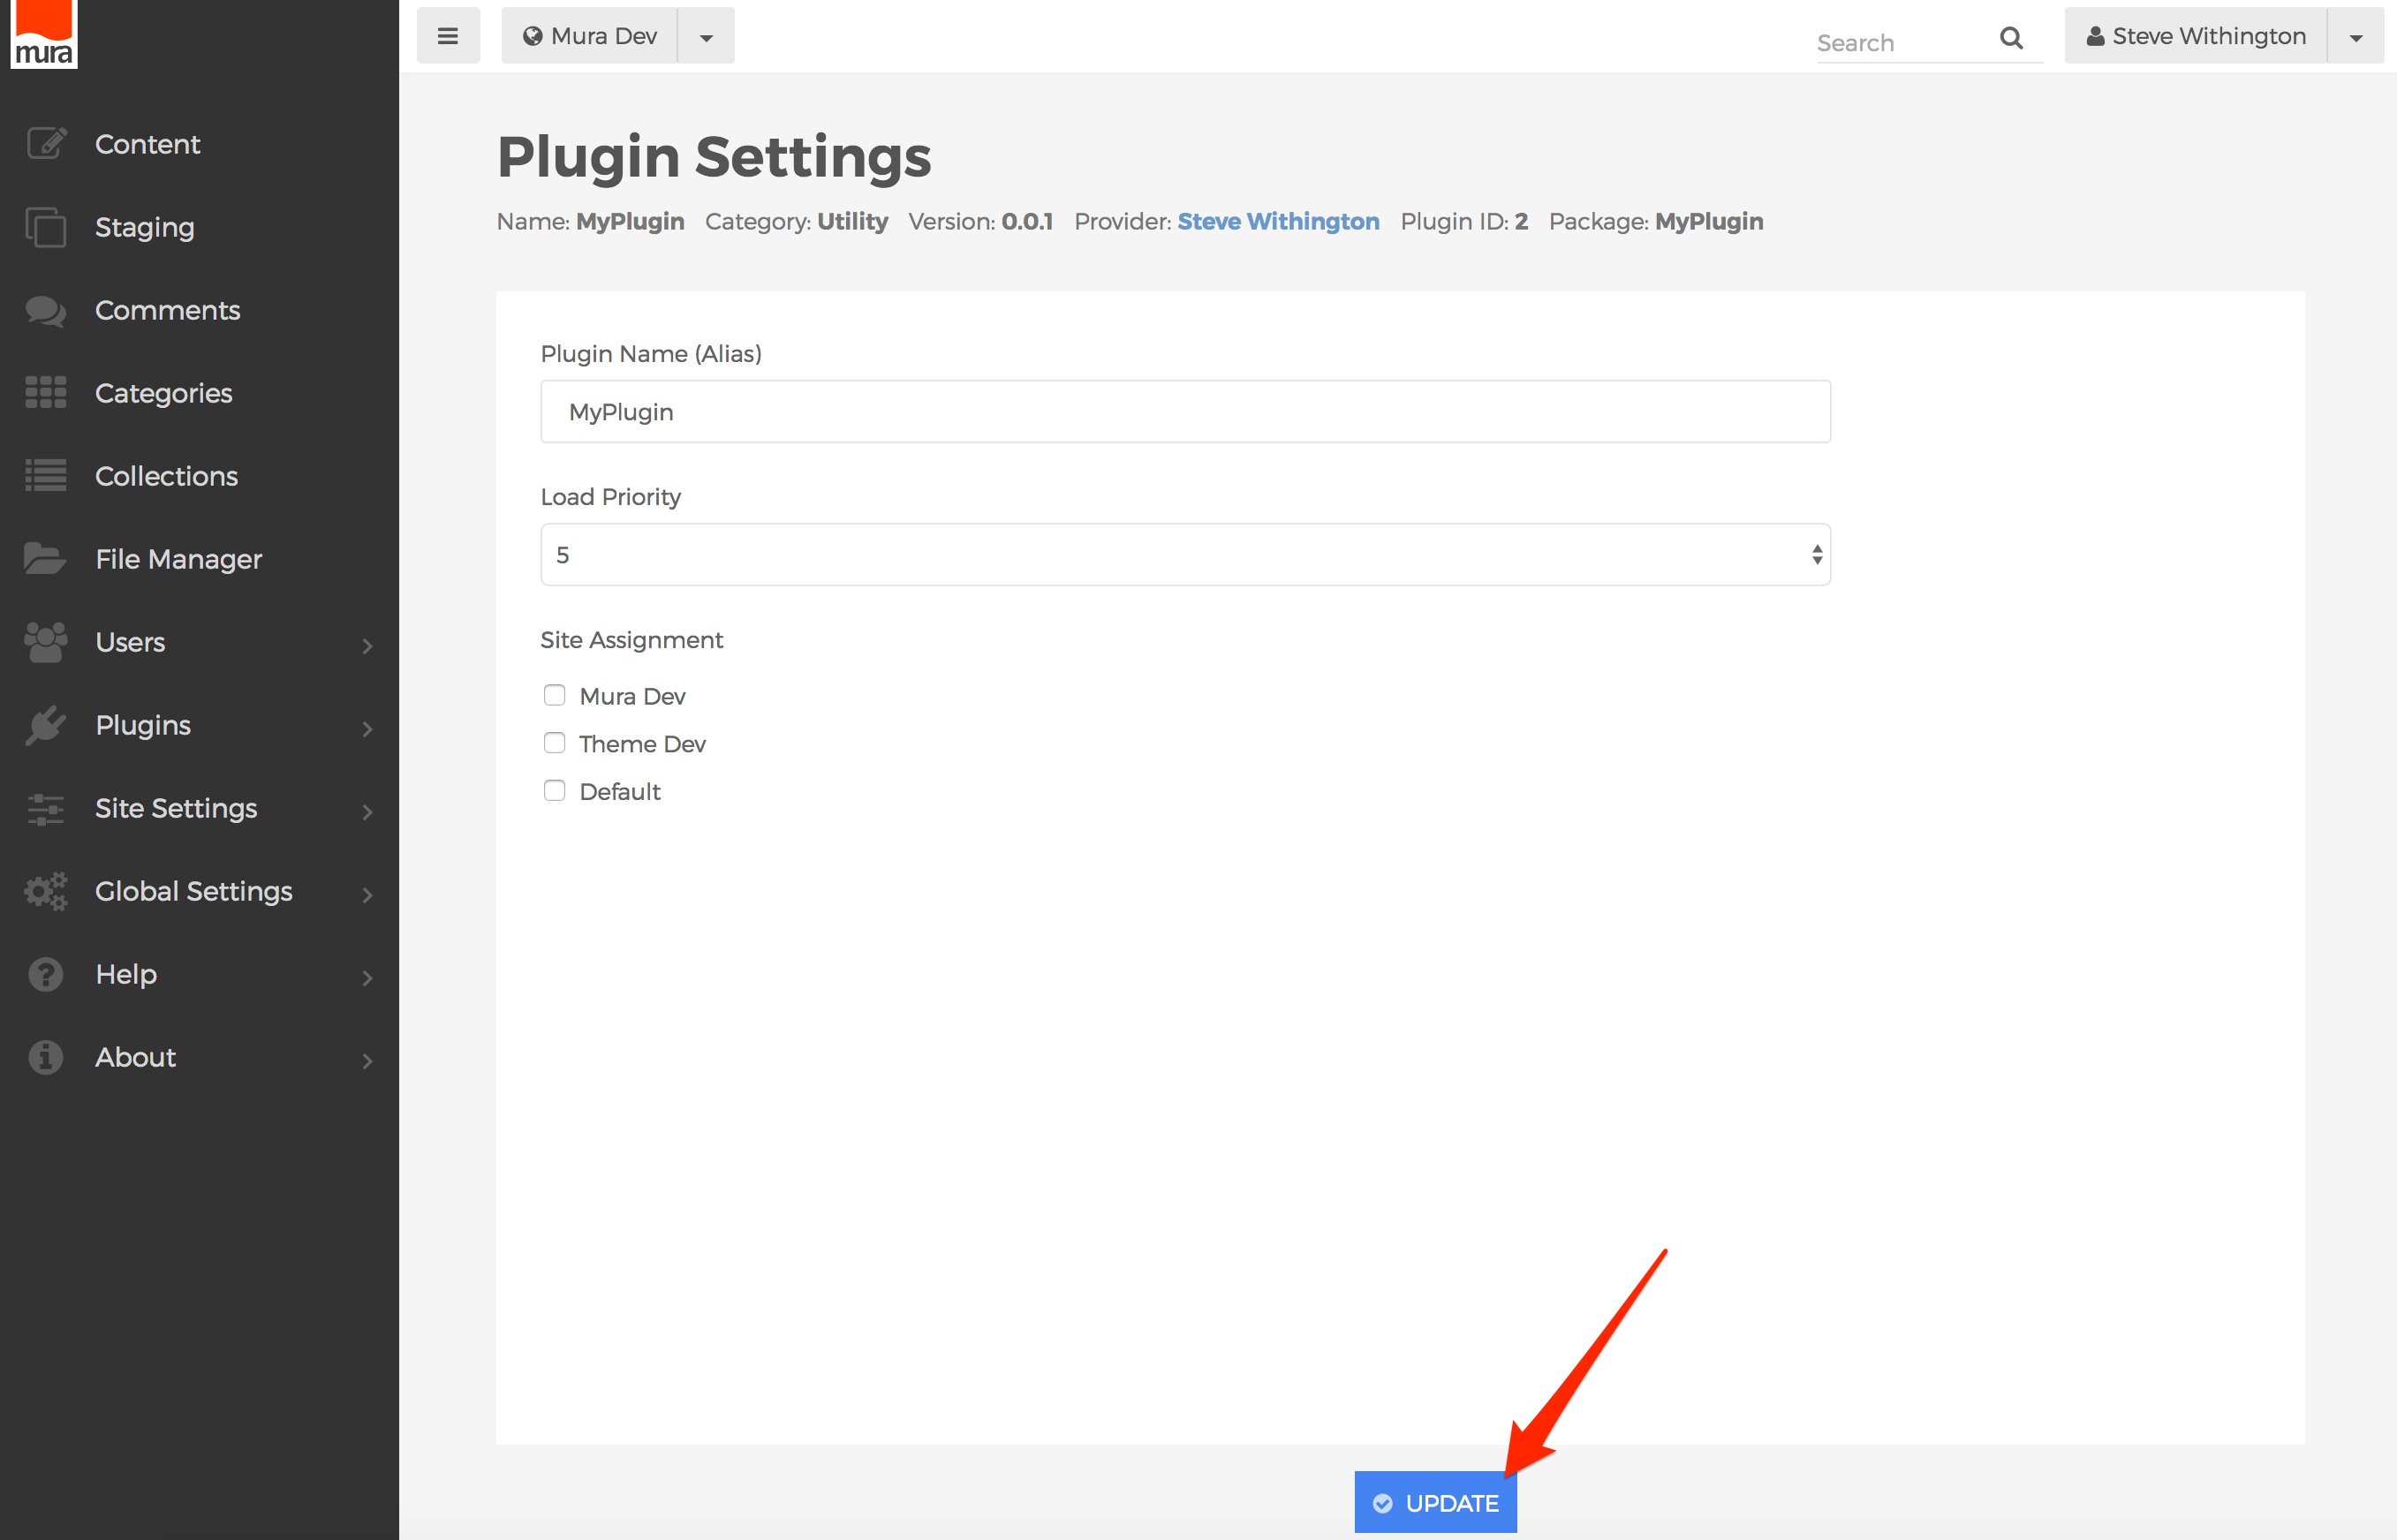
- You will then be taken to the Plugin Settings screen.
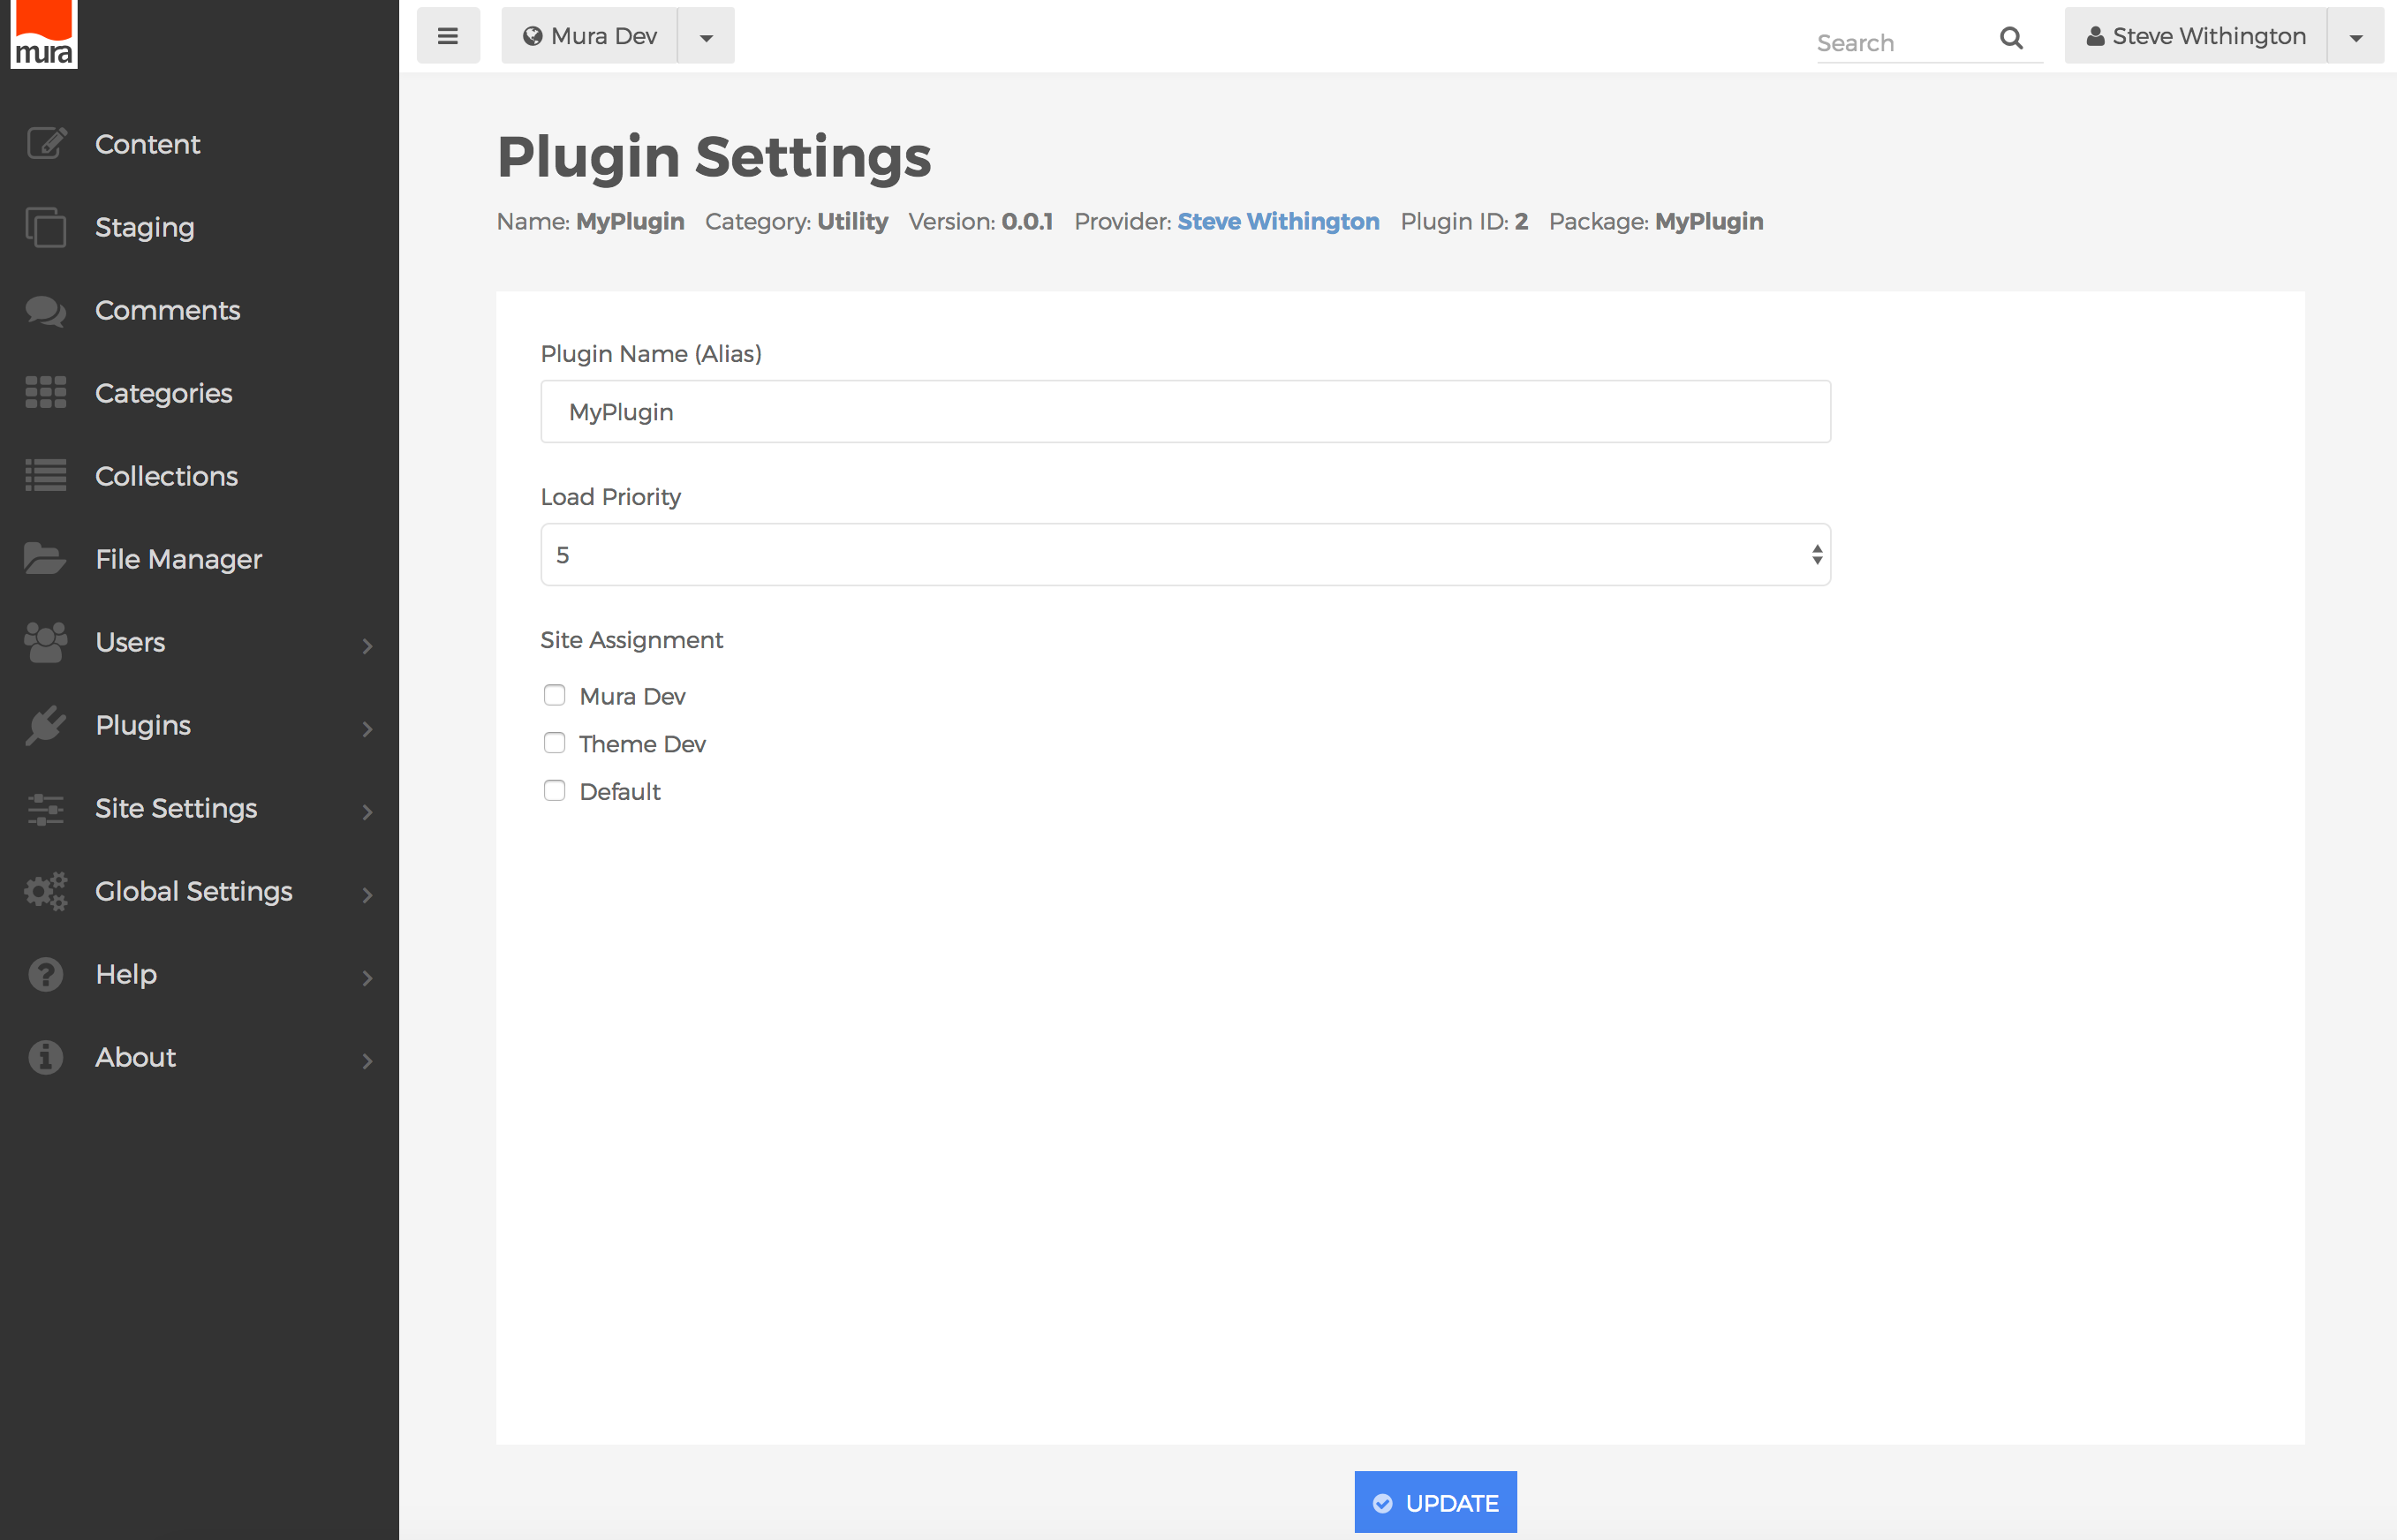
- Select your desired options, as described in the Installing Plugins Via Back-End UI section.
- When finished, click Update to save your new settings.