Import Content
Mura CMS offers the ability to import content that has been exported from Mura CMS, quickly and easily. Please review the steps from the Export Content section before proceeding.
How to Import Content
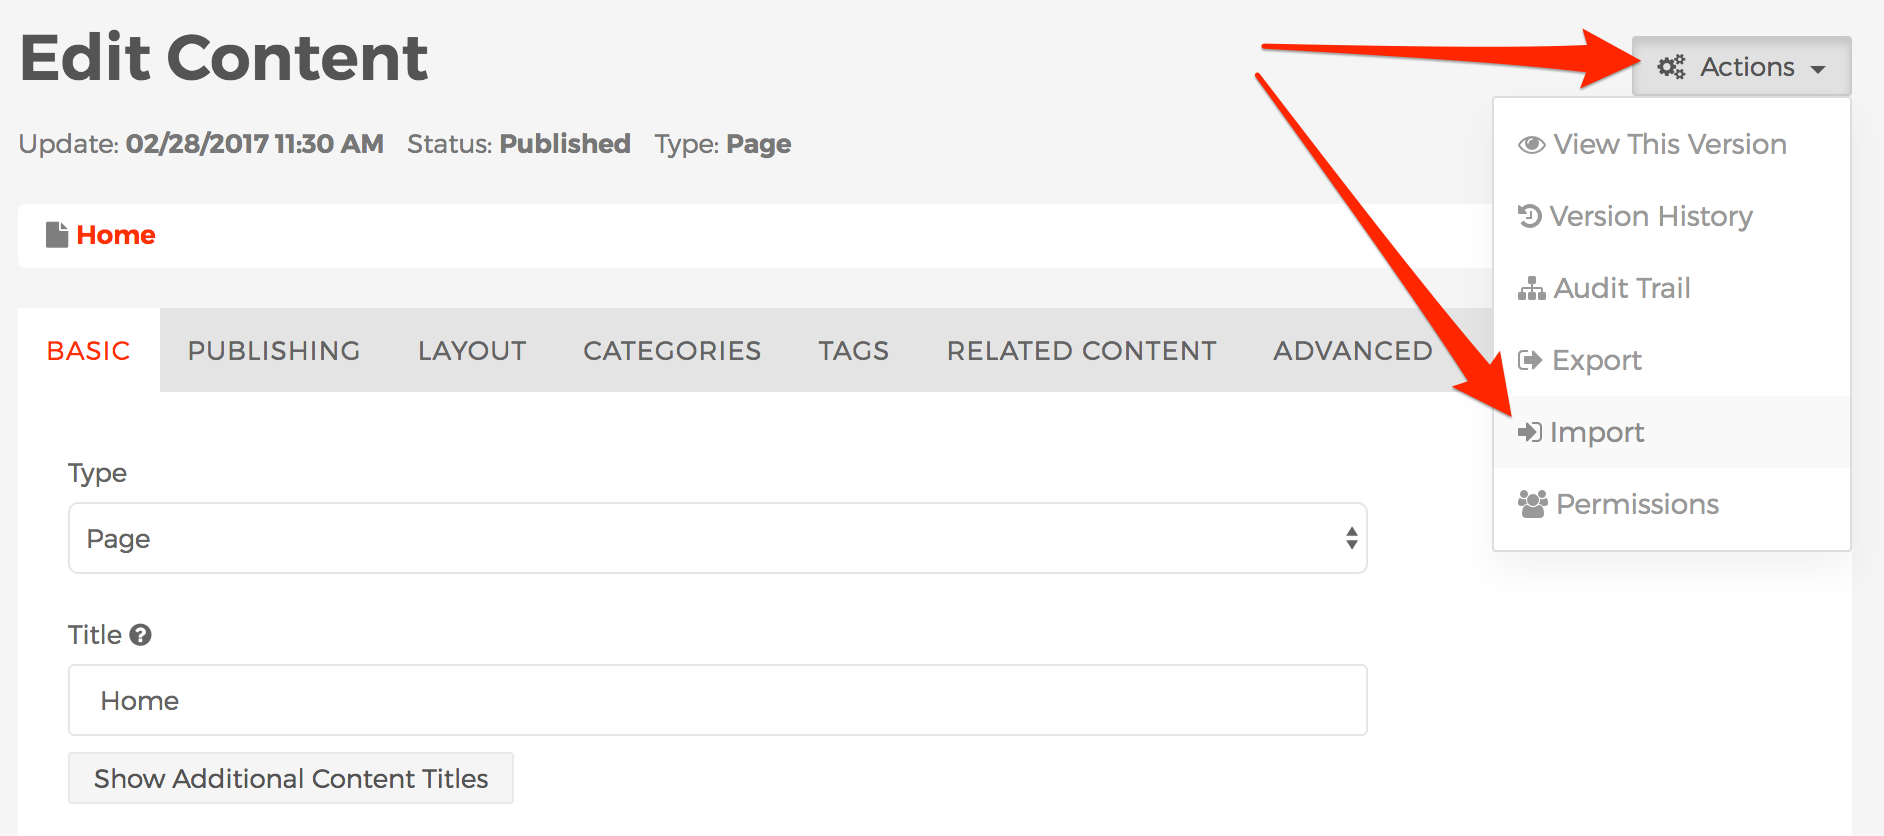
- From the back-end administration area of Mura, select a content item to edit, where you would like to import the new content. For example, if you would like to import the entire "News" section, you could choose to edit the "Home" page.
- From the Edit Content screen, go to Actions > Import.
- You should be taken to the Import Content screen.
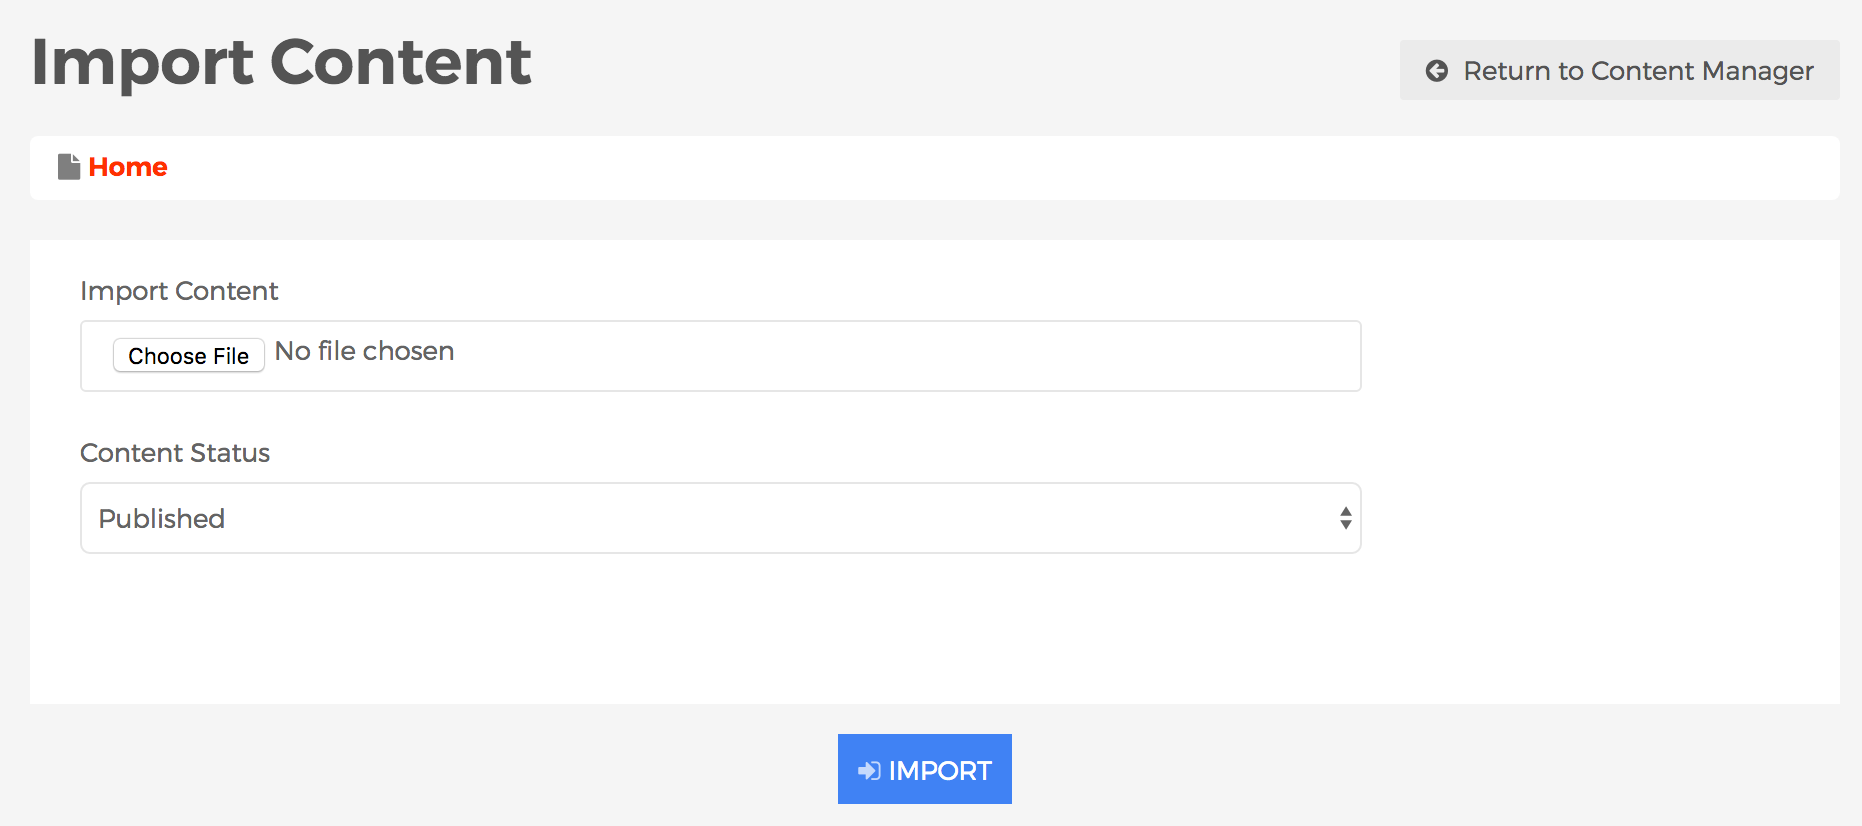
- Click Choose File or Browse to select the Mura CMS created/exported .ZIP file you wish to import.
- Select your desired Content Status for the imported content.
- Published
- The content will be visible by users visiting the front-end, public facing view of your website.
- Draft
- The content will not display on the front-end, public facing view of your website.
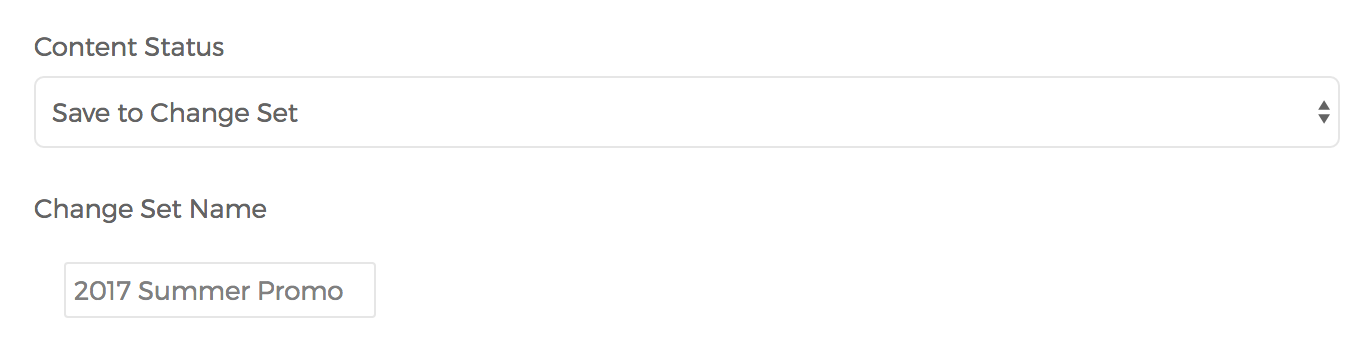
- Save to Change Set
- When you select Save to Change Set, the Change Set Name field will appear. Simply enter your desired Change Set Name.
- When you select Save to Change Set, the Change Set Name field will appear. Simply enter your desired Change Set Name.
- Published
- Click Import.
- Once completed, the imported content should now appear.