Export Content
With Mura CMS, it's very easy to export a portion of your site. Simply follow the steps below:
- Access the back-end administration area of the site and go to the Site Manager (exporting a section of the site can only occur via the back-end).
- Select a section of the site you wish to export. For this example, we'll use "News" area of a site.
- Navigate to the first page or content node of the section you want to export, whether it's a single page or an entire section
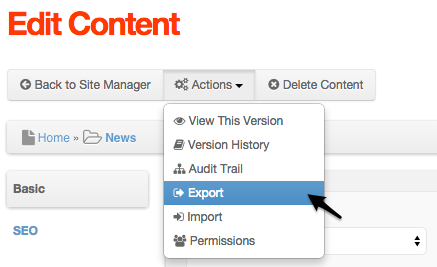
- Edit the content item.
- From the Edit Content screen, click the Actions button, and choose Export.
- If the content item you've selected has any children (sub-pages or files, etc.), you'll see the Export Content screen (if you're exporting a single content item this will be skipped).
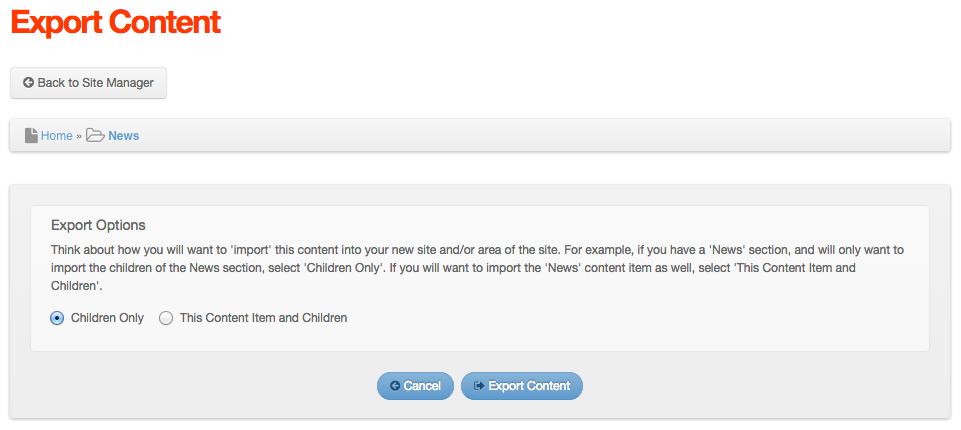
- You may choose to export either the Children Only, or This Content Item and Children. When making your selection, you may wish to consider how you will be using the content you will be exporting. For example, if you will want to include the 'News' main page in addition to its children, then select 'This Content Item and Children.'
- Once you've made your selection, click Export Content.
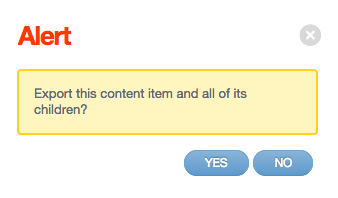
- From the Alert dialog window, click Yes to confirm your selection.
- Once Mura CMS bundles the content together for you, you will be prompted to save the export file as a .ZIP document. You can choose to save it wherever you wish.
The file you exported can now be imported into another section of either the same Mura CMS site, or a completely different one.