Approval Chain Example
This is an example of how an Approval Chain works.
Submitting Content for Approval
- Whenever a content item is either edited or added to a section which has an Approval Chain applied, the "Publish" button is replaced with a Send for Approval button. If Change Sets are enabled, the "Save to Change Set" button is replaced with Save to Change Set & Send for Approval.

- Clicking any of the Send for Approval buttons triggers the Approval Chain process.
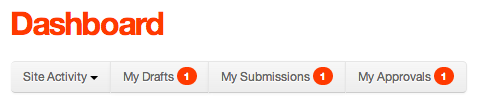
- Users can view their submissions for approval by visiting the Dashboard, and clicking the My Submissions button.
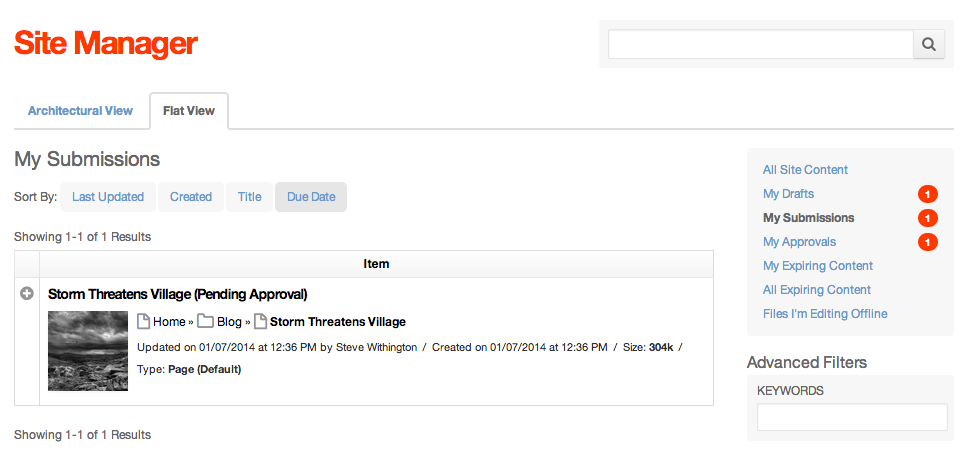
- The user will then be taken to the Flat View of the Site Manager where they can view a list of content items in a state of "Pending Approval."
Reviewing Pending Approval Requests
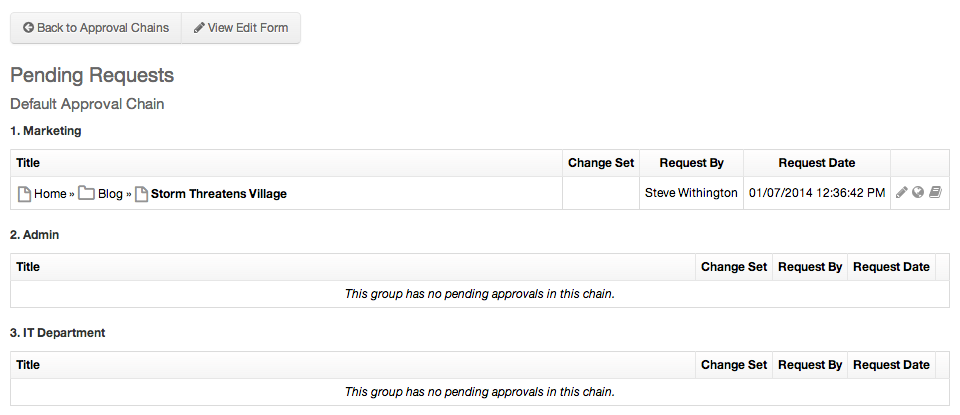
- Administrators can view all Pending Requests by visiting Site Config > Approval Chains. Then, click the desired Approval Chain name or the Pending Requests icon to view the current status of any content submissions.
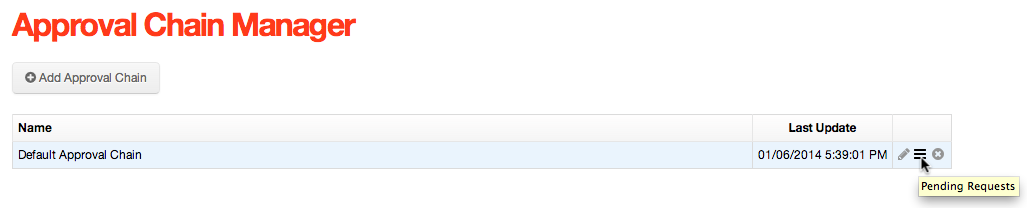
- This will take you to the Pending Requests screen.
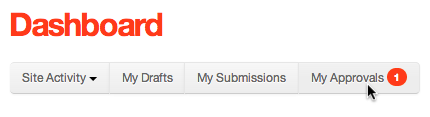
- If you are a member of one or more group(s) of an Approval Chain, you are authorized to approve/reject content submissions. To access content that is pending approval, visit the Dashboard, then click the My Approvals button. The number in the red circle indiciates how many content items are pending a decision.
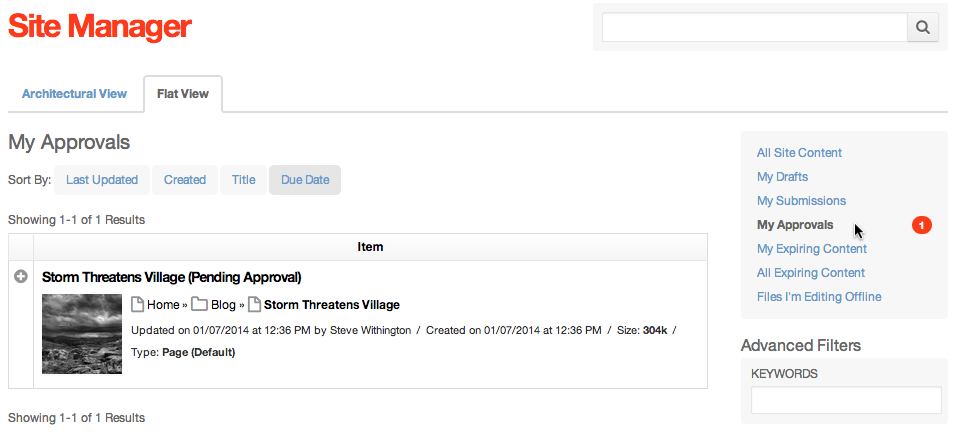
- Content pending your decision will appear under the Site Manager > Flat View screen, after you click either the My Approvals button from the Dashboard, or the My Approvals link found in the filters section of the Flat View.
- Click the Title or edit button of the content item, and a dialog window will open.
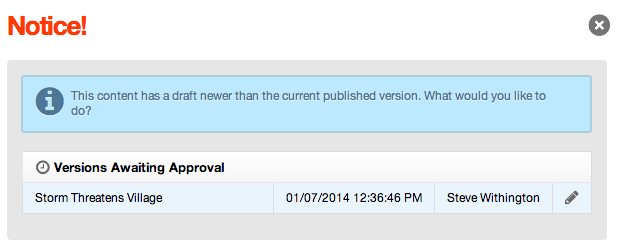
- If you are a member of a group that is exempt from an Approval Chain, then you will see a different dialog window.
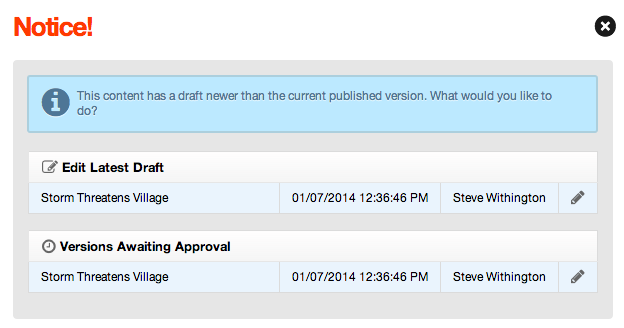
- Clicking the Title or pencil icon will launch the content item into a new window for you to review, if you're not a member of an exempted group.
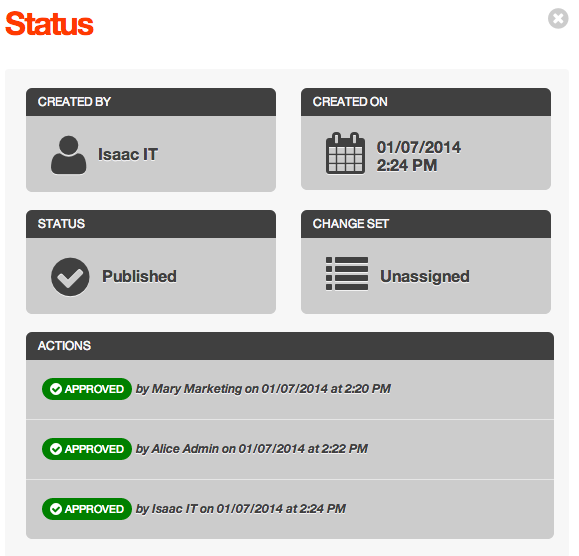
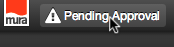
- After you have reviewed the content item, click the Pending Approval button on the Front End Toolbar to launch the Status dialog window.
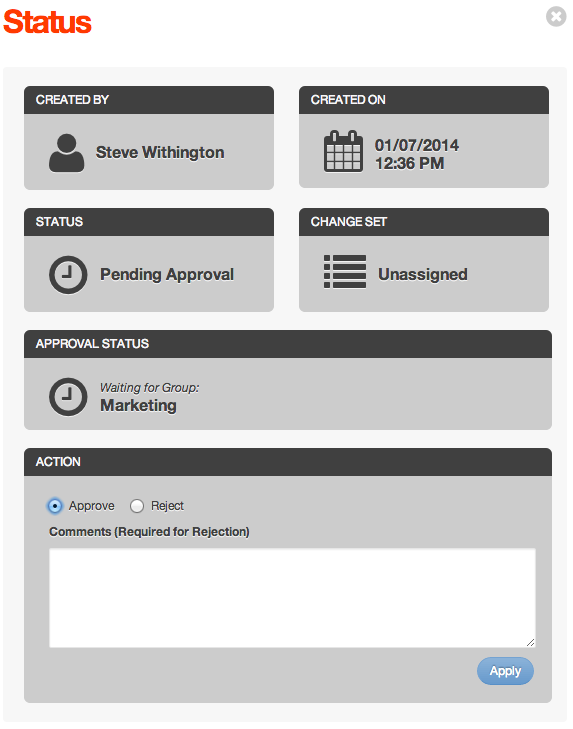
- From the Status dialog window, you can choose to Approve or Reject the content submission by clicking the appropriate radio button under the Action area of the form. Then click the Apply button.
- This process will need to be repeated by a member of any other group(s) in the Approval Chain before the item becomes Published.